

Your First App (Windows)
macOS only
RhinoMobile: Deprecated
RhinoMobile is no longer supported. Rhino 3dm file I/O is still available on iOS and Android via the rhino3dm library.
This guide presumes you have gone through the Installing Tools (Windows) guide and have successfully installed Xamarin and all the requisite libraries. These instructions presume you are using Visual Studio 2017 Professional.
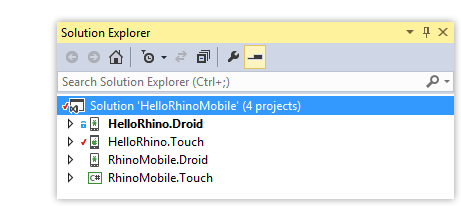
HelloRhinoMobile
These guide presumes you are using Visual Studio 2017 Professional, though this process should work with Visual Studio 2013 as well.
Android Boilerplate Build
- Launch Visual Studio and open the HelloRhinoMobile solution.
- Right-click the HelloRhino.Droid project and select Set As StartUp Project from the drop-down menu. This makes HelloRhino.Droid the active project for the build. (HelloRhino.Droid is the Android target project. The .Droid suffix is a naming convention from Mono that avoids namespace collisions with the main Android libraries).
- Open the Android Emulator Manager: Navigate to Tools > Open Android Emulator Manager. A window called the Android Virtual Device (AVD) Manager should appear. This is part of the Android SDK and will be familiar to you if you have done any Android development before. This is where you define your Android Virtual Devices (AVDs) that run in the Emulator.
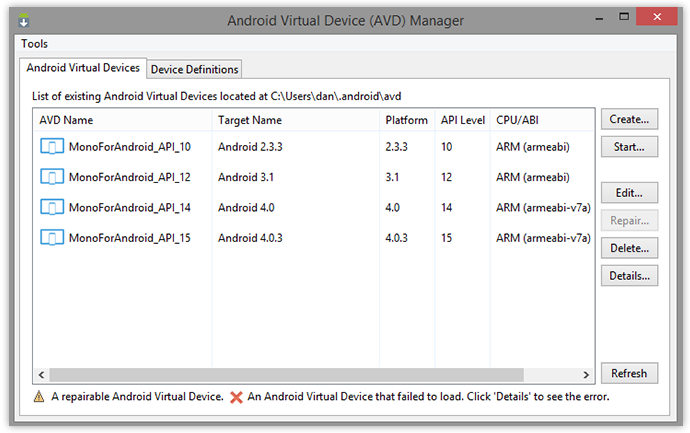
- The default AVDs are much too slow for development; Highlight each of the existing AVDs and click the Delete button.
- To create a new AVD: Click the New button. The Create new Android Virtual Device (AVD) window appears. Create a new AVD with the following parameters. AVD Name: Nexus7-API17; Device: Nexus 7 (7.02“, 1200 x 1920:xhdpi); Target: Android 4.3 - API Level 18; CPU/ABI: Intel Atom (x86); Skin: Skin with dynamic hardware controls; Front Camera: Webcam0; VM Heap: 64 Emulation Options: Use Host GPU enabled …
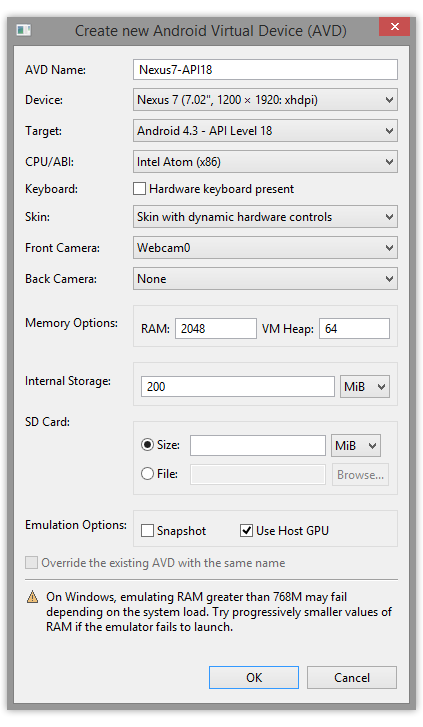
- You should see your new AVD in the list. You have just created your first AVD. More information on creating Emulators can be found in the Android documentation on Managing Devices. You can create as many as you need. Tips on using the Emulator can be found in the [Using Simulators](/guides/rhinomobile/using-simulators/] guide.
- Close the AVD Manager. Switch back to Visual Studio.
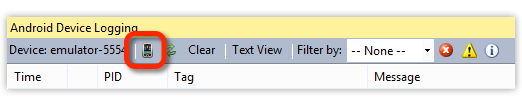
- Click the Info button in the Xamarin.Android Toolbar.

- This brings up the Android Device Logging window. Click the Change Device button …
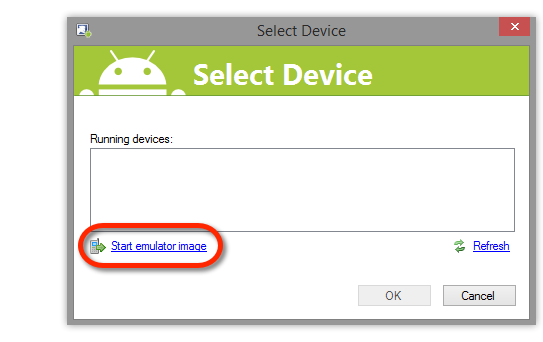
- This brings up the Select Device window, listing all running devices (emulators and physical devices). Click the Start emulator image button.
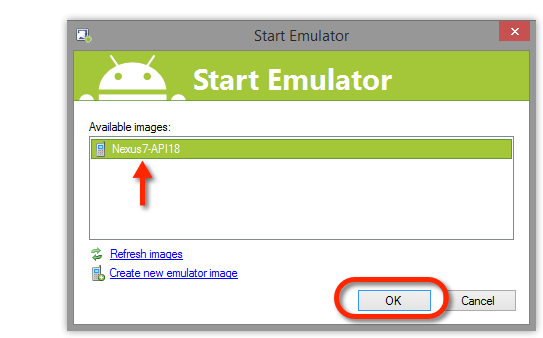
- This brings up the same list of Available AVD images that you saw in the Android Virtual Device (AVD) Manager window. Select the Nexus7-API18 AVD that you just created above. Click OK.
- If all went well, after a brief startup period (take our word for it, it’s much quicker than the standard emulators) you should see Android boot. It may take extra time to launch the first time and it is highly recommended that you leave this window open during your development session. Once Android boots, you are ready to go…you just need to unlock the device by sliding the lock to the right. We are now ready to send the app to the emulator.
- In the Solution Explorer, right-click the HelloRhino.Droid project, and select Deploy. HelloRhino.Droid will build, along with its dependency, RhinoMobile.Droid. (NOTE: The first time you build RhinoMobile.Droid, the libopennurbs library must be compiled…this can take up to 20 minutes. Subsequent builds will be much, much faster).
- Once the app has been deployed to the running emulator, you can now run the app. In Visual Studio, click the Start button. If all goes well, you should see something like this…
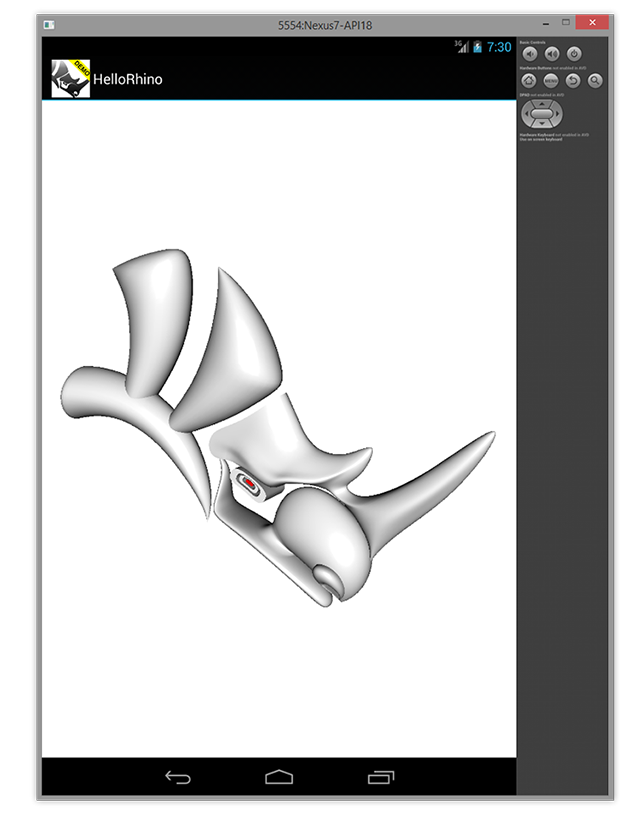
Congratulations! You’ve built a RhinoMobile app for Android.
iOS Boilerplate Build
COMING SOON
