
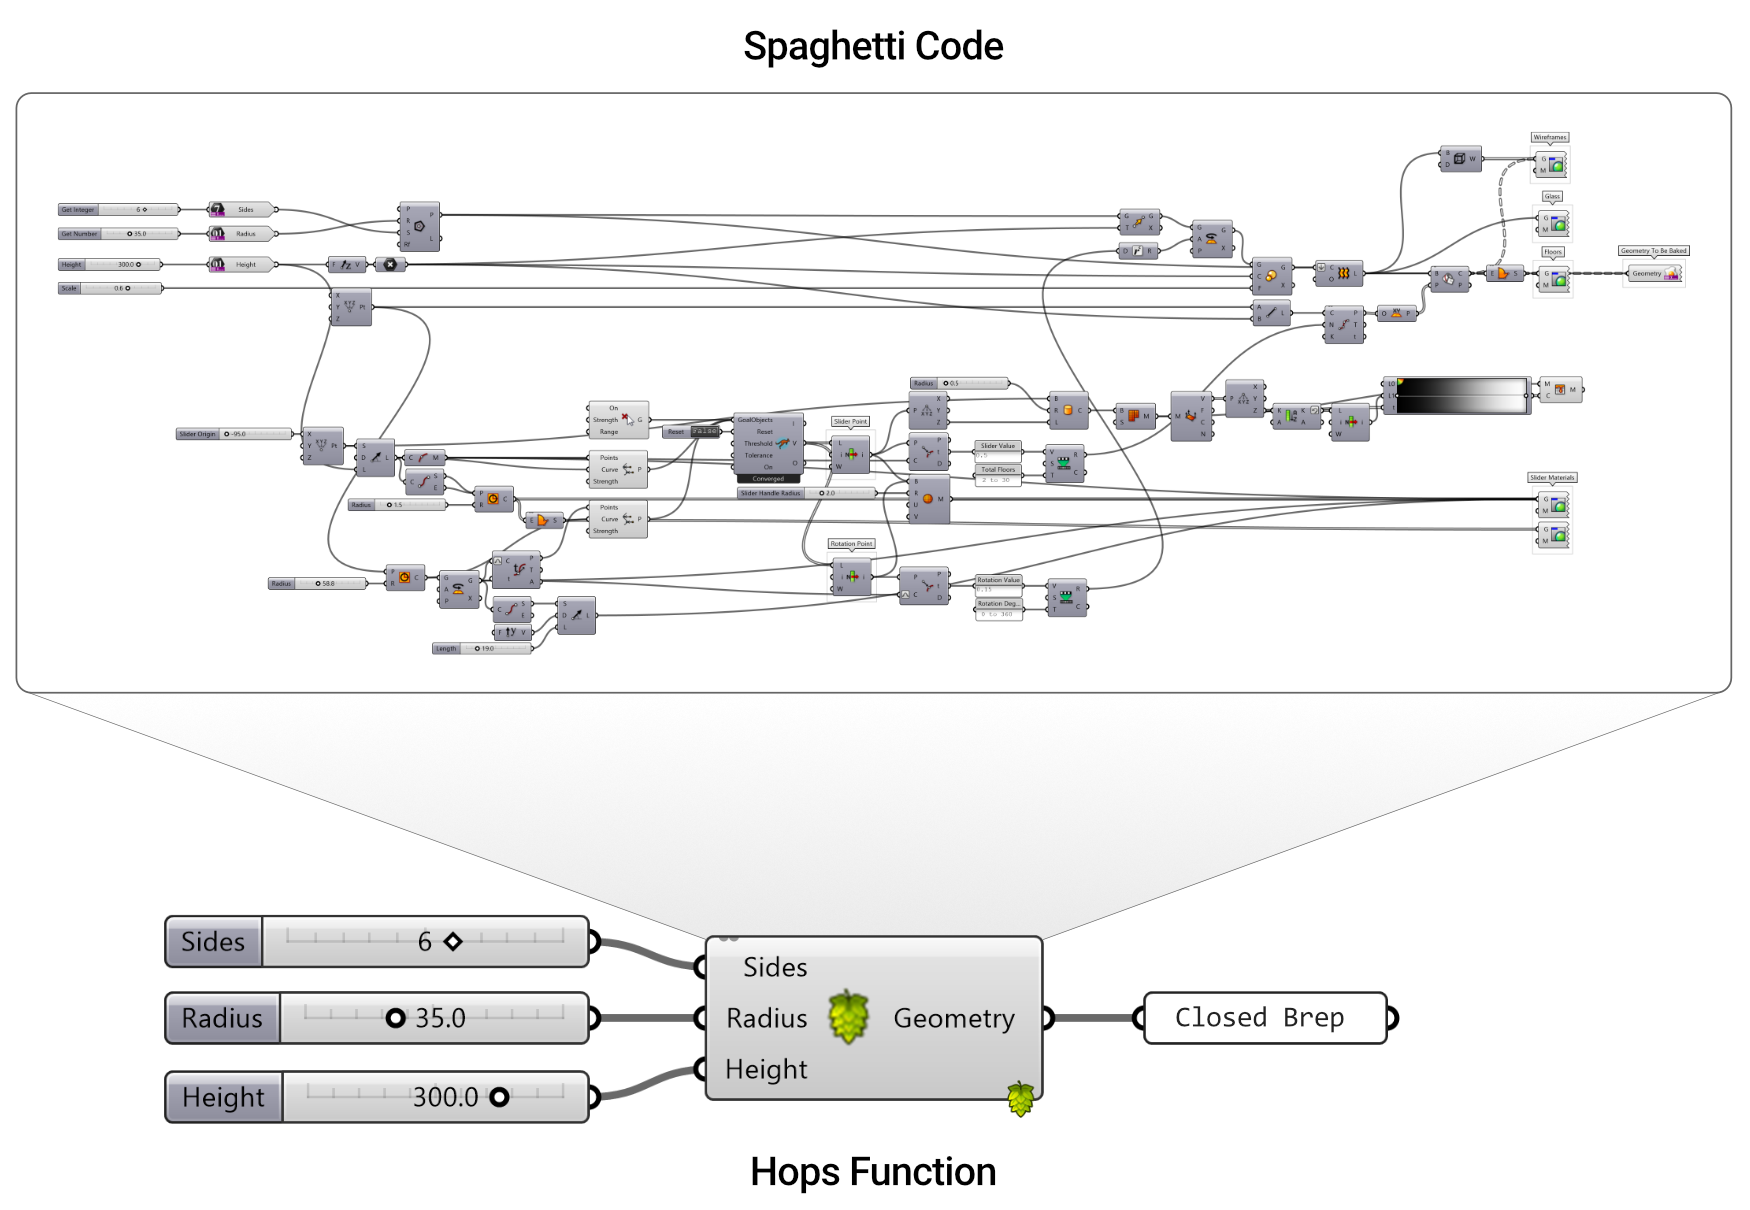
Hops lets you simplify large complex definitions. Grasshopper definitions can be big, complicated, and repetitive. This state of disorganization is sometimes called Spaghetti Code. Many factors contribute to spaghetti code including: time constraints, programmer skill level, project complexity, and limitations in the programming language. After trying to decipher a big ball of Grasshopper spaghetti, there is one universal truth - spaghetti code is hard to read and understand. Now, you can use Hops to simplify hard to read spaghetti code.
Calling Functions in Grasshopper
In programming, a function is a “self-contained” module of code that processes inputs and returns a result. Grasshopper definitions also process inputs and returns results. However, Grasshopper wasn’t written with functions in mind. Clusters sort of work, but don’t make it easy to reuse simple definitions in complex projects.
To fix this, the Hops component was added. Hops lets you use separate grasshopper definitions as functions. The key is learning to break a problem into smaller sub-definitions which we will use as functions.
Imagine that you needed to run a shadow analysis for a parametric tower you were designing for New York City. This problem could be broken down into four smaller tasks:
- Create the building lot outline
- Create the building envelope
- Create the floor plates
- Run the shadow analysis from the building enevlope and surrounding buildings
Once the tasks have been clearly defined, you can determine what information will be needed to perform each task (i.e., the inputs) and what data will be returned at the end (i.e., the outputs). For step 1, the inputs needed to generate the building lot outline would include site setbacks and other regulatory parameters from the building and zoning codes. The output for this function would likely include a polyline outlining the maximum building area at the ground floor.
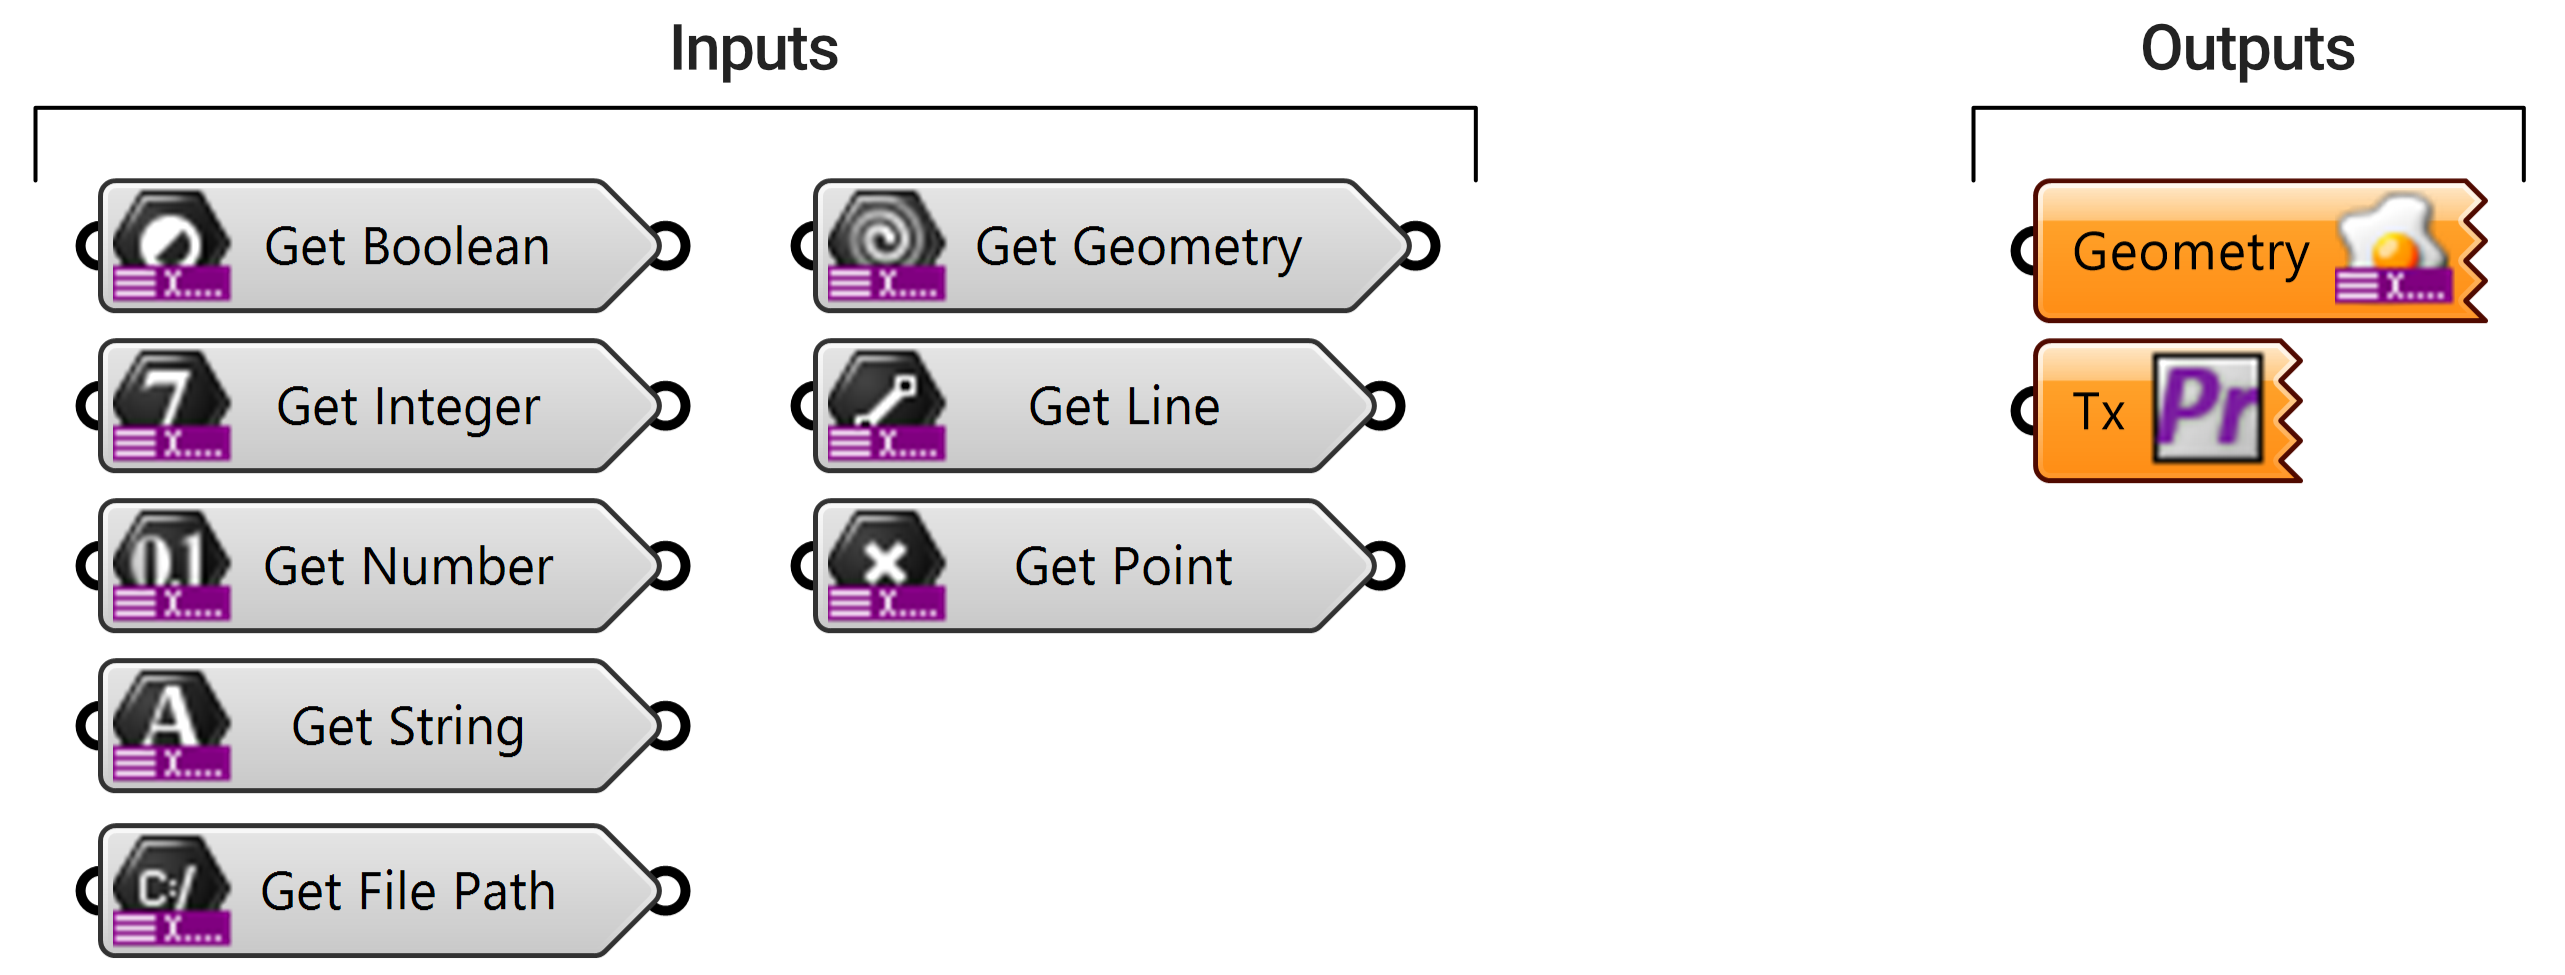
To define the parameters which will be used in a Grasshopper function, use the Context Get components for the inputs and the Context Bake component for the outputs. Each of these can be found under the Params Tab > Util Group.
Now that we have the inputs and outputs defined, all that is left is to fill in the steps to turn those inputs into outputs. After a function has been fully defined as a Grasshopper definition it can be called by Hops. Hops exposes the inputs and outputs you defined inside your function in the containing definition. Unlike clusters, Hops lets you reference external files which can be saved locally or on a network drive - making it easy to share definitions among other team members and collaborators.
Hops lets you increase the legibility of your code by simplifying complex definitions, reducing duplication, and sharing and reusing functions. Hops lets you solve functions in parallel, potentially speeding up large projects. It also lets you solve functions asynchronously, without blocking Rhino and Grasshopper interactions.
How it works?
Behind the scenes, the Hops client passes the Grasshopper definition you specify to a headless instance of Rhino and Grasshopper server.
The Hops Client
A client is a hardware device (i.e., computer) or software application which makes a request for a digital resource from a server over a network connection.
The Hops component is the client. It can be found under the Params Tab > Util Group after you install Hops through the package manager. Hops needs the path or URL for the definition that it is going to solve.
Once you specify the definition, the component updates to show the inputs and outputs defined in the definition.
The Rhino Server
A server serves data to its clients over a network connection.
In the context of Hops, the server is a headless (meaning it has no user interface to interact with) version of Rhino and Grasshopper. The headless Rhino server solves the Grasshopper definition sent from Hops and then returns the result.
Hops optionally lets you point to a Rhino.Compute server running on another computer to solve the Grasshopper definitions. This lets you offload some or all of the solving to an external compute resource.
Getting Started
To create a function that can be referenced by Hops, we need to break our definition into three distinct sections; one to define our input parameters, another to specify the outputs, and finally a section which performs the actions of the function. To get started with Hops, you can either follow along in the video or walk through the steps listed below.
In this example we want to create a simple function that will take in a user’s name as an input (i.e., David) and return a message such as “Hello David!”.
Install Hops
Before we begin, let’s start by making sure Hops is installed properly. There are a few ways to install hops on your machine.
- Install Hops (This will launch Rhino)
- Or, type
PackageManageron the Rhino command line.- Then, search for “Hops”
- Select Hops and then Install
Create an Input
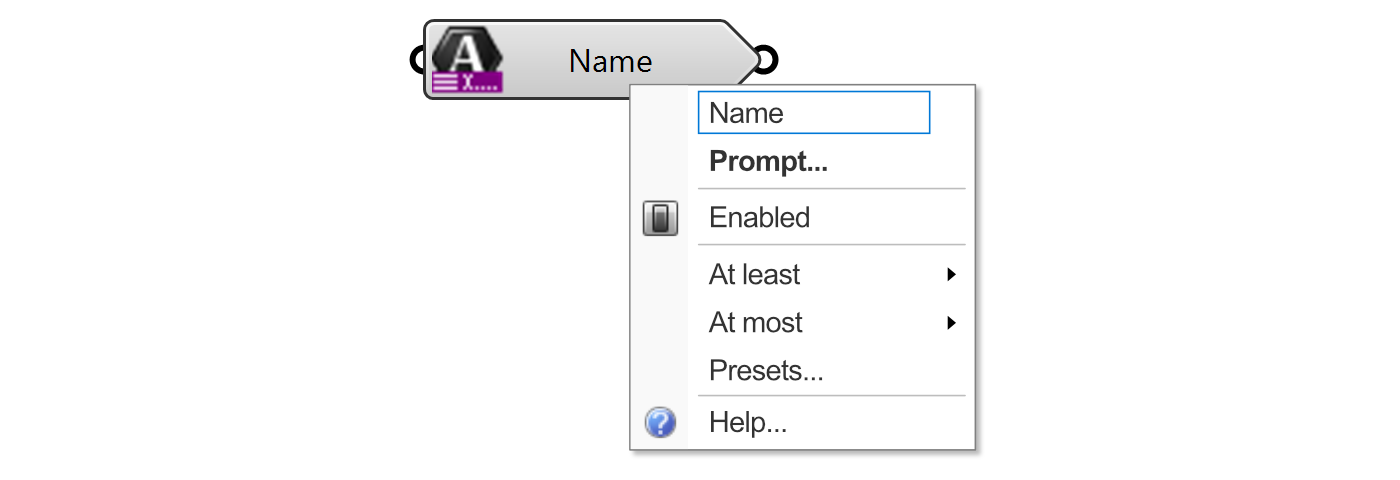
Now that we have Hops installed, let’s start defining our function by creating an input text parameter. Under the Params Tab > Util Group you will see a collection of Context Getter components. Place a Get String component onto your canvas. Right-click on the middle of this component and change the name from Get String to Name. This value is what Hops will use as for the input parameter name.
You can assign a default value to this parameter by connecting a string to the input of the Get String component. Add a Text Panel to the canvas. This can be found under the Params Tab > Input Group. Double-click on the Text Panel and write your name in the input.

Define the Function
Now that we have created an input parameter, we need to perform some sort of action using that value. Let’s create a message using the name you just passed into the Get String component. Add a Concatenate Component onto the canvas. This can be found under the Sets Tab > Text Group.
The Concatenate component will add a series of text snippets into a single message. In our case, we want to create a string that reads Hello Your Name Here!.
The Concatenate component is a special type of component in Grasshopper which uses a Zoomable User Interface (ZUI for short). If you zoom in on the component (using the middle scroll wheel), a small (+) button will appear on the left side of the component. Click on the (+) under the second parameter (B) to add a third input parameter.
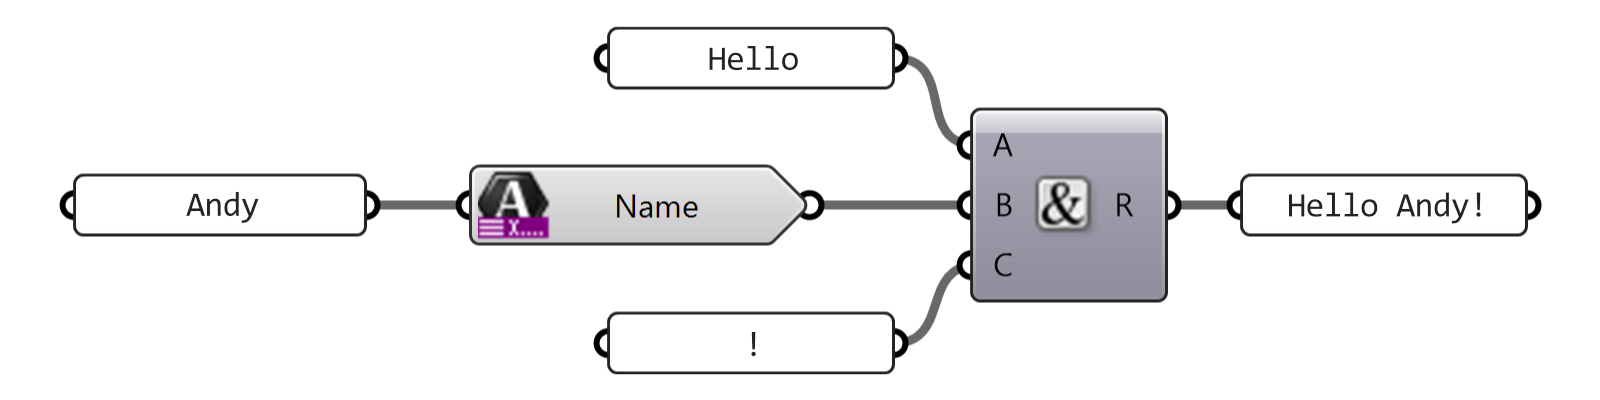
Now, zoom out and add another Text Panel onto the canvas. Double-click on it to enter some text. Type Hello into the panel (Note: there is an extra space added after the word). Connect that panel into the A-input of the Concatenate component.
Next, connect the output of the Get String component to the B-input of the Concatenate component. Finally, add another text panel onto your canvas and type an exclamation mark ! into the panel. Connect the output of that text panel into the C-input of the Concatenate component.
Connect a Text Panel to the output of the Concatenate component to view this message. Your definition should look like this.
Create an Output
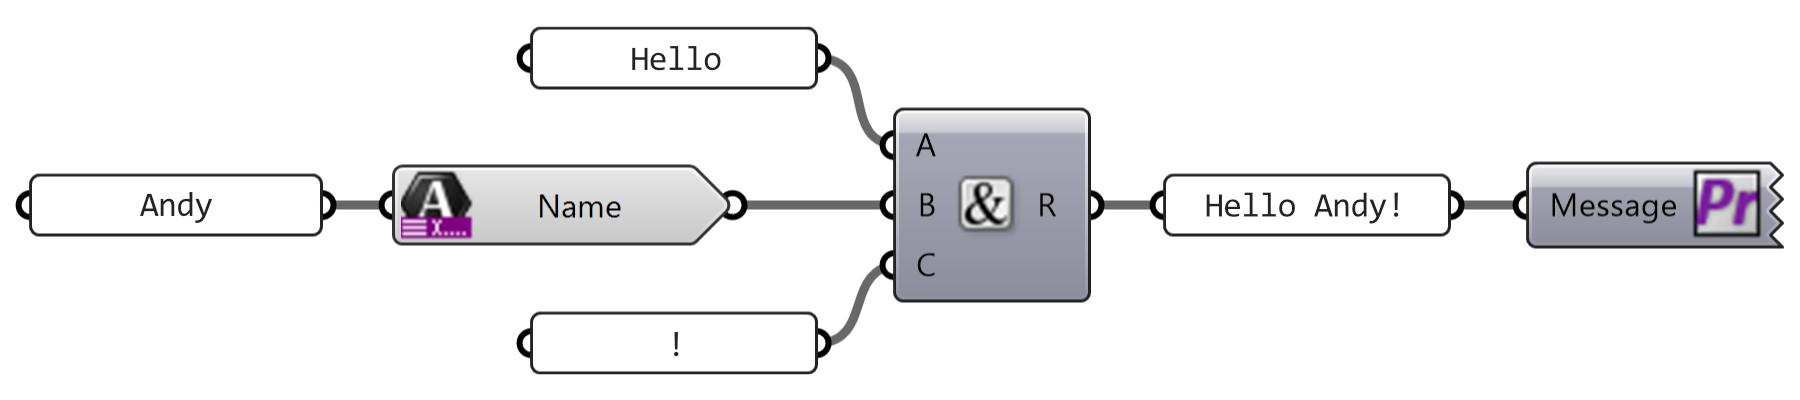
The last step in creating our Hops function would be to create an output parameter to return the string we just created. Go to the Param Tab > Util Group and add a Context Print component to your canvas.
Right-click on the input parameter (labeled Tx) and change the name to Message. You can name this anything you like, but this value is what Hops will use for the output parameter.
Now save your file to some directory on your computer. Call the file Hello_World.gh.
Call the Function
We’ve now created a Hops compatible function. Let’s use Hops to call that function. Start by creating a new Grasshopper definition (Ctrl + N).
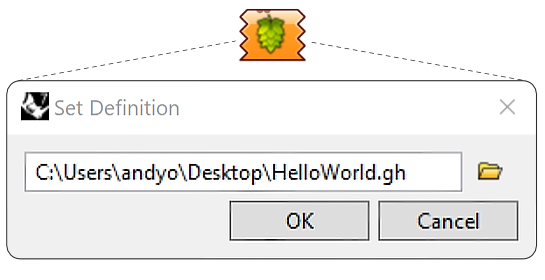
Go to the Param Tab > Util Group and add a Hops component to your canvas. Right-click on this component and select the Path menu item. In the pop-up dialog, select the Hello_World.gh file we just created. Select OK when the path has been selected.
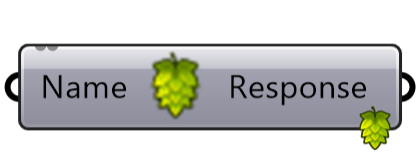
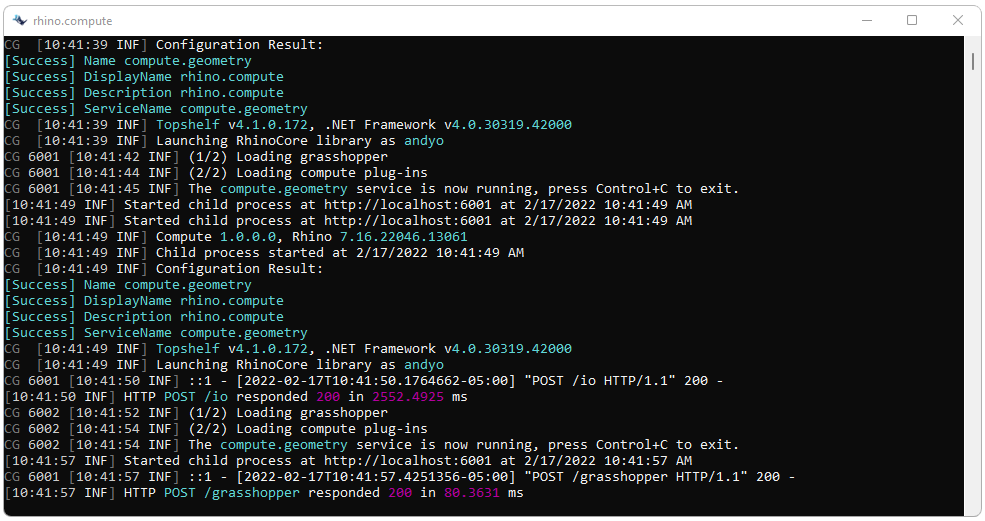
At this point, the Hops component should change appearance - adding one input called Name and one output called Message. Hops essentially bundled up the Hello_World.gh example we created and sent it to a local rhino.compute server to perform the calculation and return the result.
Try adding a new Text Panel onto the canvas and connect it to the Name-input of the Hops component. Double-click to change the name in the Text panel. Add another Text Panel to the output of the Hops component to see the result that is return from the rhino.compute server.

We have just covered how to create and call your very first Hops function. If you would like to learn more about how Hops communicates with the rhino.compute server or setting up your own production environment, check out the links below.
