
As you may be new to Rhino, Eto and/or programming, this guide will focus entirely on a small fun eto app to get you started.
As we have so many exciting things to learn in Eto, it might be good to make a small To Do list.
Your first Window
Let’s start simple and show a window. In this case, we’re going to use a Dialog.
using Eto.Forms;

var dialog = new Dialog()
{
  Width = 200,
  Height = 200
};

dialog.ShowModal();
import Eto.Forms as ef

dialog = ef.Dialog()
dialog.Width = 200
dialog.Height = 200

dialog.ShowModal()
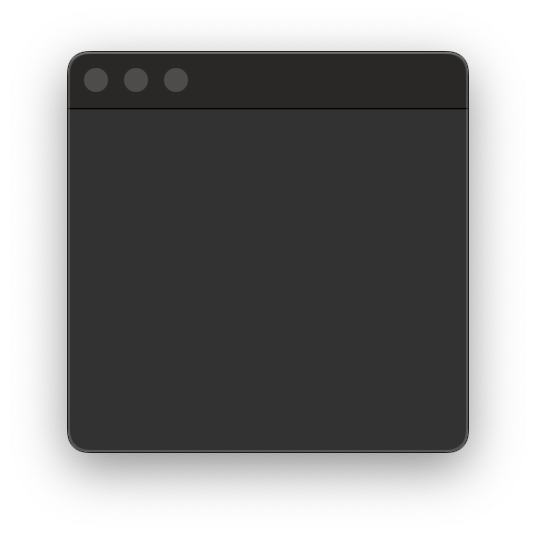
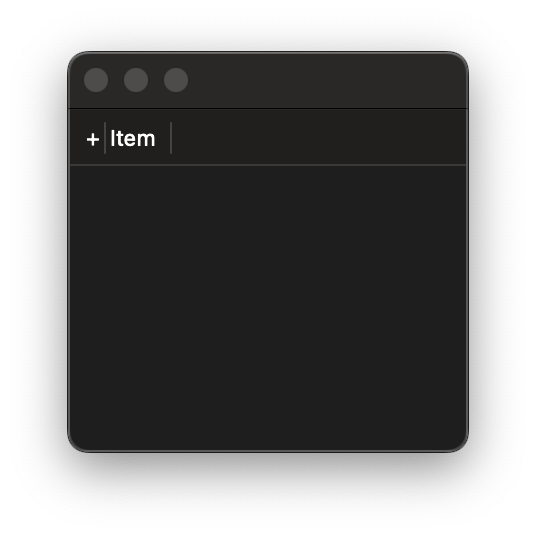
Creating Content
Creating a window in Eto isn’t too complex in C# or python. Only a few lines of code and a we’re already making progress! The window is a bit empty though, lets add some content. We’re going to use a GridView.
using Eto.Forms;

var gridView = new GridView()
{
  Columns = {
    new GridColumn()
    {
      HeaderText = "±"
    },
    new GridColumn()
    {
      HeaderText = "Item"
    },
  },
};

var dialog = new Dialog()
{
  Width = 200,
  Height = 200,
  Content = gridView,
};
import Eto.Forms as ef

plusColumn = ef.GridColumn()
plusColumn.HeaderText = "±"

itemColumn = ef.GridColumn()
itemColumn.HeaderText = "Item"

gridView = ef.GridView()
gridView.Columns.Add(plusColumn)
gridView.Columns.Add(itemColumn)

dialog = ef.Dialog()
dialog.Width = 100
dialog.Height = 100
dialog.Content = gridView

dialog.ShowModal()
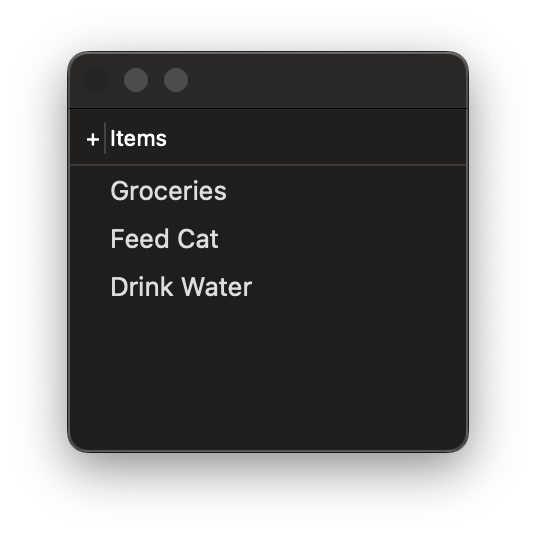
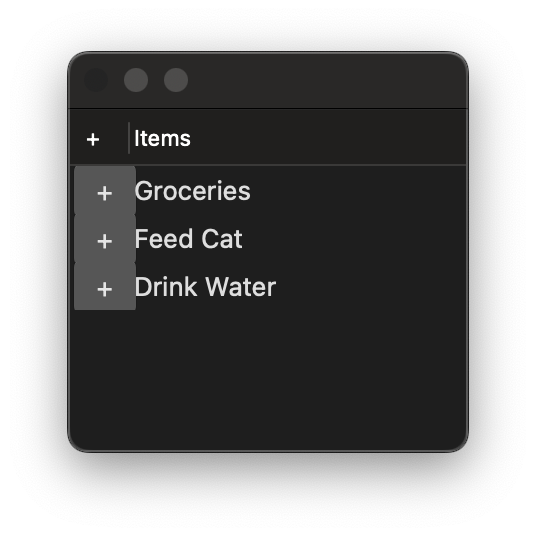
Adding Data
We’ve added a GridView, our first Eto control along with some columns. The UI looks a little sparse still. It would be nice to have some items in the UI.
using System.Collections.Generic;

using Eto.Forms;

internal class ToDoItem
{
    public string Text { get; set; }

    public ToDoItem(string text)
    {
      Text = text;
    }
}

var items = new List<ToDoItem>()
{
  new ToDoItem("Buy Groceries"),
  new ToDoItem("Feed Cat"),
  new ToDoItem("Drink Water"),
};

var gridView = new GridView()
{
  Columns = {
    new GridColumn()
    {
      HeaderText = "±"
    },
    new GridColumn()
    {
      HeaderText = "Items",
      Editable = true,
      DataCell = new TextBoxCell("Text")
    },
  },
  DataStore = items, // <-- Don't miss this!
};

var dialog = new Dialog()
{
  Width = 200,
  Height = 200,
  Content = gridView,
};

dialog.ShowModal();
import Eto.Forms as ef

class ToDoItem():
def __init__(self, text: str):
  self.Text = text

items = [
ToDoItem("Buy Groceries"),
ToDoItem("Feed Cat"),
ToDoItem("Drink Water"),
]

plusColumn = ef.GridColumn()
plusColumn.HeaderText = "±"

itemColumn = ef.GridColumn()
itemColumn.HeaderText = "Item"
itemColumn.Editable = True
itemColumn.DataCell = ef.TextBoxCell("Text")

gridView = ef.GridView()
gridView.Columns.Add(plusColumn)
gridView.Columns.Add(itemColumn)
gridView.DataStore = items, # <-- Don't miss this!

dialog = ef.Dialog()
dialog.Width = 200
dialog.Height = 200
dialog.Content = gridView

dialog.ShowModal()
Custom Cells
The UI is looking great! It’s starting to look like a list UI now, we have items in our list. It’s just not very functional. Let’s add some functionality.
The code is getting big now, we’re going to focus on sections now that the skeleton is there.
var buttonCell = new CustomCell()
{
    CreateCell = (cc) =>
    {
      var button = new Button() { Text = "-" };
      return button;
    }
};

var gridView = new GridView()
{
    Columns = {
        new GridColumn()
        {
          HeaderText = "±",
          Width = 24,
          DataCell = buttonCell,
def create_cell(self, args):
    button = ef.Button()
    button.Text = "-"
    return button

buttonCell = ef.CustomCell()
buttonCell.CreateCell += create_cell

plusColumn = ef.GridColumn()
plusColumn.Width = 24
plusColumn.HeaderText = "±"
plusColumn.DataCell = buttonCell
Adding Functionality
The UI still doesn’t do anything, but it’s starting to look like it does. Let’s fix that and make it functional.
var buttonCell = new CustomCell()
{
    CreateCell = (cc) => {
        var button = new Button();
        button.Text = "-";
        button.Click += (s, e) => {
            try
            {
                int row = cc.Row;
                items.RemoveAt(row);
            } catch {}
        };

        return new Panel() { Content = button, Padding = 2 };
    },
};
def create_cell(self, args):

    def button_click(self, args):
        items.RemoveAt(cc.Row)

    button = ef.Button()
    button.Text = "-"
    button.Click += button_click

    return button

buttonCell = ef.CustomCell()
buttonCell.CreateCell += create_cell
Notify the UI
That’s odd. Why doesn’t the - button do anything?
That’s because the data behind our UI isn’t informing our GridView of the updates.
Luckily the solution is pretty simple.
var items = new List<ToDoItem>()                 // Old
var items = new ObservableCollection<ToDoItem>() // New
items = []                                     # Old
items = ObservableCollection[type(ToDoItem)]() # New
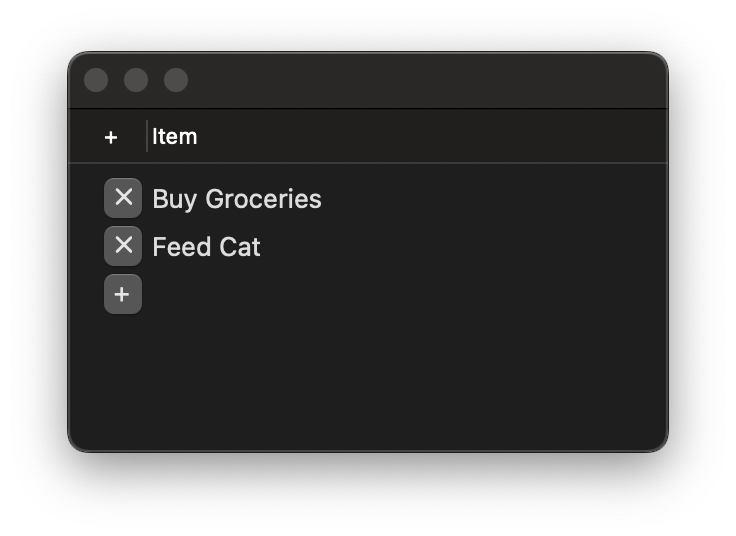
Finishing Up
ObservableCollections notify the UI of changes in the collection. It is advisable to NEVER replace the collection with a new collection, but instead clear and refill.
internal class ToDoItem
{
    public string Text { get; set; }
    public bool AddItem { get; set; } = false; // <-- Add a new property

    public ToDoItem(string text)
    {
      Text = text;
    }
}

var items = new ObservableCollection<ToDoItem>()
{
  new ToDoItem("Buy Groceries"),
  new ToDoItem("Feed Cat"),
  new ToDoItem("Drink Water"),
  new ToDoItem("..") { AddItem = true }, // <-- Add a new item
};

var buttonCell = new CustomCell()
{
    CreateCell = (cc) => {
        if (cc.Item is not ToDoItem element) return new Panel();
        int row = cc.Row;

        var button = new Button();
        if (element.AddItem) // <-- AddItems only add
        {
            button.Text = "+";
            button.Click += (s, e) => {
                try
                {
                    items.Insert(items.Count - 1, new ToDoItem("...") { AddItem = true });
                } catch {}
            };
        }
        else // <-- Otherwise they remove
        {
            button.Text = "-";
            button.Click += (s, e) => {
                try
                {
                  if (items[row].AddItem) return;
                  items.RemoveAt(row);
                } catch {}
            };
        }

        return button;
    },
};
from System.Collections.ObjectModel import ObservableCollection

import Eto.Forms as ef

class ToDoItem():
  def __init__(self, text: str, add_item:bool = False):
    self.text = text
    self.add_item = add_item # <-- Add a new property

items = ObservableCollection[object]()
items.Add(ToDoItem("Buy Groceries"))
items.Add(ToDoItem("Feed Cat"))
items.Add(ToDoItem("Drink Water"))
items.Add(ToDoItem("...", True)) # <-- Add a new item

def create_cell(args):

    def remove_click(self, rc_args):
      if args.Row == -1:
        return
      items.RemoveAt(args.Row)

    def add_click(self, ac_args):
      if items.Count <= 0:
        return

      items.Insert(items.Count - 1, ToDoItem("...", True))

    button = ef.Button()

    if (args.Item.add_item): # <-- add_items only adds
      button.Text = "+"
      button.Click += add_click
    else:                    # <-- Otherwise it removes
      button.Text = "-"
      button.Click += remove_click

    return button

button_cell = ef.CustomCell()
button_cell.CreateCell = create_cell

plus_column = ef.GridColumn()
plus_column.Width = 24
plus_column.HeaderText = "±"
plus_column.DataCell = button_cell

item_column = ef.GridColumn()
item_column.HeaderText = "Item"
item_column.Editable = True
item_column.DataCell = ef.TextBoxCell("Text")

grid_view = ef.GridView()
grid_view.Columns.Add(plus_column)
grid_view.Columns.Add(item_column)
grid_view.DataStore = items

dialog = ef.Dialog()
dialog.Width = 200
dialog.Height = 200
dialog.Content = grid_view

dialog.ShowModal()
Putting it all together
Above we finish getting the UI working and now have a functioning UI. It’s not perfect though, and the code can be a bit tricky to read, often this is good for brevity and tutorials.
Below is all of the code with a few extra bits to make the UI a bit nicer, they’re not strictly necessary, but they should make it easier to read, edit and extend.
using System;
using System.Linq;
using System.Collections.ObjectModel;

using Eto;
using Eto.Forms;

using Rhino.UI;

internal class ToDoItem
{
    public bool AddItem { get; set; } = false;
    public string Text { get; set; }

    public ToDoItem(string text)
    {
      Text = text;
    }
}

internal class ToDoModel : ViewModel
{
    public ObservableCollection<ToDoItem> Items { get; } = new();
}

internal class ToDoList : Dialog
{

    private ToDoModel Model => DataContext as ToDoModel;

    public ToDoList()
    {
        Width = 300;
        Height = 200;
        DataContext = new ToDoModel();
        Model.Items.Add(new ToDoItem("Buy Groceries"));
        Model.Items.Add(new ToDoItem("Feed Cat"));
        Model.Items.Add(new ToDoItem("Drink Water"));
        Model.Items.Add(new ToDoItem("") { AddItem = true });
        InitLayout();
    }

    private void InitLayout()
    {
        var buttonCell = new CustomCell()
        {
            CreateCell = (cc) => {
                int row = cc.Row;
                var element = Model.Items.ElementAtOrDefault(row);
                if (element is null) return new Panel();

                var button = new Button();
                if (element.AddItem)
                {
                    button.Text = "-";
                    button.Click += (s, e) => {
                        try
                        {
                            Model.Items.Insert(Model.Items.Count - 1, new ToDoItem("..."));
                        } catch {}
                    };
                }
                else
                {
                    button.Text = "-";
                    button.Click += (s, e) => {
                        try
                        {
                            if (Model.Items[row].AddItem) return;
                            Model.Items.RemoveAt(row);
                        } catch {}
                    };
                }

                return new Panel() { Content = button, Padding = 2 };
            },
        };

        var gv = new GridView()
        {
            Border = BorderType.None,
            CanDeleteItem = (e) => true,
            GridLines = GridLines.None,
            RowHeight = 24,
            Columns = {
                new GridColumn()
                {
                    HeaderText = "±",
                    HeaderToolTip = "Click + to add, - to remove",
                    DataCell = buttonCell,
                    Width = 24,
                    Expand = false,
                },
                new GridColumn()
                {
                    HeaderText = "Item",
                    Editable = true,
                    Expand = true,
                    HeaderToolTip = "To Do Item",
                    DataCell = new TextBoxCell(nameof(ToDoItem.Text))
                    {
                        AutoSelectMode = AutoSelectMode.OnFocus,
                        TextAlignment = TextAlignment.Left,
                    },
                },
            },
            DataStore = Model.Items,
        };

        Content = gv;
    }

}

var list = new ToDoList();
list.ShowModal(RhinoEtoApp.MainWindowForDocument(__rhino_doc__));
