
By the end of this guide, you should have all the tools installed necessary for authoring, building, and debugging C# mobile applications using RhinoMobile.
Prerequisites
If you have not done so already, please read the What is RhinoMobile? guide.
This guide presumes you have an:
- PC running Microsoft Windows 8.1 or later.
Install Visual Studio
Visual Studio is Microsoft’s flagship development platform and Integrated Development Environment (IDE). Visual Studio now comes in three “flavors”: Visual Studio Code1, Visual Studio Online2, and Visual Studio “proper”3. In order to author RhinoMobile apps, you will need Visual Studio “proper” (Visual Studio Code and Visual Studio Online are not supported).
At the time of this writing, Visual Studio “proper” comes in three editions: Community, Professional, and Enterprise. Any of these editions will work.
For the purposes of this guide, we will presume you are using Visual Studio 2017 Community Edition.
Step-by-Step
- Visual Studio 2017 Community Edition is free from Microsoft for students, open-source contributors, and small teams. Details here. Click the Community button to download the installer.
- Run the Visual Studio installer you downloaded from Microsoft, in this case vs_community.exe.
- Follow the onscreen prompts to install Visual Studio. It is recommended that you install the Typical installation. Depending on your internet connection, this can take minutes or hours. When successfully installed, click the Launch button to verify it is installed properly.
Install Xcode (Optional)
Xcode is Apple’s development platform and IDE. This step is optional and only required if you want to build for iOS. You will need to preform this step on your Mac build box running macOS.
Step-by-Step
- Xcode is free in the Mac App Store. Click the View in Mac App Store button.
- Click the Get > Install App button underneath the Xcode icon.
- You will be prompted for your Apple ID (required to download apps on the App Store).
- Xcode is large download - nearly 2.6 GB in size. You can monitor the progress of the download in Launchpad. When Xcode is finished downloading an installing, it will be your /Applications folder.
- Launch Xcode. On initial launch, Xcode will install some additional components.
- Quit Xcode.
Install Xamarin
Xamarin’s platform is currently required to build RhinoMobile apps. Please check out the What are Mono and Xamarin? guide for more information.
Step-by-Step
- Download the Xamarin Platform.
- Xamarin uses an Installer app, which downloads and installs the components that you select. Once you have downloaded the XamarinInstaller.dmg, double-click it to mount the disk image. Double-click the big Install Xamarin icon to launch the installer.
- You must accept the Xamarin Software License Agreement to use the Xamarin platform.
- The Xamarin Platform is comprised of these pieces:
- Xamarin Studio
- Xamarin.Android
- Xamarin.iOS
- Xamarin.Mac …verify that Xamarin.Android and Xamarin.iOS are checked and click Continue.
- Xamarin installs: Xamarin Studio, Xamarin.Android, and Xamarin.iOS. Click Continue.
- Xamarin is will now download and install. Depending on which products you selected in step 4 above, this can take a while.
- Launch Xamarin Studio.
- Navigate to Help > Check for Updates. Update and restart Xamarin Studio if necessary.
- Xamarin Studio - along with Xamarin.Android and Xamarin.iOS - are now installed.
Update the Android SDK
Once Xamarin Studio itself has been updated, you need to fetch the updates for the Android SDK.
Step-by-Step
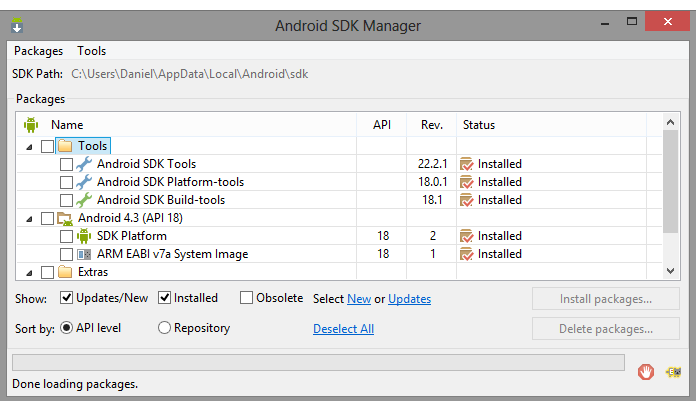
- In Xamarin Studio, navigate to Tools > Open Android SDK Manager….
- In the Android SDK Manager window, wait until manager has finished fetching the update manifest.
- Note: you may need to run the SDK manager as Administrator. The default path to the Android SDK is: C:\Users\you\AppData\Local\Android\android-sdk.
- Depending on when you downloaded the Xamarin tools, you will want to install the most recent API (21 at the time of writing) as well as the last couple (20 and 19) for backward compatibility. Select the small check boxes next the names and then click Install N packages… button.
- This brings up a (very buggy) window in which you must accept all the licenses of each item before continuing. If you can’t get the Install button to work, exit out of the window, open it again, and individually click the Accept radio button on the left until it works.
- Note Downloads can take awhile depending on your internet connection.
Install the Intel HAXM
The Intel HAXM is the Intel Hardware Acceleration Execution Manager. HAXM provides a hardware-accelerated engine for the x86 Android emulators. Without HAXM, the emulators are nearly unusable, as their performance lags so much. However, with HAXM, the x86 emulators are responsive and usable. Not as fast as an actual device, but at least passable. It’s available to install via the Android SDK manager, but the version there is ineffective. Instead, get it from the link above. HAXM will not work in a virtualized environment, e.g. a VM, so if you’re doing your Android development in a Windows VM, you will need to use a device.
Step-by-Step
- Visit the Intel Hardware Acceleration Execution website.
- Find the Microsoft Windows section of the page.
- Download the haxm-windows_rxx.zip. You may be asked to accept an license agreement before downloading can begin.
- Unzip haxm-windows_rxx.zip.
- Install the HAXM by running the intelhaxm-android.exe executable.
Clone RhinoCommon
RhinoMobile is built around RhinoCommon’s rhino3dmio branch. You can either download RhinoCommon as a zip or clone the repository using git (recommended). (If you are new to GitHub, there is a GitHub Windows Desktop app to get you started).
Step-by-Step
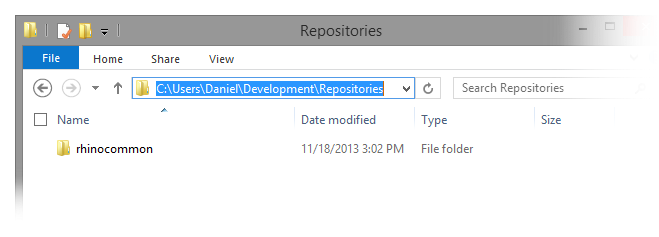
- Unzip or clone rhinocommon (rhino3dmio branch) in a convenient folder, such as C:\Users\you\Development\Repositories\rhinocommon:
- Download openNURBS. RhinoMobile requires the C++ openNURBS SDK.
- Unzip openNURBS and place the contents in the rhinocommon\c\opennurbs folder (the folder containing only the readme.md file):

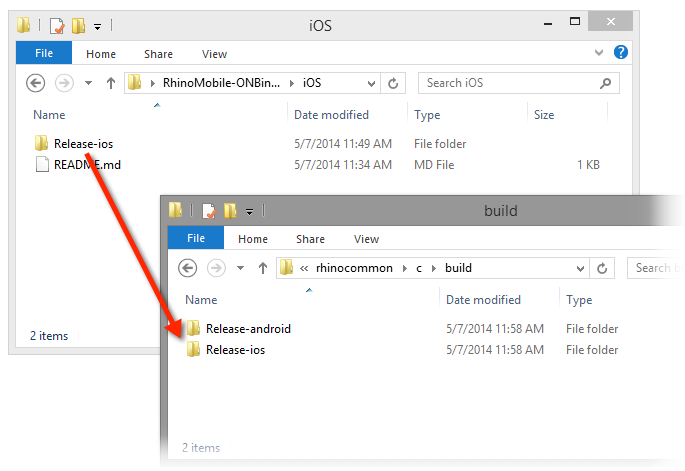
- It is not possible to build the native openNURBS mobile library for iOS on Windows - this requires a Mac. For convenience purposes, we have provided pre-built binaries for iOS that you can use in your project on the Windows side. Once these binaries have been downloaded, move the Release-ios folder into the *rhinocommon\c\build* folder
Clone RhinoMobile
You will need to download or clone RhinoMobile and the RhinoMobileSamples repositories. (If you are new to GitHub, there is a GitHub Windows Desktop app to get you started).
Step-by-Step
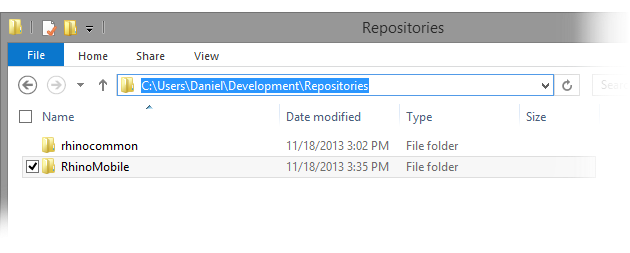
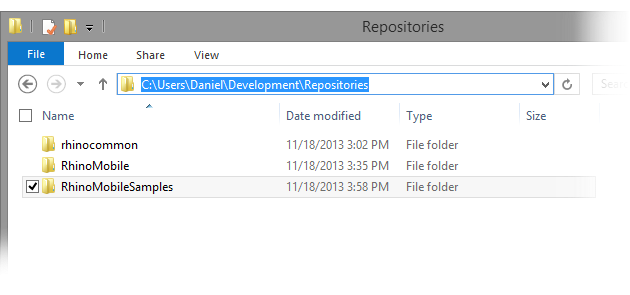
- Unzip or clone RhinoMobile into a folder parallel to rhinocommon (cloned above). For example, if rhinocommon is in the C:\Users\you\Development\Repositories\rhinocommon folder, then RhinoMobile should be in the C:\Users\you\Development\Repositories\RhinoMobile folder:
- Unzip or clone RhinoMobileSamples into a folder parallel to rhinocommon and RhinoMobile:
Next Steps
Congratulations! You have all the tools necessary to build a mobile app that uses RhinoMobile. Now what?
Check out the Your First App (Windows) guide for instructions building - your guessed it - your first app.
Related Topics
- What is RhinoMobile?
- What is RhinoCommon?
- What are Mono and Xamarin?
- Installing Tools (Mac)
- Your First App (Windows)
Footnotes
-
Visual Studio Code is Microsoft’s cross-platform source code editor for Windows, Linux, and macOS. At the time of this writing, Visual Studio code does not yet support the features required to author RhinoMobile apps. ↩︎
-
Visual Studio Online is Microsoft’s online counterpart to the desktop edition of Visual Studio (referred to as Visual Studio “proper” above). We have not tested using Visual Studio Online to debug RhinoMobile apps. ↩︎
-
Visual Studio “proper” is the desktop version of Visual Studio…we are only attaching the “proper” epithet to distinguish it from the Visual Studio Code and Visual Studio Online. In subsequent guides this will be referred to as simply “Visual Studio.” ↩︎
