

Rhino.Compute allows you to bring the Rhino’s geometric computation capabilities to the cloud. Before deploying your application to a production environment, you should ensure that everything works perfectly in a controlled environment.
This guide is intended for developers who are familiar with Windows and have basic knowledge of Visual Studio and Git. Whether you are a seasoned Rhino user or new to Rhino.Compute, this documentation will provide you with the necessary steps to set up your development environment and start debugging effectively.
Prerequisites
Before diving into the setup of Rhino.Compute on your local machine, you need to ensure that you have the right tools. Here’s what you’ll need:
- Windows Operating System. Rhino.Compute only runs in Windows.
- Development Environment. You will need Visual Studio 2022 to compile the code.
- Version control. Git is necessary for cloning the compute.rhino3d repository and managing branches according to your Rhino version.
- Rhino. Visit our downloads page to get the latest Rhino 8 or Rhino 7 builds. After downloading and installing it, please start Rhino and follow the instructions at startup to validate your license on your machine or through the Cloud Zoo.
Clone the repository
To get the latest version of Rhino.Compute you will need to clone its repository from our official account in Github.
-
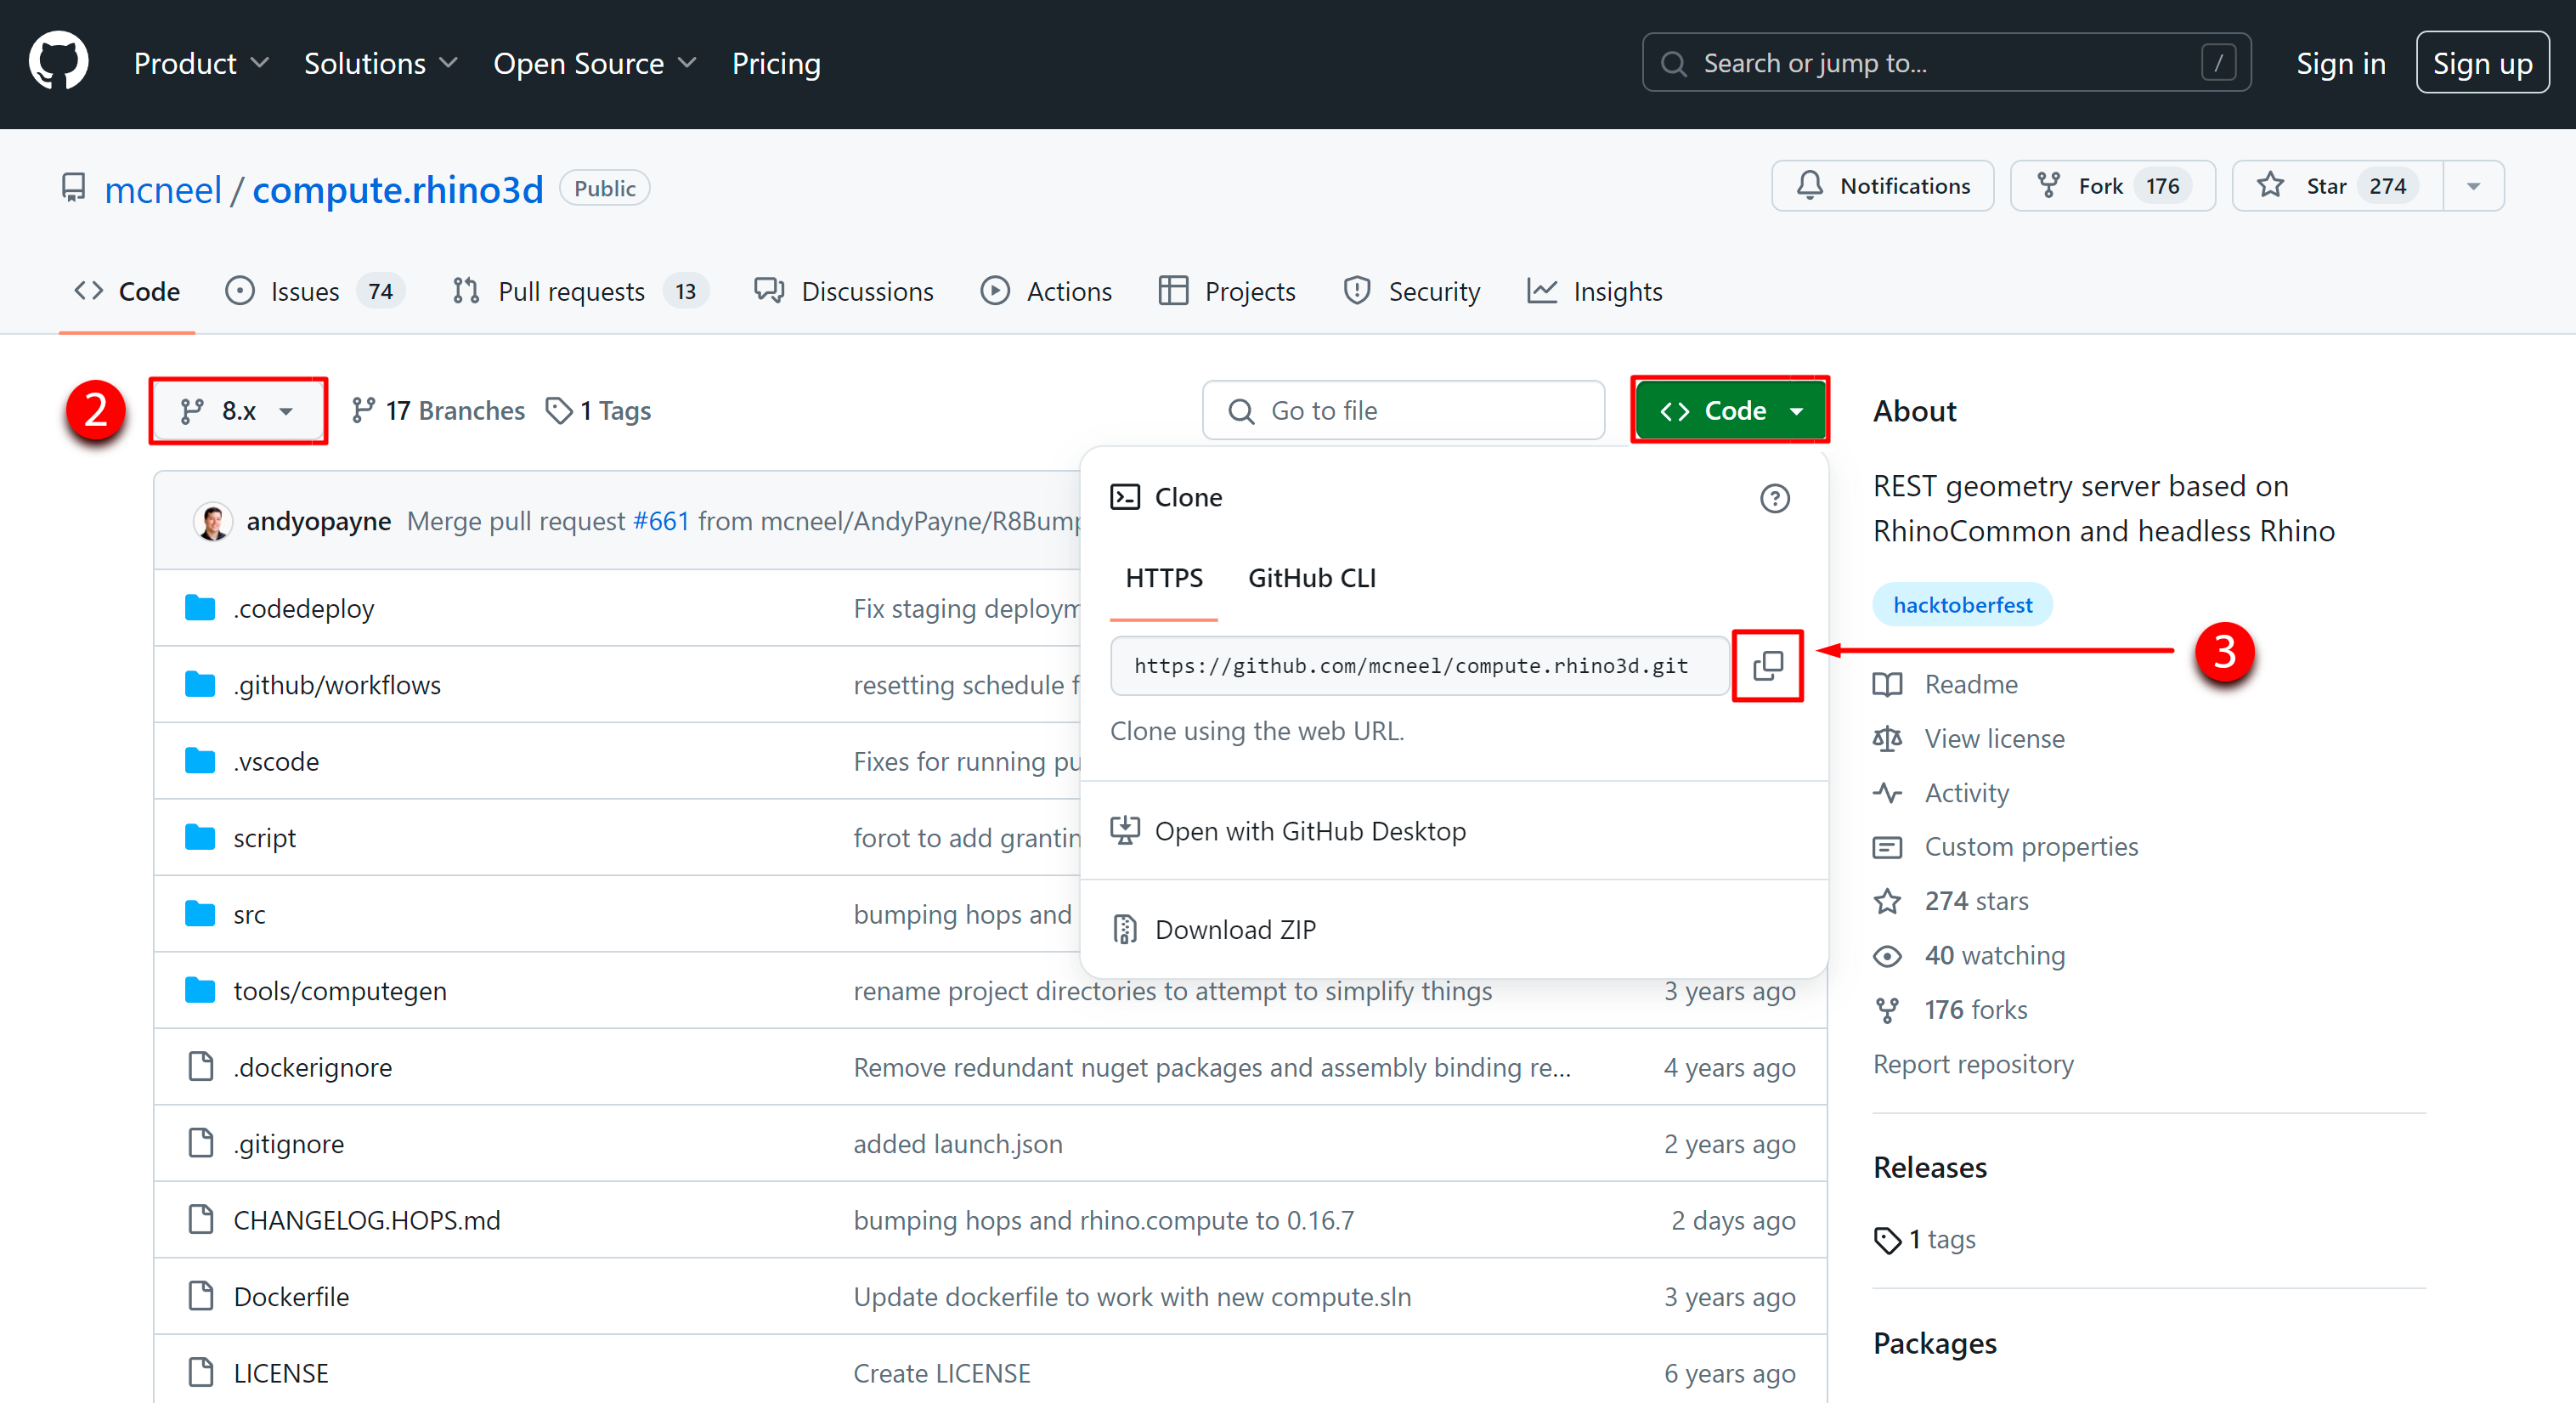
From the branch drop-down menu, make sure you select either the 8.x or 7.x branch to clone.
-
Once there, click on the green button “<> Code” and copy the URL for the repository.
-
On your local computer, create a folder where you want to clone the repository into.
-
Navigate to that directory through your preferred command prompt and type
git cloneand paste the URL you copied earlier.git clone https://github.com/mcneel/compute.rhino3d.git -
After the cloning operation is complete, you should see a number of files and directories which have be downloaded from the compute.rhino3d repository into the folder you created.
Anatomy of the solution
The Rhino.Compute repository consists of two main projects, each serving distinct purposes within the framework. Understanding these can help clarify how Rhino.Compute operates, especially if you’re looking to work with or contribute to its development. Here’s a breakdown of the two projects:
-
compute.geometry. This project primarily focuses on the geometric calculation aspects. Esentially, compute.geometry provides a REST API that exposes Rhino’s geometry engine to be used over the web. This means that geometric operations can be performed on a server, and results can be retrieved remotely, making it highly useful for web-based applications or serices that require complex geometric processing.
-
rhino.compute. This project can thought of as a higher-level service layer that manages and orchestrates the calls to the compute.geometry API - handling tasks like authentication, spawning child processes, and setting up time limits for the shutting down process.
Compile the solution
Now that you have the code, it’s time to open the project in Visual Studio 2022 and prepare it for debugging.
-
Navigate to the directory where you cloned the repository and find the compute.sln file. Double-click it to open the project in Visual Studio 2022.
-
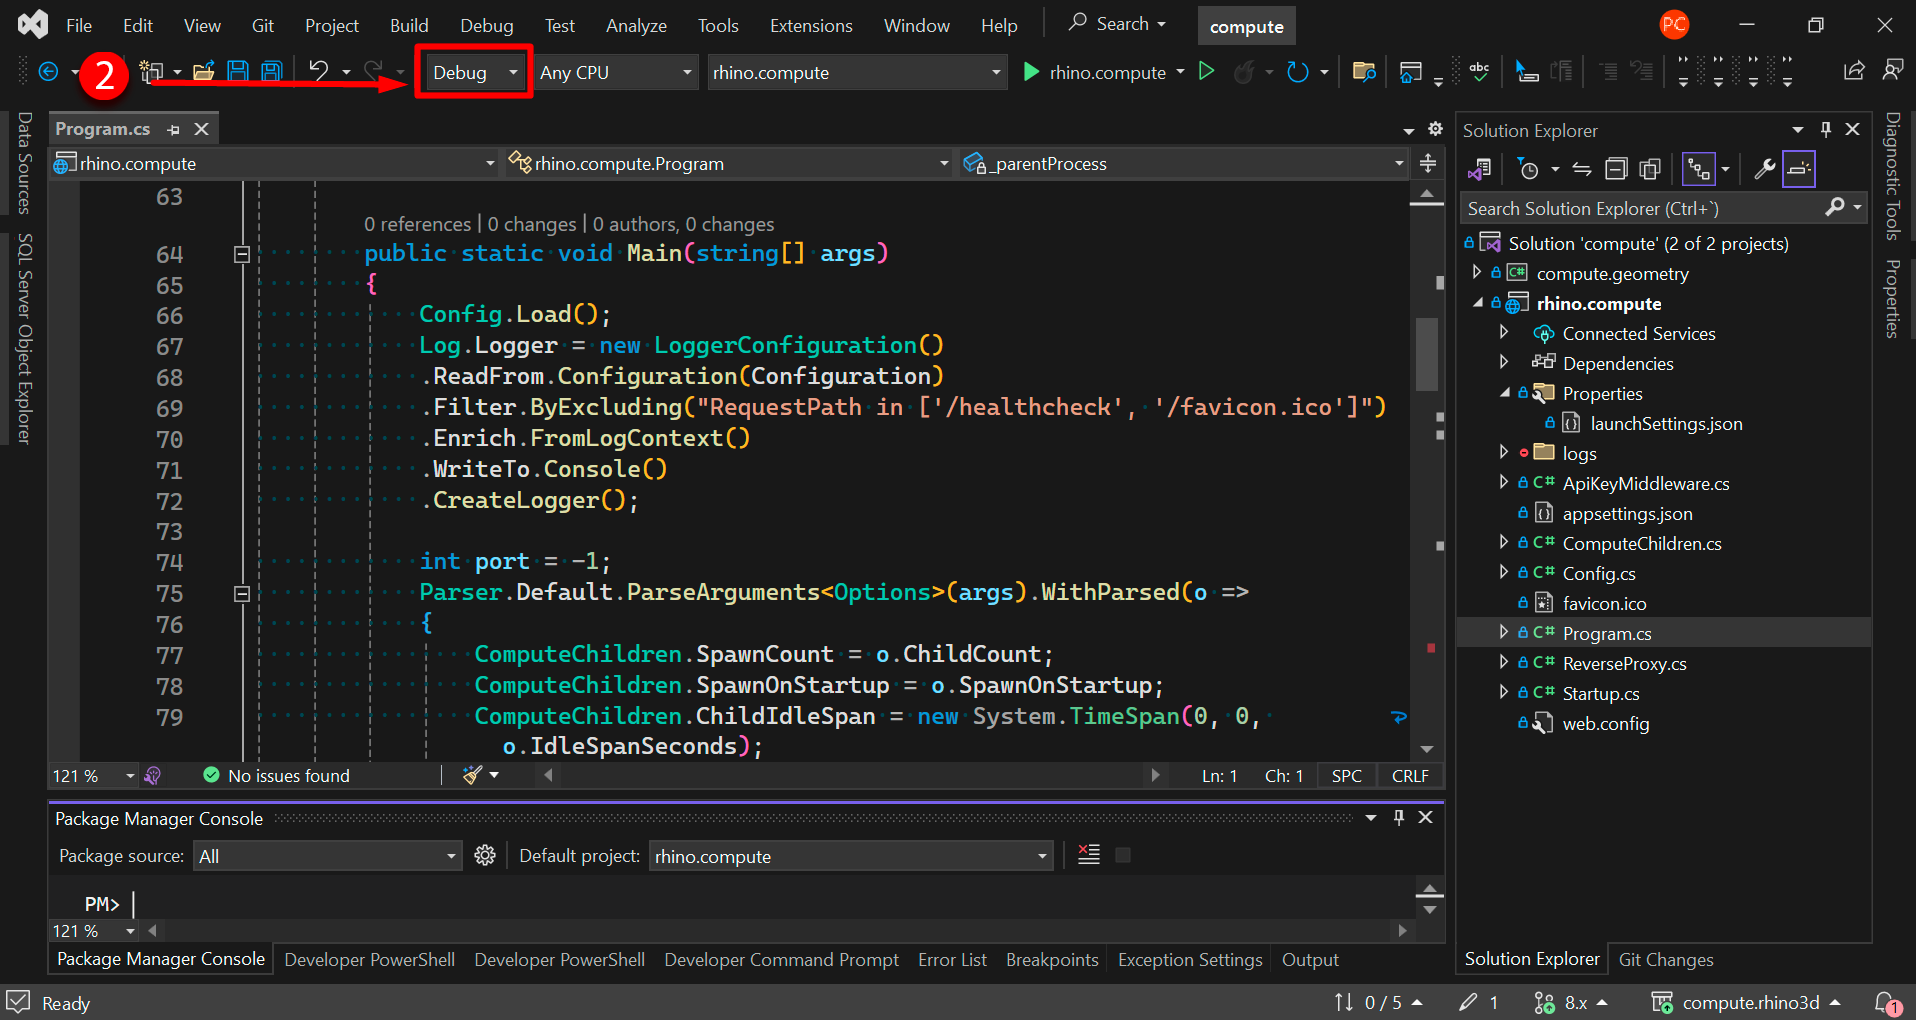
Set the solution configuration to Debug mode. This allows you to run the code with full debugging features, making it easier to trace through the code and spot errors.
-
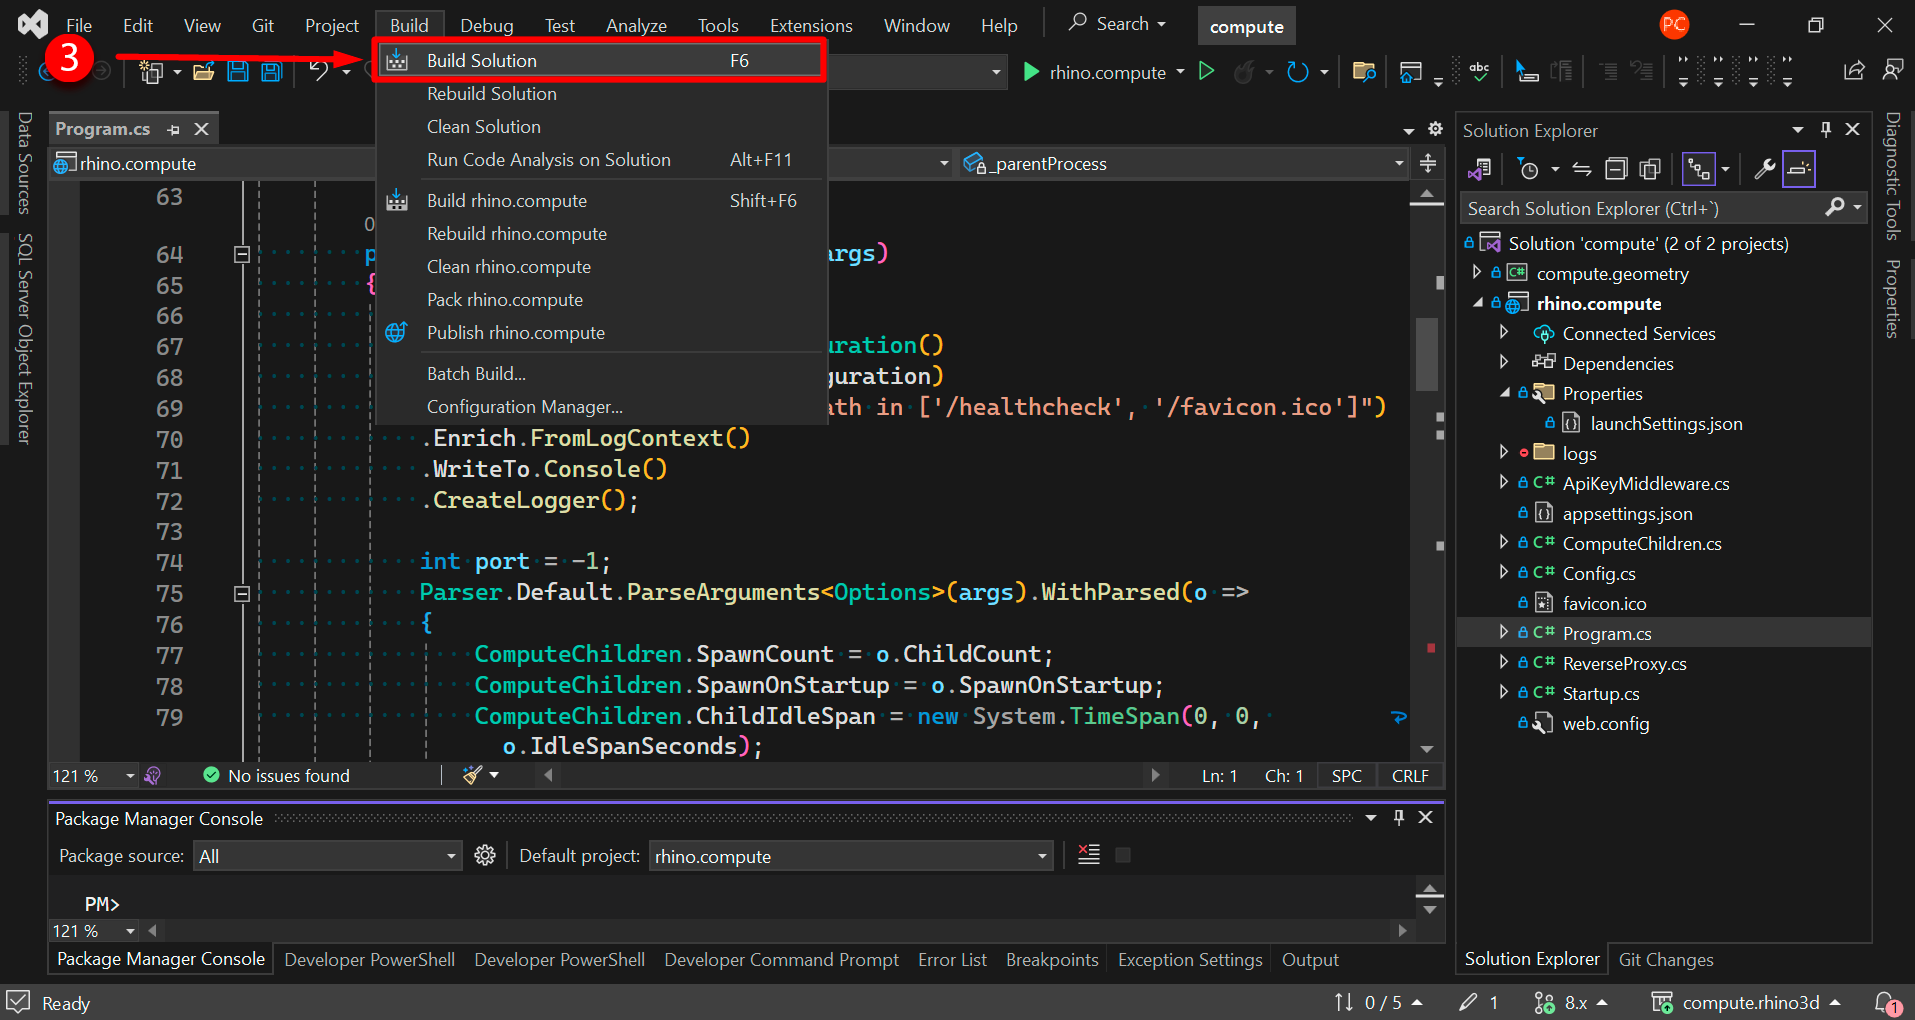
In the File menu, click on Build -> Build Solution (Ctrl + Shift + B). This will compile all of the project files.
-
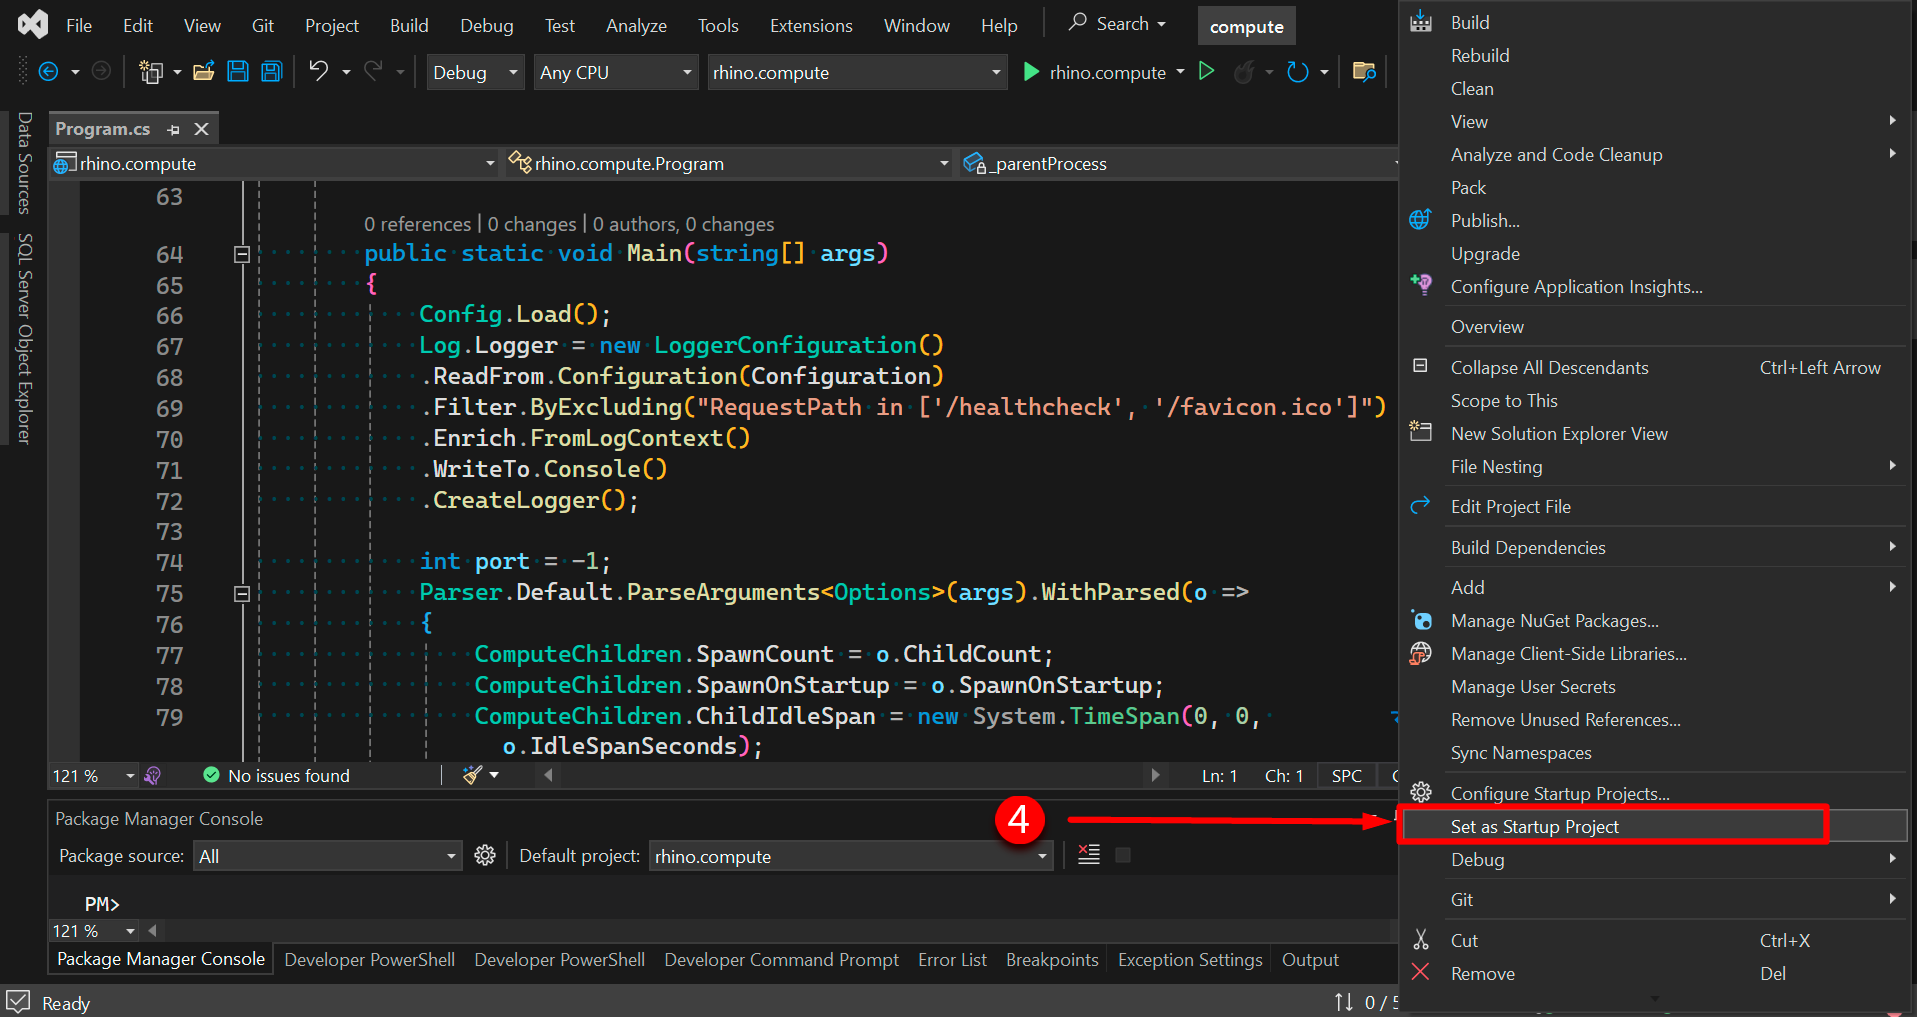
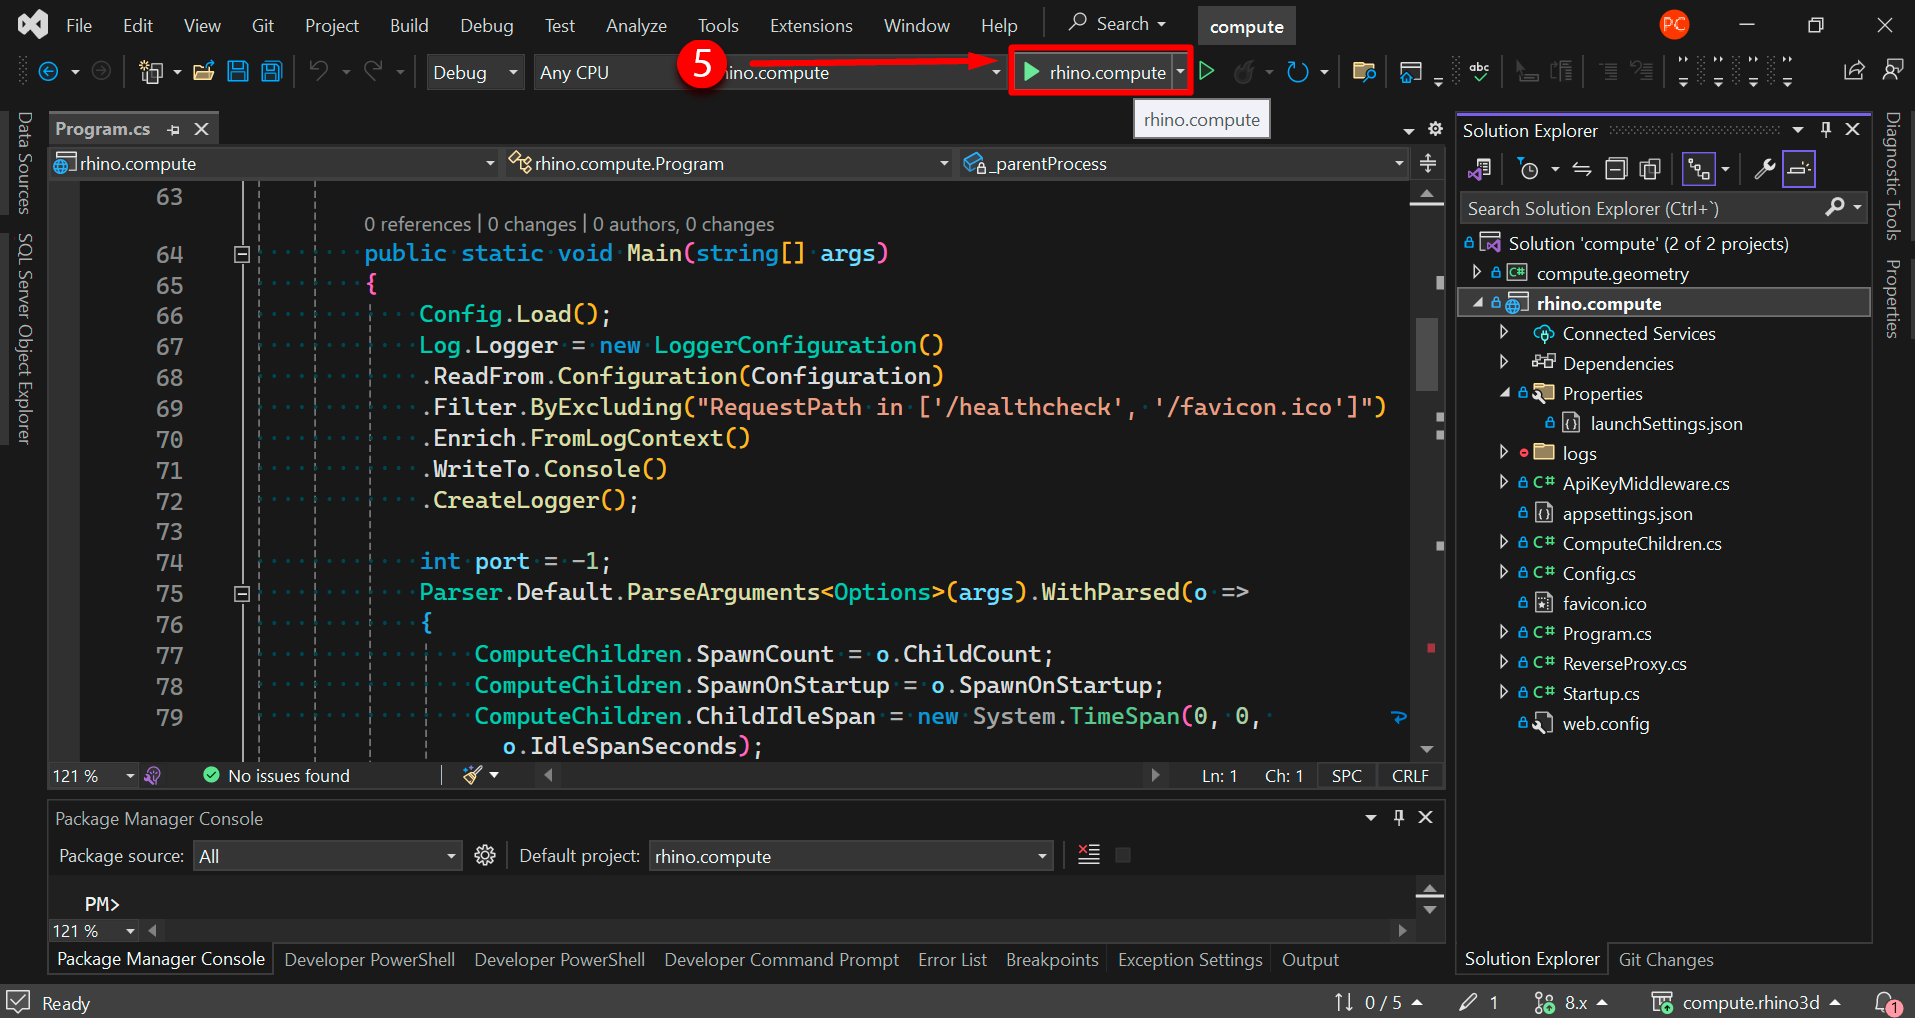
In the Solution Explorer panel, right-click on the rhino.compute project and select Set as Startup Project. This ensures that when you run the debugger, Visual Studio will start this particular project.
-
Click on rhino.compute to start the application in the debugger. A console application should show up in your task bar showing the status of the Rhino.Compute loading process.
-
Now all you need to do is wait for a few seconds for Rhino.Compute to load. Please take into account that the logged information depends on the Rhino version you had chosen previously.
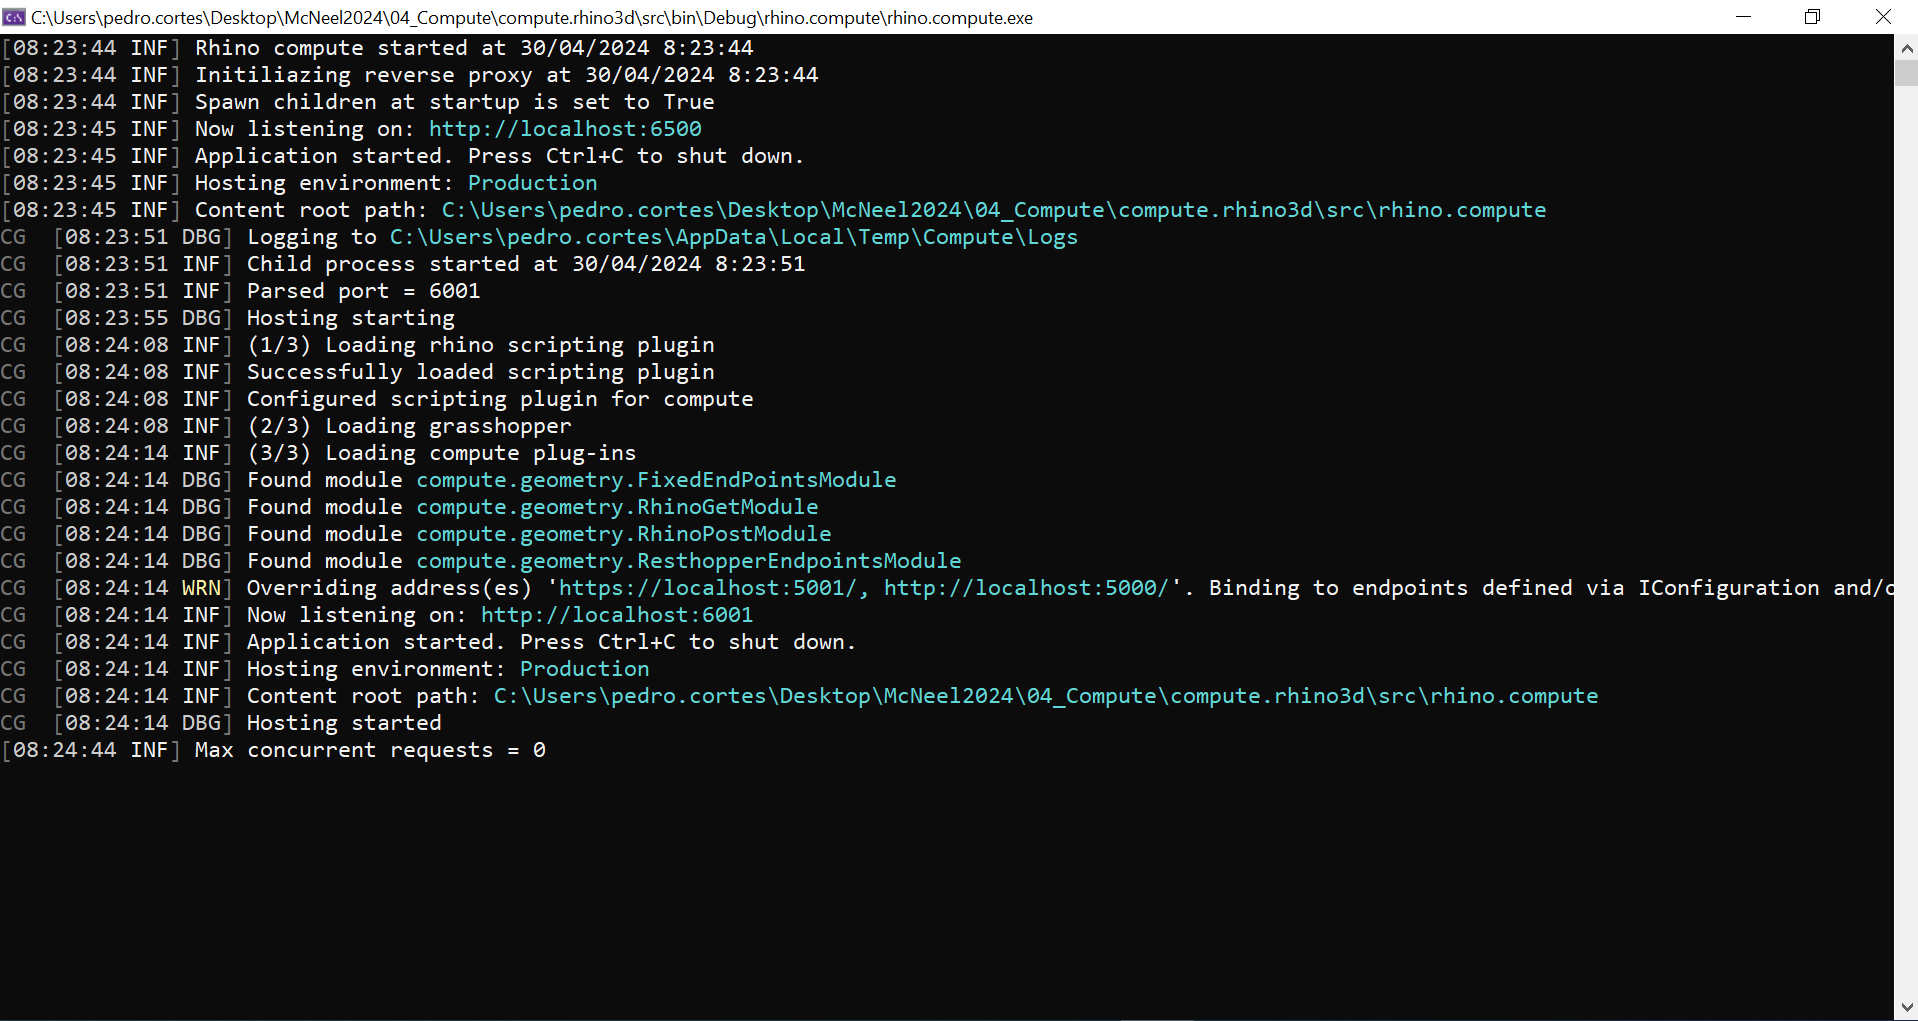
Test an endpoint
With the Rhino.Compute console application running, browse to any of these endpoints to check that everything is working!
