Project Setup (C#) |
Grasshopper Component Library Project Setup in C#
Please note that we now have Assembly Wizards for Grasshopper and it is no longer necessary to manually create a GHA project in Visual Studio.
This topic outlines all the steps required to create a new project in C# which will create a Grasshopper Component Library. If you are using C# Express, some of these steps will differ since the Express version does not expose a UI for all these settings.
Creating a new Project
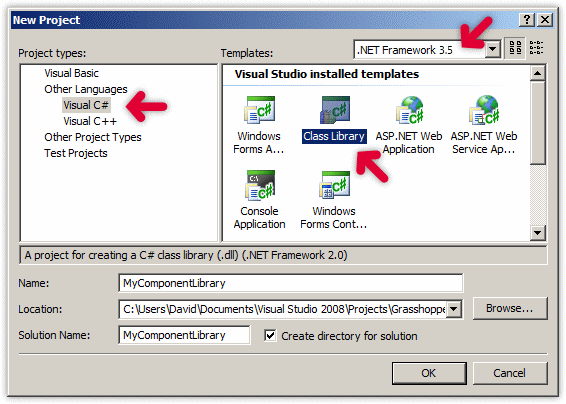
Start Visual Studio and create a new project via the File menu.

In the Project types tree, navigate towards the Visual C# root node. Make sure the Target Framework is 3.5 and select the Class Library type:
A new, empty project will now be created. Before this project becomes a valid Grasshopper Component Library, we have to add all the required Assembly References. In your Solution Explorer pane, find the References node and make sure the list includes the assemblies listed below.
Careful! When adding Assembly Reference, the default Visual Studio behaviour is to tag them as CopyLocal=True. This is wrong. So very wrong. Set the Copy Local tag of GH_IO, Grasshopper and RhinoCommon to False before you press the Compile button for the first time.
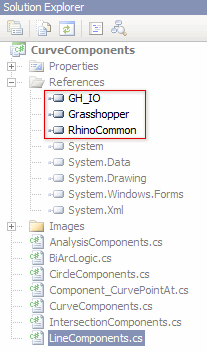

Note that the folder locations for RhinoCommon, Grasshopper and GH_IO will differ depending on installation.
Assembly Probable location GH_IO.dll <Program Files>\Rhinoceros 4.0\Plug-ins\Grasshopper\ Grasshopper.dll <Program Files>\Rhinoceros 4.0\Plug-ins\Grasshopper\ RhinoCommon.dll <Program Files>\Rhinoceros 4.0\Plug-ins\Grasshopper\rh_common\ By default, a Visual Studio project has two build 'flavours'; DEBUG and RELEASE. Debug builds are not optimized by the compiler so the instructions that eventually get executed are very similar to the source code. Release builds do get optimized, which usually results in a slightly better performance (and occasionally vastly superior performance), but it can be very confusing to try and debug a Release version.
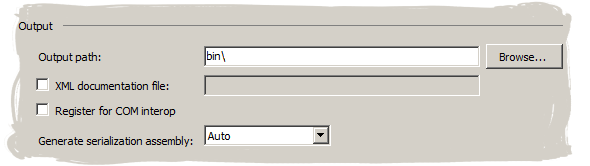
Debug and Release builds are written into different folders (usually ..\Bin\Debug\ and ..\Bin\Release\ ), which is a very useful feature when writing stand-alone application, but it is outright confusing when your application is loaded by another program. We advice that you alter the build folders so that both Debug and Release builds are stored in the same location. This way there can be no confusion about which build you are loading. If you have VB Express, then you will not be able to adjust the build locations through the Visual Studio interface. See this topic on how to solve this with Visual Studio Express.
In Project Properties, go to the Build tab, switch the Configuration filter to All Configurations and set the Output path: to bin\:
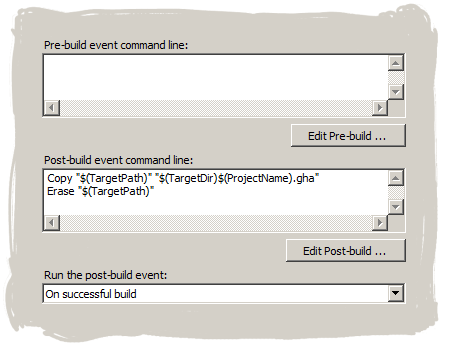
When you override the default build folder destinations, both DEBUG and RELEASE flavours will end up in the same location. However, the file type of the compiled Class Library is still dll. Even though this is the correct file type for a Grasshopper Component Library, you must change the extension before Grasshopper will consider loading the library. You can automatically rename the compiled dll using a Post-Build Event. Once again, if you have C# Express you will not be able to add an event via the Visual Studio UI. See this topic on how to solve this with Visual Studio Express.
On the Build Events tab of the Project Properties you will find a text field called Post-build event command line where you can enter the following macro:
Copy "$(TargetPath)" "$(TargetDir)\$(ProjectName).gha"
Erase "$(TargetPath)"
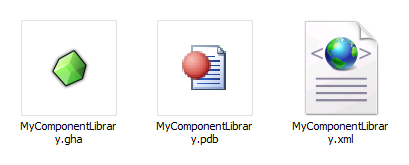
You are now finished with the project setup for Grasshopper Component Libraries. When you compile your new project, the contents of the build folder should be: