
Overview
In this guide, we will walk through the process of setting up a virtual machine using Amazon Elastic Compute Cloud (Amazon EC2).
To start, you will need to confirm your AWS subscription. If you are new to AWS, you can get started with Amazon EC2 using the AWS Free Tier.
Launch the instance
To create a new virtual machine instance on AWS, follow these steps:
-
Open the Amazon EC2 console.
-
From the EC2 console dashboard, int the Launch instance pane, select Launch Instance.
-
Under the Names and tags section, enter a name for the VM instance. For this tutorial, we’ll use the name “RhinoComputeVM”.
-
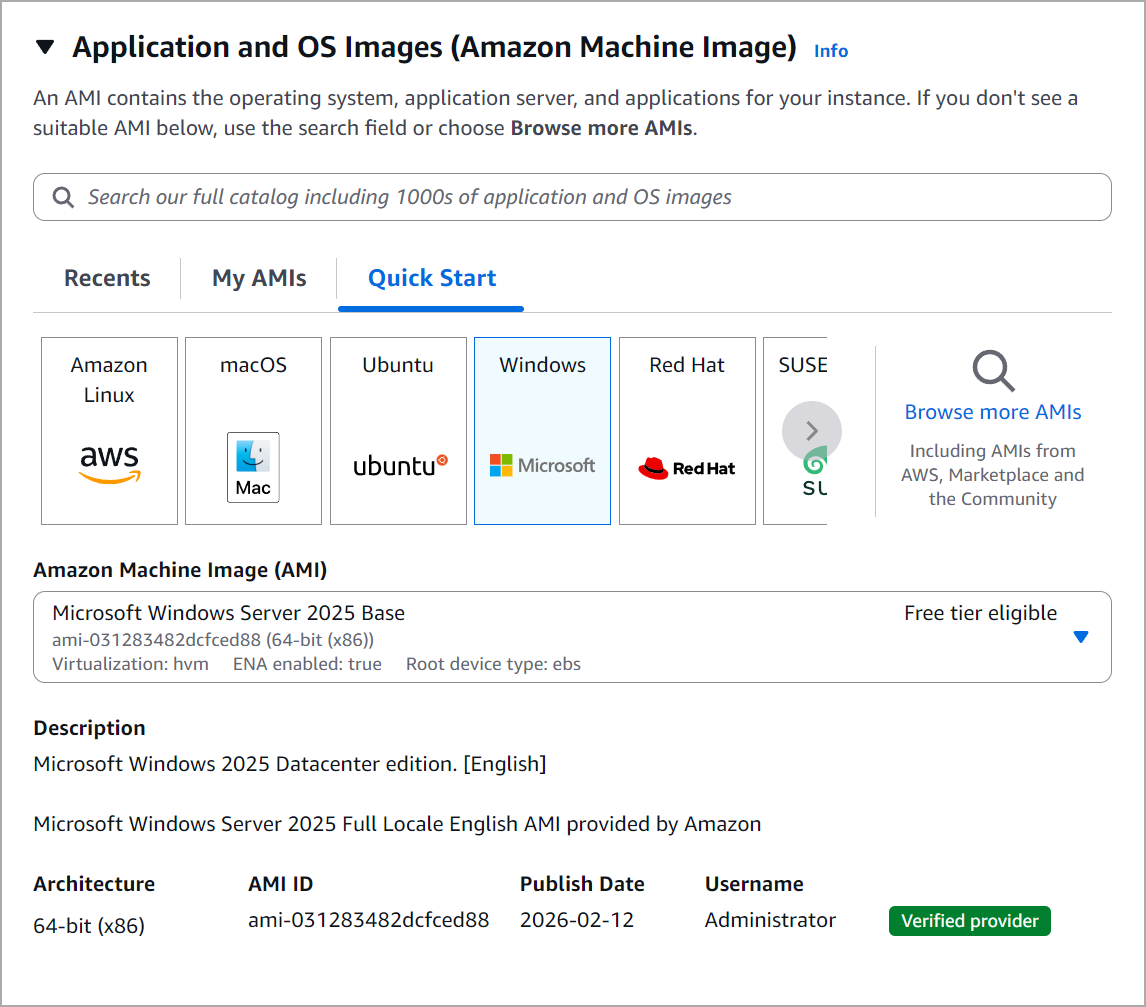
Under the Application and OS Images section, click on the Windows button under the Quick Start tab. Under the Amazon Machine Image (AMI) section there should be a drop-down menu listing all of the available machine images. Select the AMI for Microsoft Windows Server 2025 Base.
-
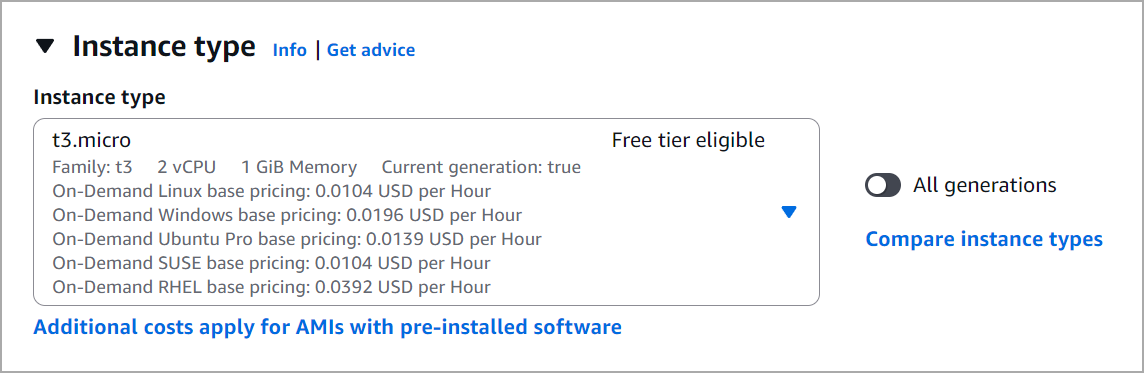
In the Instance Type section, select the t3.micro instance type (default) or a larger instance type if needed. Note: the t3.micro instance type is elegible for the free tier.
-
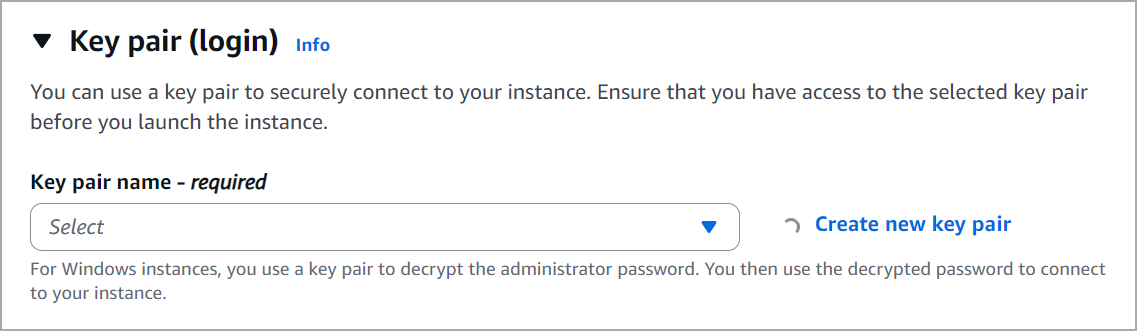
In the Key Pair (login) section, for Key pair name, choose an existing key pair or choose Create new key pair to create your first key pair.
-
In the Network Settings section, under the Firewall (security groups) choose the Select existing security group radio button. Then, under the Common Security Groups drop-down list, select the security group. Note: if you are creating a new security group, you must allow RDP traffic.
ImportantIf the Auto-assign public IP setting is set to Disabled, click on the Edit button on the top-right of this section panel and change this setting to Enabled.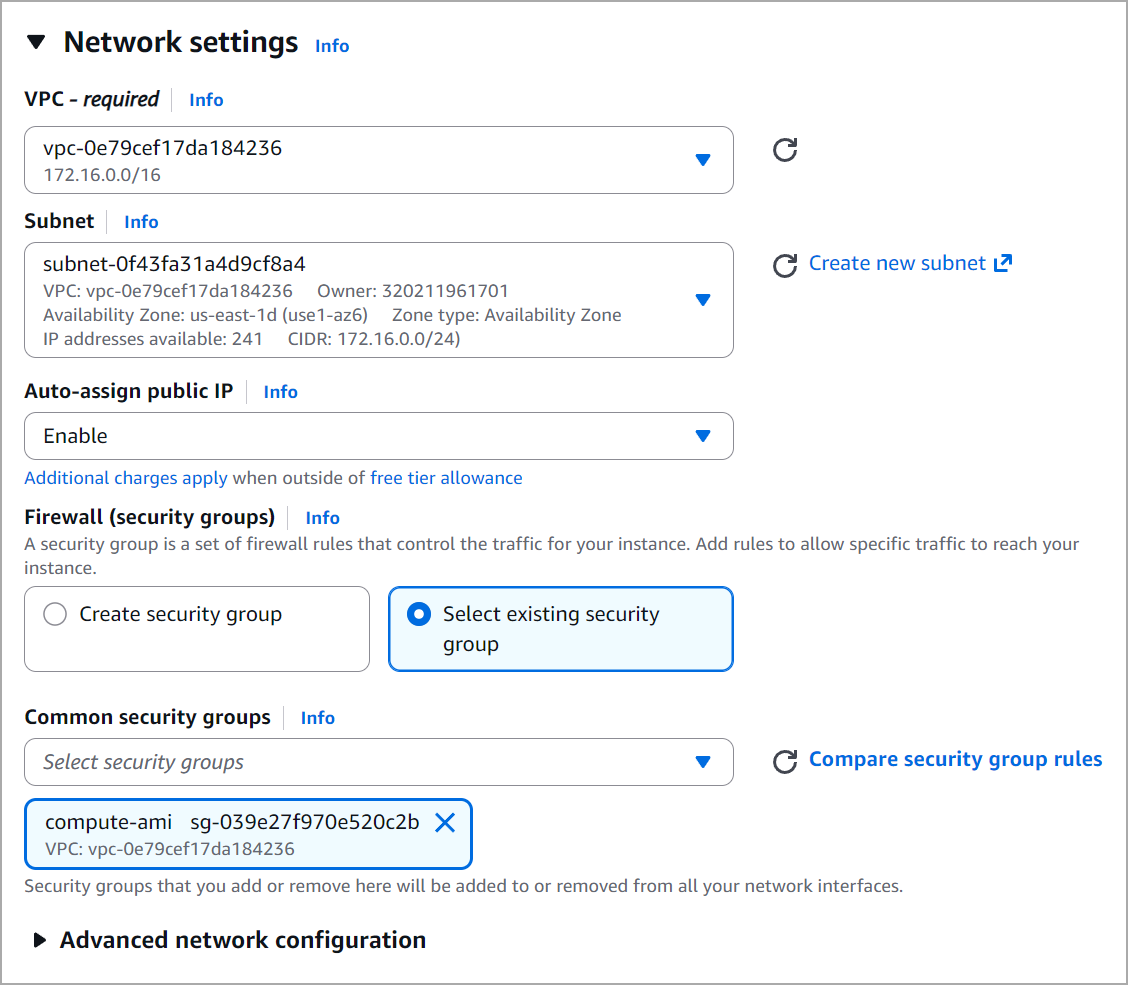
-
In the Configure storage section, select the default amount of storage for this instance.
-
Now, on the far right select the Launch Instance.
-
A confirmation page lets you know that your instance has successfully launched. In the top-most menu which reads EC2 > Instances > Launch an instance, select the Instances menu item to view the instances console window.

-
On the Instances screen, you can view the status of the launched instance. The instance should automatically be running after launch, but if not select the instance row checkbox and then select the Instance State menu item at the top. Select Start Instance to start the virtual machine.
-
With the instance row selected, click the Connect button in the top menu.
-
On the Connect to instance page, select the RDP client tab.
-
Next, select the Get password button.
-
Choose Upload private key file and navigate to the private key (.pem) file that you created when you launched the instance.
-
Choose Decrypt Password. The console displays the default administrator password for the instance under Password, replacing the Get password link shown previously. Save this password in a safe place. This passord is required to connect to the instance.
-
Select Download remote desktop file to save the .rdp file to your local computer. You will need this file when you connect to your instance using the Remote Desktop Connect app.
Congratulations! In this tutorial, you successfully launched a virtual machine on AWS and downloaded the RDP file which can be used to connect to that instance.
