
Creating the Virtual Machine
In this guide, we will walk through the process of setting up a virtual machine using Azure services.
To start, please confirm that you have a valid Azure subscription and that you have already setup a resource group to hold the various resources for this instance. To learn more about setting up a resource group on Azure, visit this page.
-
Sign in to the Azure portal.
-
Type virutal machines in the search bar.
-
Under Services, select Virtual machines.
-
In the Virtual machines page, select Create then Virtual Machine
-
In the Basics tab, under Project details, make sure the correct Subscription and Resource group are selected.
-
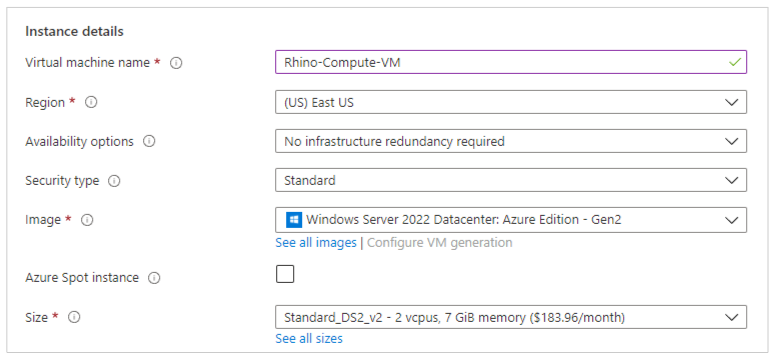
Under Instance details, create a unique name for the virutal machine. We’ll use Rhino-Compute-VM for our VM name. Select a region close to you, and then select Windows Server 2022 Datacenter - Azure Edition Gen2 for the Image. Feel free to select any Size VM that fits your needs. We’ll use Standard DS2_v2 for this example. Leave the other defaults.
-
Under Administrator account, provide a username and a password. Take note of these credentials as we will use these when we log into the remote machine.
-
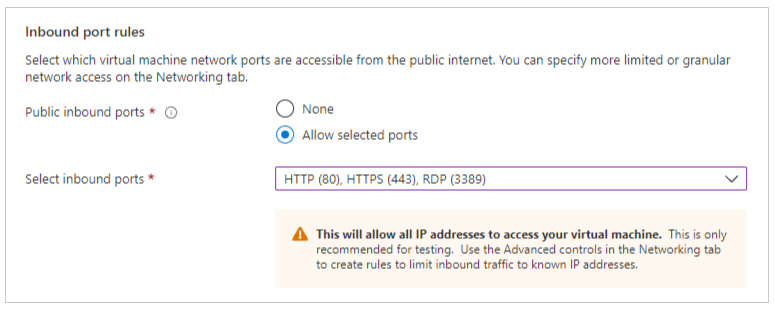
Under Inbound port rules, choose Allow selected ports then select RDP (3389), HTTPS (443), and HTTP (80).
-
Select Next : Disk >.
-
Select Next : Networking >.
-
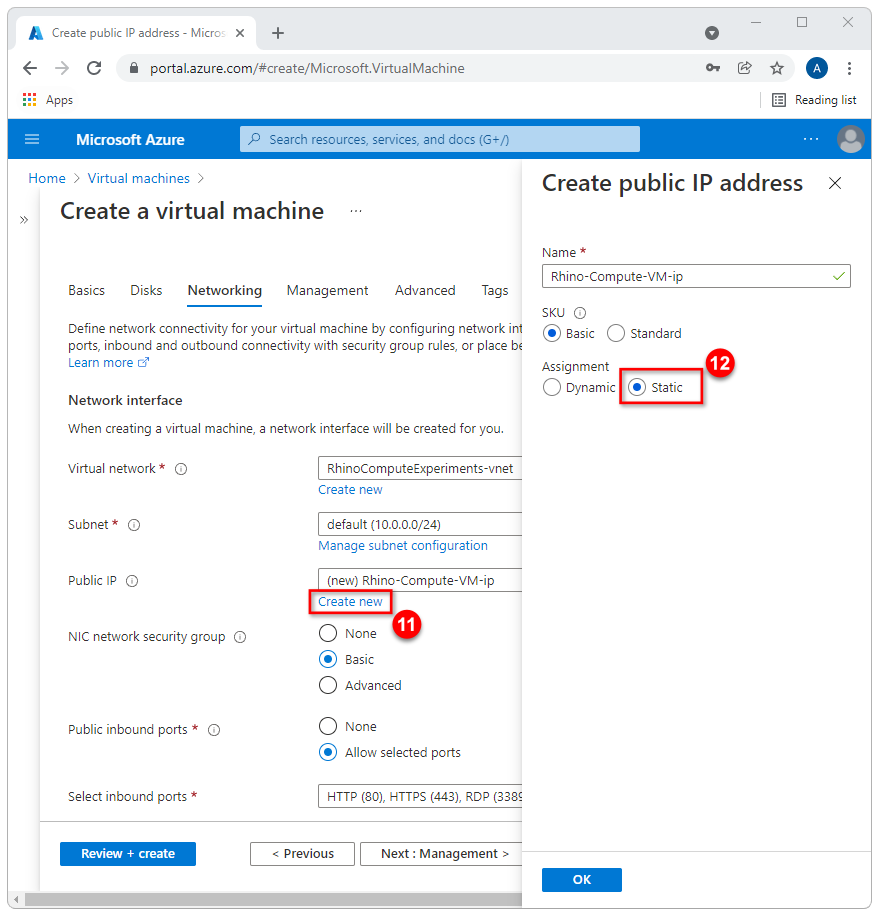
Under the Network interface section, click on the Create new button under the Public IP subsection.
-
When the pop-out blade opens up, select Static under the Assignment tab. Click OK to save this setting.
-
Leave all other defaults. Select Review + create.
-
Once your configuration passes the validation check, select Create to deploy your virtual machine.
-
After deployment is complete, select Go to resource.
Add an inbound port rule
Once your virtual machine has been deployed you should be able to go to the resource home page. Here, you can change various settings and configurations. We are going to add an inbound port rule so that we can send API requests on a dedicated port.
By default, Azure denies and blocks all public inbound traffic - which also includes ICMP traffic. This is a good thing since it improves security by reducing the attack surface. The Internet Control Message Protocol (ICMP) is typically used for diagnostics and to troubleshoot networking issues.
We’ll want to turn ICMP traffic on for our VM so that we can try to ping the IP address and make sure we get a response. The first thing we need to do is add an inbound port rule for ICMP traffic.
-
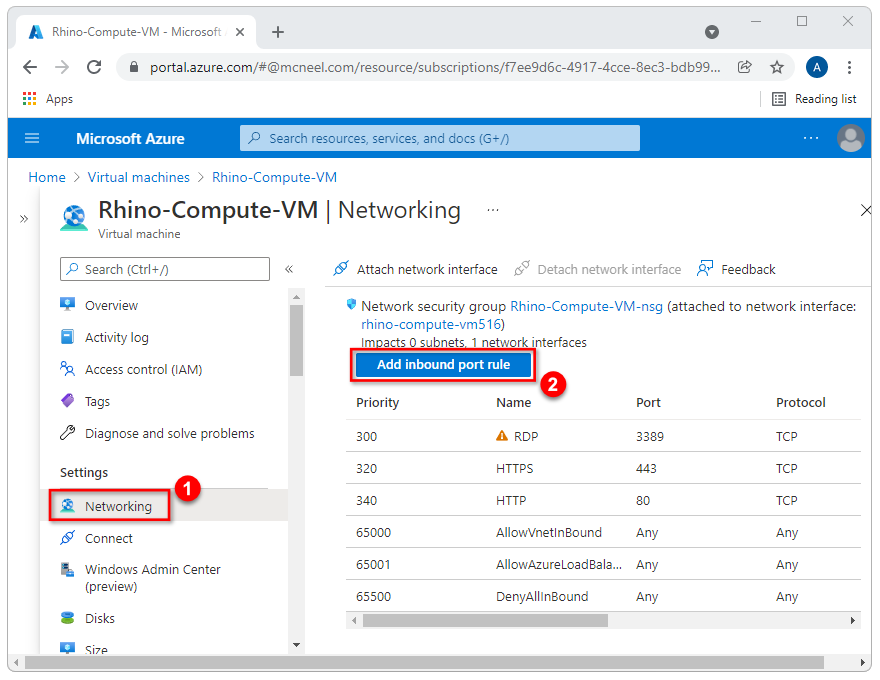
On the left-hand side menu, select the Networking menu item. This will open the Networking blade.
-
Click on the Add inbound port rule button
-
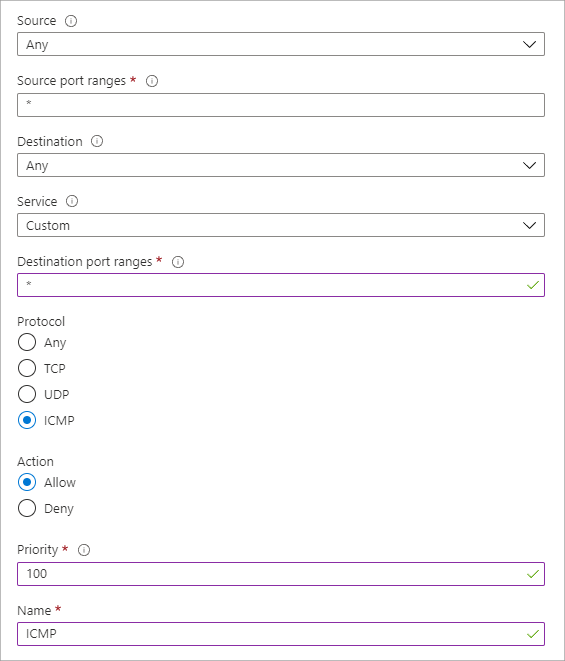
In the Add inbound security rule pane, set the Destination port ranges to *, change the Protocol to ICMP, set the Priority to 100, and type ICMP in the Name input.
-
Click Add to create the new inbound port rule.
Congratulations! In this guide, you deployed a simple virtual machine on Azure.
