
By the end of this guide, you should have all the tools installed necessary for authoring, building, and debugging custom Grasshopper components in Rhino for Windows.
Prerequisites
This guide presumes you have an:
- A PC running Microsoft Windows 10 or later.
- Rhino 7 for Windows
Install Visual Studio
Visual Studio is Microsoft’s flagship development platform and Integrated Development Environment (IDE). Visual Studio now comes in three major “streams”: Visual Studio Code1, Visual Studio Online2, and Visual Studio “proper”3. In order to author custom Grasshopper components, you will need Visual Studio “proper” (Visual Studio Code and Visual Studio Online are not supported).
Step-by-Step
- Visual Studio Community Edition is free from Microsoft for students, open-source contributors, and small teams. Details here. Click the Community button to download the installer.
- Run the Visual Studio installer you downloaded from Microsoft, in this case VisualStudioSetup.exe.
- Follow the onscreen prompts to install Visual Studio. You will need the “.NET desktop development” workload for RhinoCommon based plug-in development. When successfully installed, click the Launch button.
Grasshopper Templates
The RhinoCommon and Grasshopper templates for Rhino 7 contains wizards to get you started creating components quickly.
Step-by-Step
- Launch Visual Studio.
- Navigate to Extensions > Manage Extensions
- In the left-hand sidebar, expand the Online section, then select the Visual Studio Marketplace entry…
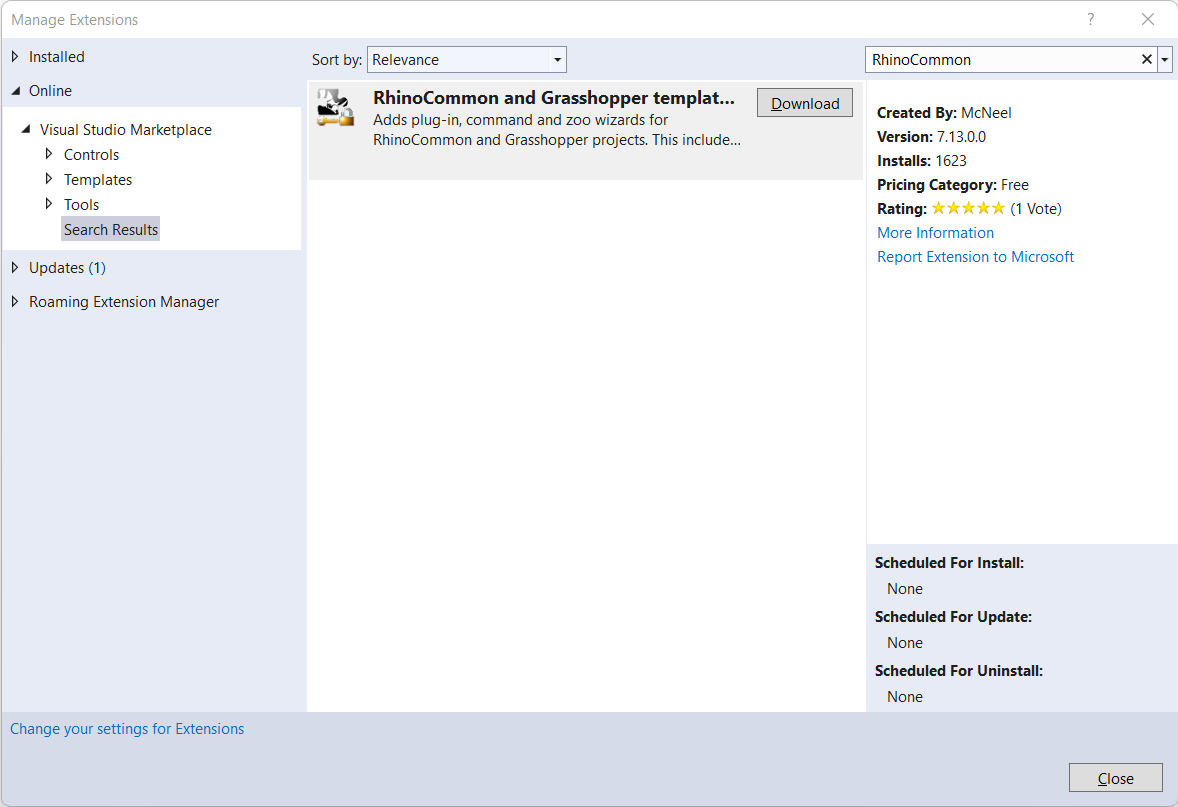
- In the Search field, search for RhinoCommon. This filters the gallery list below.
- Find RhinoCommon and Grasshopper templates for Rhino 7 and select it.
- Click the Download button. The extension installation should begin.
- You must Accept the license agreement by clicking on the Install button.
- Press the Close button and Quit Visual Studio.
- The extension installer should start once you quit. Click the Modify button to install the extension.
- Once this is done, the extension should appear in your list of Installed extensions in Extensions > Manage Extensions.
Next Steps
Congratulations! You have the tools to build custom Grasshopper components for Grasshopper for Windows. Now what?
Check out the Your First Component (Windows) guide for instructions building - your guessed it - your first component.
Footnotes
-
Visual Studio Code is Microsoft’s cross-platform source code editor for Windows, Linux, and macOS. At the time of this writing, Visual Studio code does not yet support the features required to author Grasshopper components ↩︎
-
Visual Studio Online is Microsoft’s online counterpart to the desktop edition of Visual Studio (referred to as Visual Studio “proper” above). We have not tested using Visual Studio Online to debug Grasshopper components as having a copy of Rhino and Grasshopper running would prove logistically difficult. ↩︎
-
Visual Studio “proper” is the desktop version of Visual Studio…we are only attaching the “proper” epithet to distinguish it from the Visual Studio Code and Visual Studio Online. In subsequent guides this will be referred to as simply “Visual Studio.” ↩︎
