
It is presumed you already have the necessary tools installed and are ready to go. If you are not there yet, see Installing Tools (Windows).
HelloGrasshopper 2
We will use the Grasshopper 2 Assembly templates to create a new, basic, component library called HelloGrasshopper2.
If you are familiar with Visual Studio, these step-by-step instructions may be overly detailed for you. The executive summary: create a new project using the Grasshopper 2 Assembly template, build and run, and then make a change.
We are presuming you have never used Visual Studio before, so we’ll go through this one step at a time.
File New
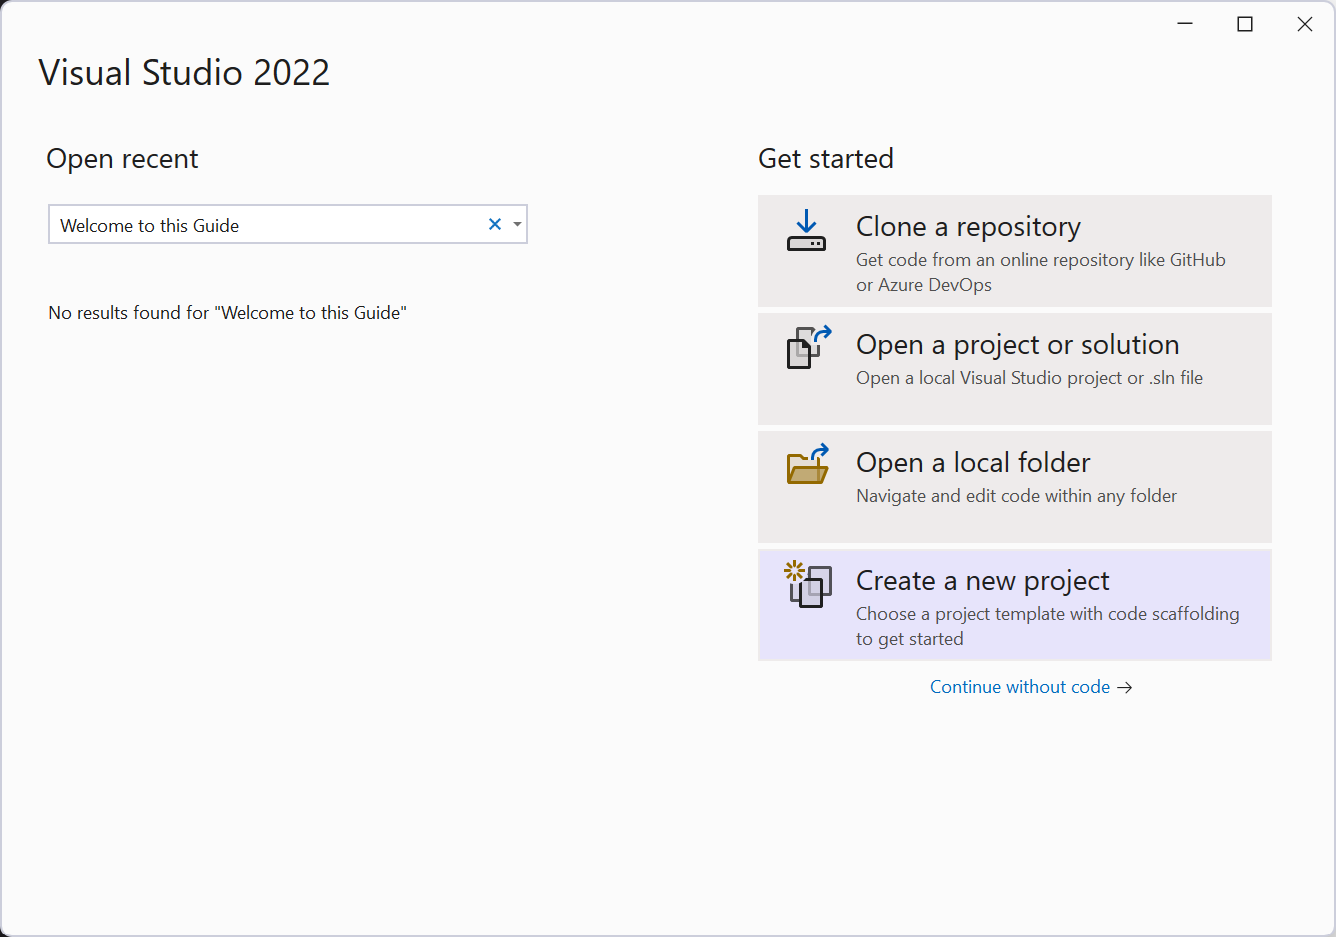
- If you have not done so already, launch Visual Studio (for the purposes of this guide, we are using Visual Studio Community Edition and C#). Click Create New Project.
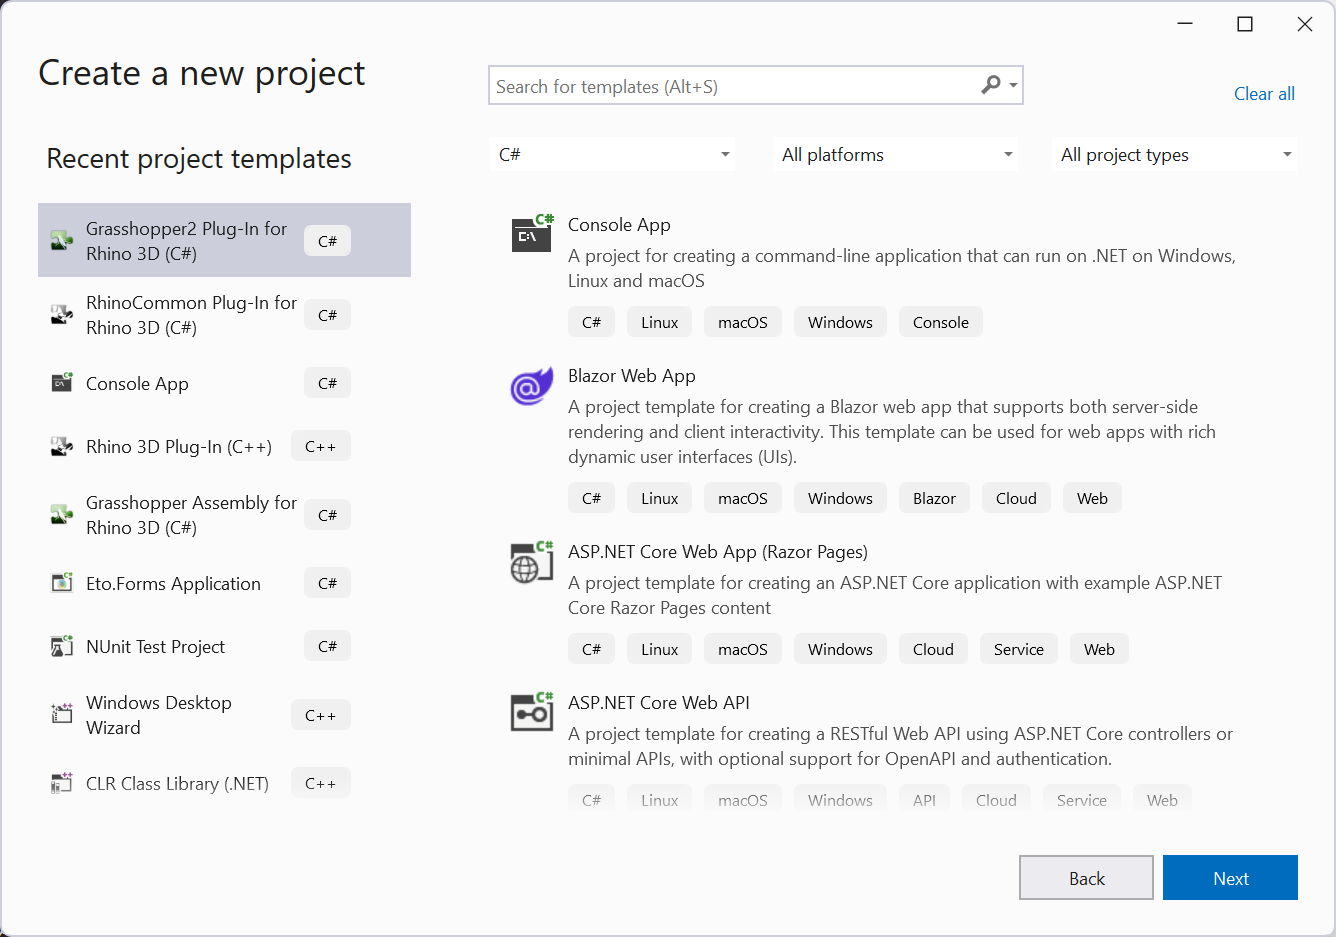
- A Create a new project wizard should appear. In the Search for templates area, search for
Grasshopper2to filter the results. Find and select the Grasshopper 2 Plug-In for Rhino (C#) entry and click Next.
- For the purposes of this Guide, we will name our demo plugin HelloGrasshopper 2. In the Configure your new project dialog, fill in the Project name field. Browse and select a location for this project on your disk, then click Create
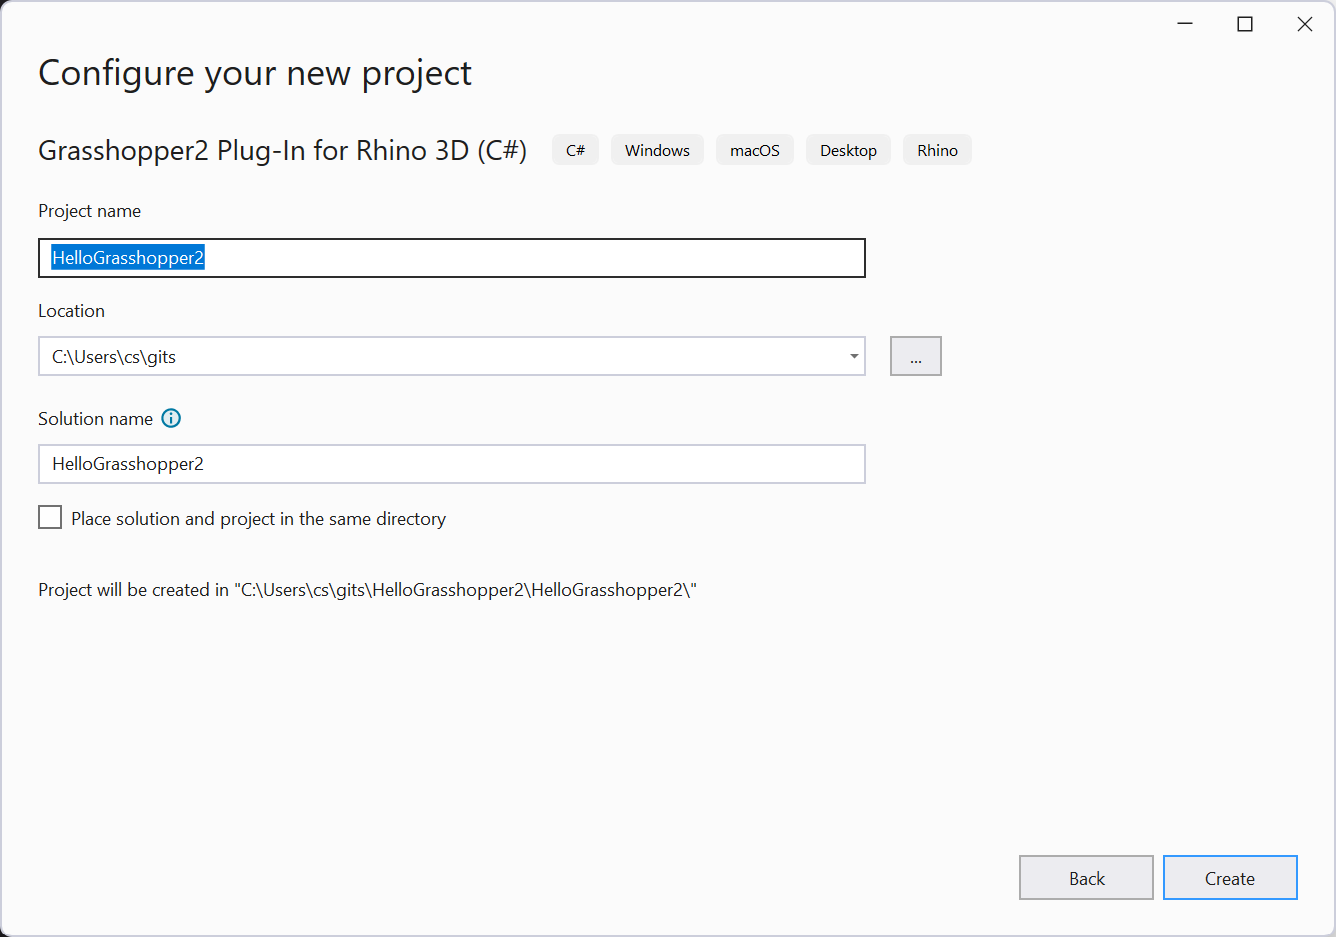
- For the purposes of this guide, let’s check the Provide Sample Code
-
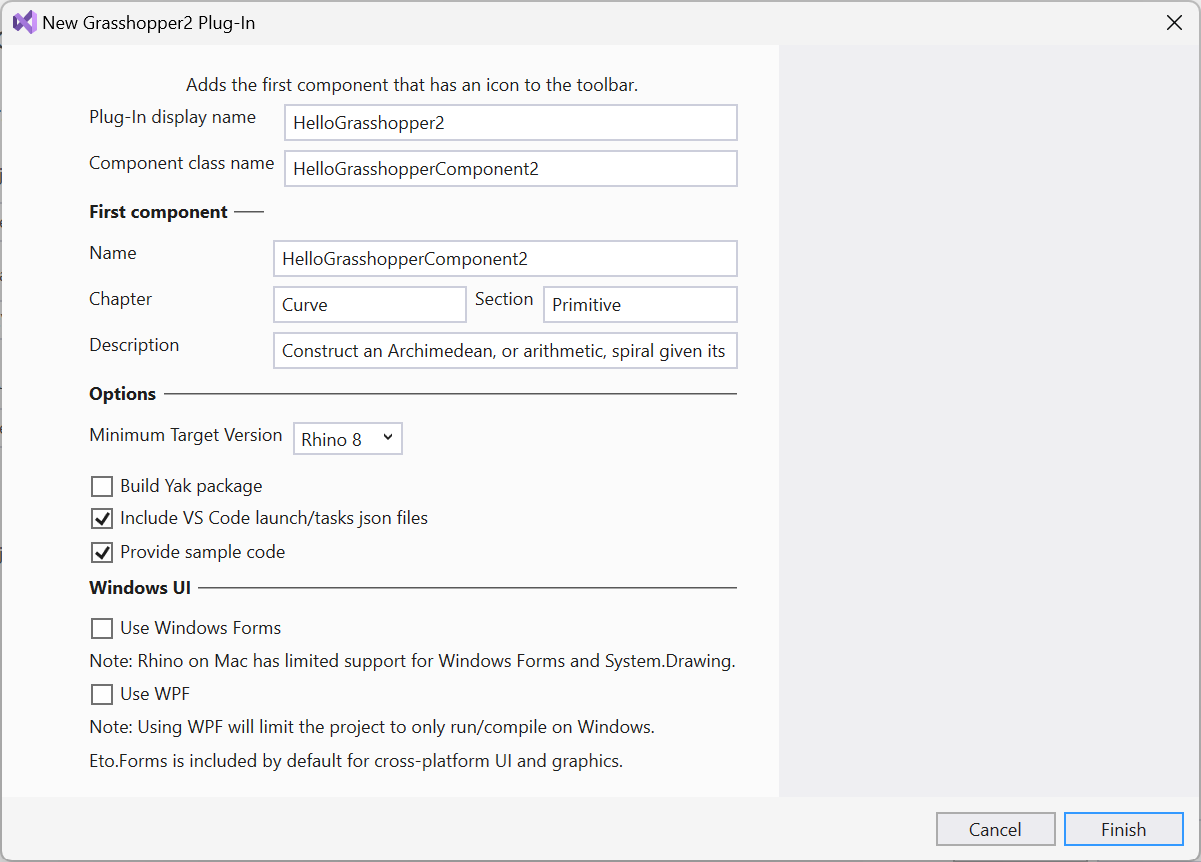
This is where you fill out information about your first component:
- Plug-In display name: the name of the plugin itself.
- Component class name: the name of the component class.
- Name: the name of the component as displayed in the ribbon bar and search menus.
- Chapter: name of tab where component icon will be shown.
- Section: name of group inside tab where icon will be shown.
- Description: description shown in tooltip when mouse is over the component icon in the menu.
-
Click Finish
-
A new solution called HelloGrasshopper 2 should open…

Boilerplate Build
- Before we do anything, let’s build and run HelloGrasshopper 2 to make sure everything is working as expected. We’ll just build the boilerplate Plugin template. Click Start (play) button in toolbar corner of Visual Studio (or press F5) to Start Debugging…
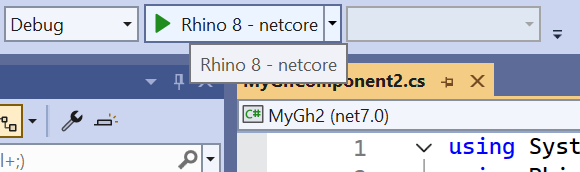
- Rhinoceros launches and a moment later, so will Grasshopper 2.
- Navigate to Curve > Primitive in the components menus. You should see HelloGrasshopper 2 in the list with a blank icon. Drag this onto the canvas. The component will run and some interesting Geometry will appear in the Rhino Viewport.
- Exit Rhinoceros. This stops the session. Go back to Visual Studio. Let’s take a look at the…
Component Anatomy
- Use the Solution Explorer to expand the Solution (.sln) so that it looks like this…
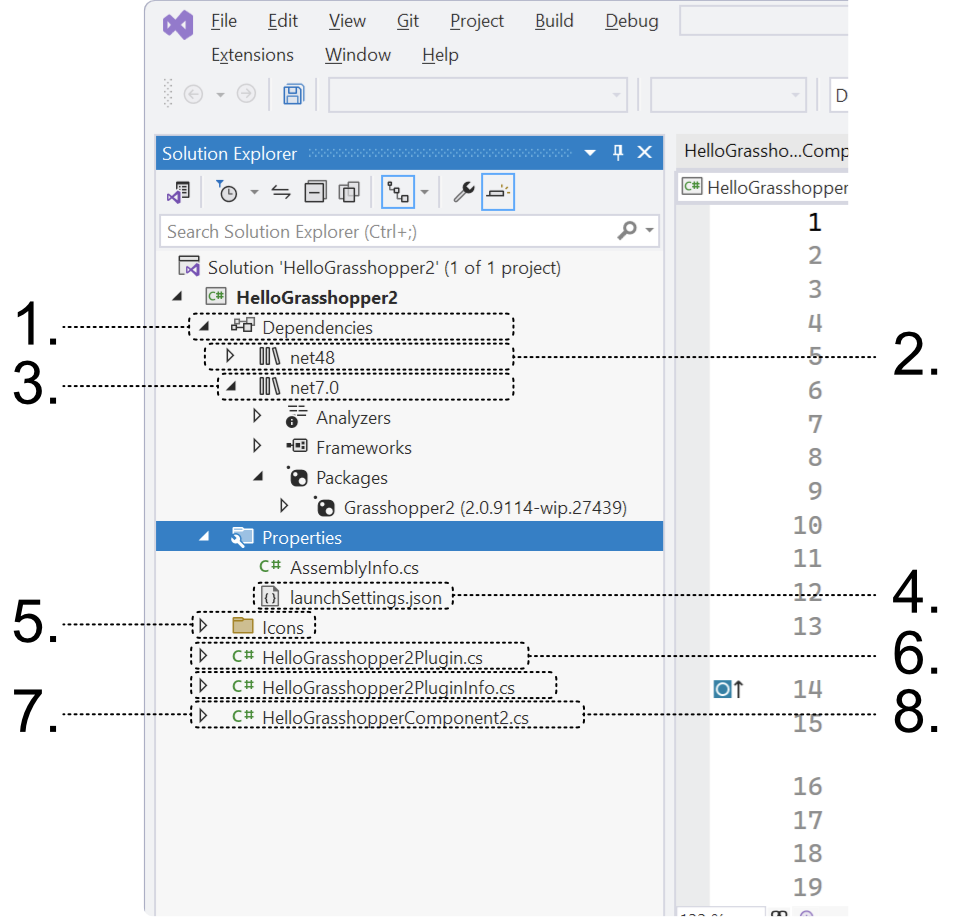
- The HelloGrasshopper 2 project (.csproj) has the same name as its parent solution…this is the project that was created for us by the Grasshopper 2 Assembly template wizard earlier.
- Dependencies: Just as with most projects, you will be referencing other libraries. The Grasshopper 2 Assembly template added the necessary dependencies to create a custom Grasshopper 2 component.
- Framework Targets - The Grasshopper 2 Assembly template is multi-targeted so that the correct assemblies are loaded for the correct platforms.
- Grasshopper2 - The referenced Grasshopper 2 Nuget.
- Properties contains the launchSettings.json file. This file contains all of the debug.
- HelloGrasshopper2Plugin.cs the Rhino Plugin required for Grasshopper 2.
- HelloGrasshopper2PlpuginInfo.cs contains the component library information, such as the name, icon, etc.
- HelloGrasshopper2Component.cs is where the action is. Let’s take a look at this file…
Make Changes
-
Open HelloGrasshopper 2Component.cs in Visual Studio’s Source Editor (if it isn’t already).
-
Notice that
HelloGrasshopper 2Componentinherits fromComponent…public class HelloGrasshopper2Component : Component -
If you hover over
Componentyou will notice this is actuallyGrasshopper.Components.Component. -
HelloGrasshopper2Componentalso overrides two methods for determining the input and output parameters …
protected override void AddInputs(InputAdder inputs)
...
protected override void AddOutputs(OutputAdder outputs)
- The actual work done by the component is to be found in the
Processmethod…
protected override void Process(IDataAccess access)
- As you can see, this is where the action happens. This boilerplate component creates a spiral on a plane. Just to make sure everything is working, let’s change the default plane on which the spiral is constructed. On line1 51, in
protected override void Process(IDataAccess access), notice that an XY plane is retrieved from the inputs…
access.GetItem(0, out Plane plane);
- Go back to the
AddInputs, and find the line where the Plane input is registered. The chained method sets the default value of the input…
inputs.AddPlane("Base Plane", "Bp", "Base plane for spiral").Set(Plane.WorldXY);
- Change the default value of the Plane input to be
Plane.WorldYZ…
inputs.AddPlane("Base Plane", "Bp", "Base plane for spiral").Set(Plane.WorldYZ);
- Now let’s examine what happens when inputs are given to this component…
Debugging
- Set a breakpoint on line1 69 of HelloGrasshopper 2Component.cs. You set breakpoints in Visual Studio by clicking in the gutter…

- Build and Run.
- Note that at first the breakpoint is not loaded, and won’t be until Grasshopper 2 loads.

- In Grasshopper 2, place a HelloGrasshopper2 component on the canvas…as soon as you do, you should hit your breakpoint and pause…

- The reason you hit the breakpoint is because the
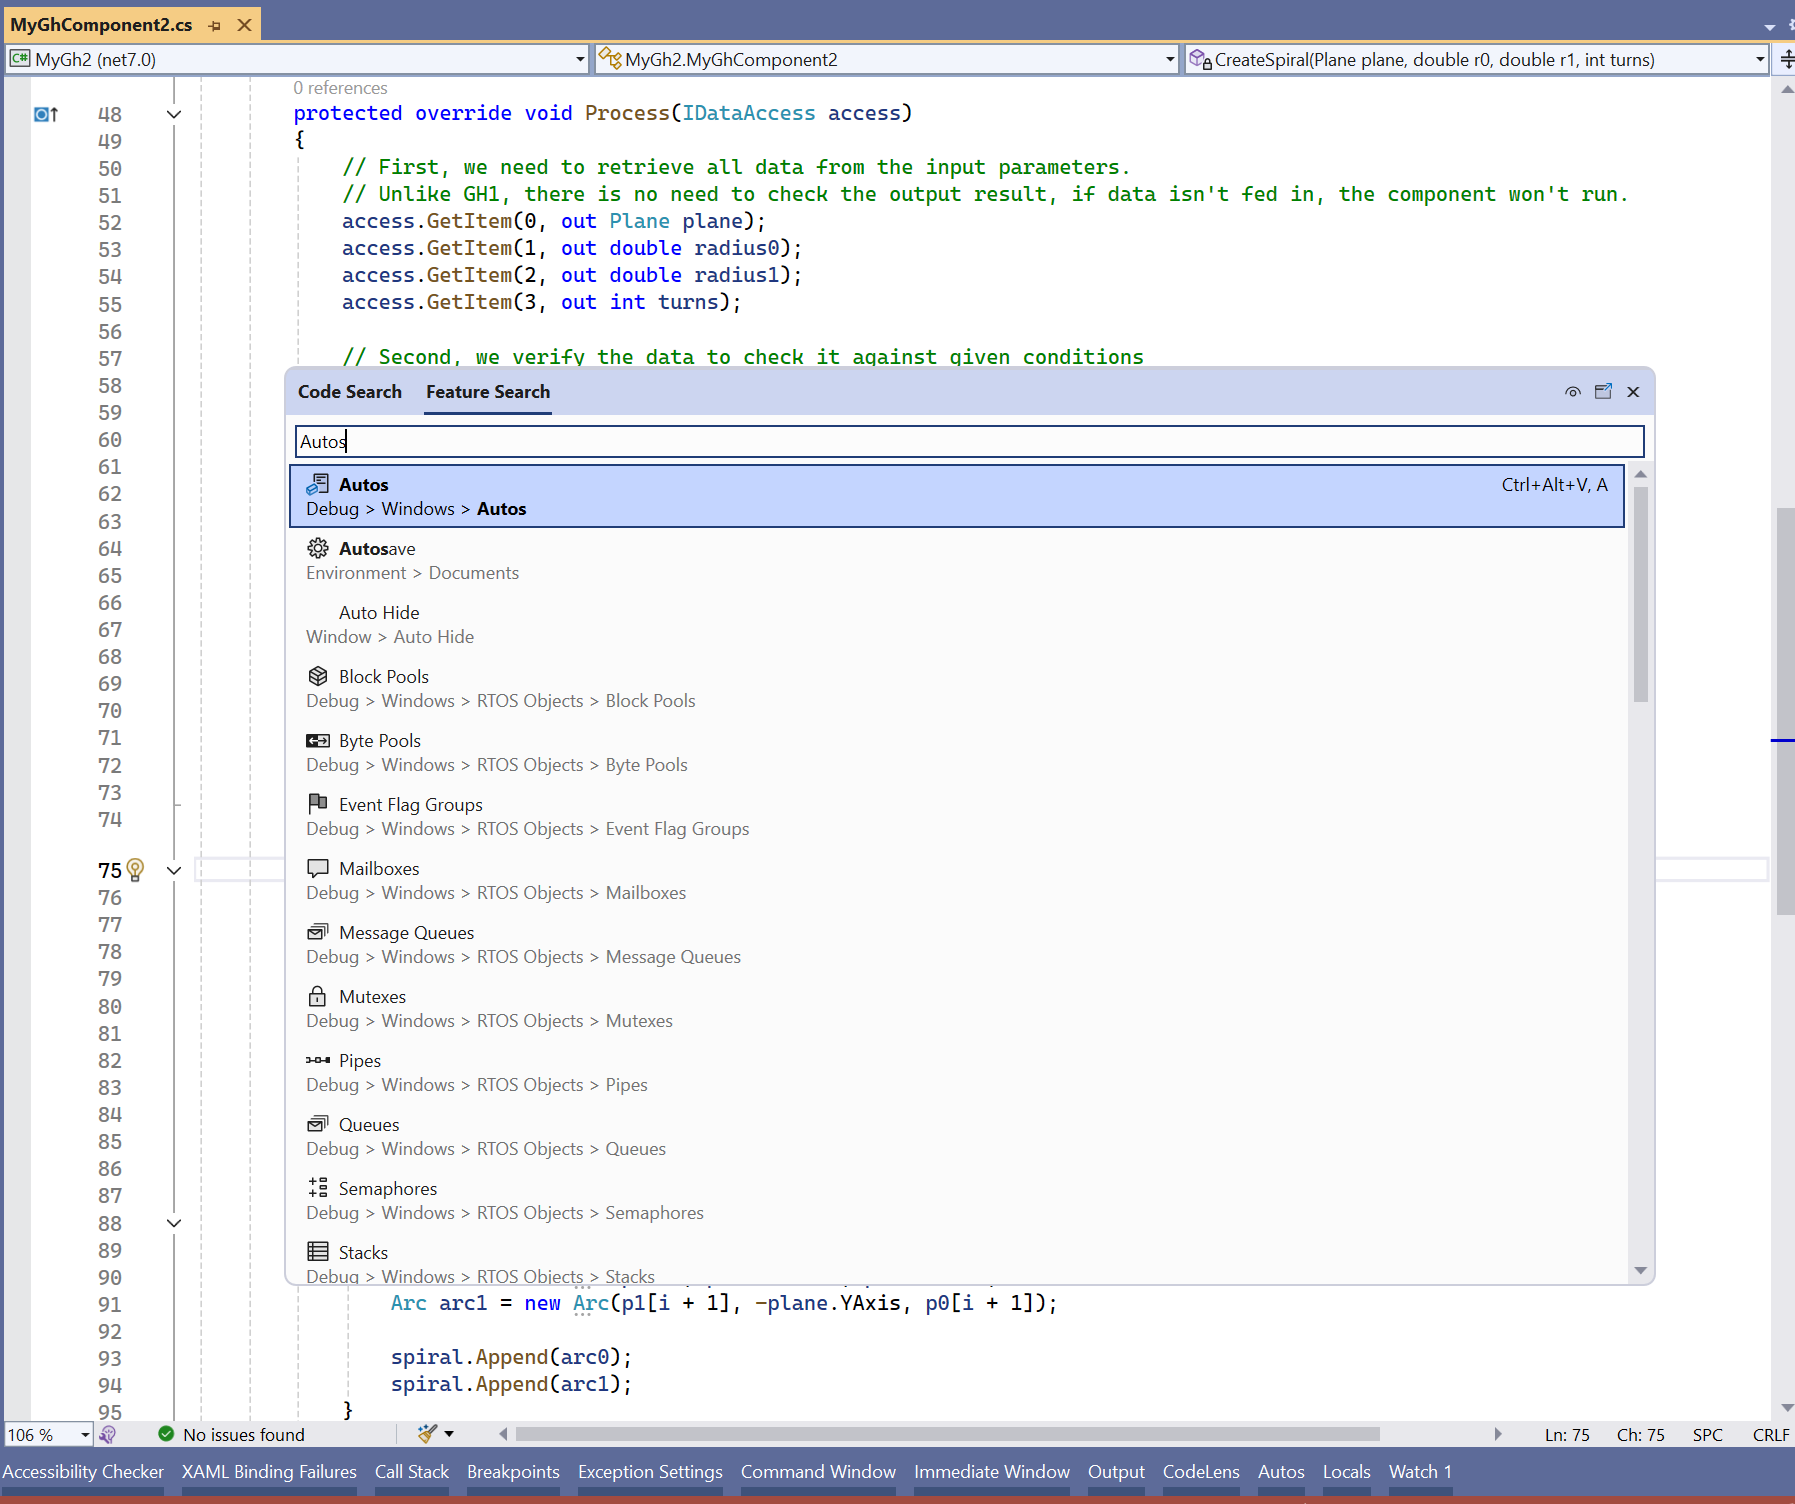
Processmethod was called when the component was placed on the canvas. With Rhino and Grasshopper 2 paused. - In Visual Studio let’s open the autos panel, use Ctrl + Q and search Autos, double click the first result, make sure to pin the panel on the right hand side or else it may auto close. (You may need to be in Debug to see this Window)
- In the list, find the
planeobject. Ourplaneis aRhino.Geometry.Planewith a value of{Origin=0,0,0 XAxis=0,1,0, YAxis=0,0,1, ZAxis=1,0,0}…an YZ plane, the default, as expected.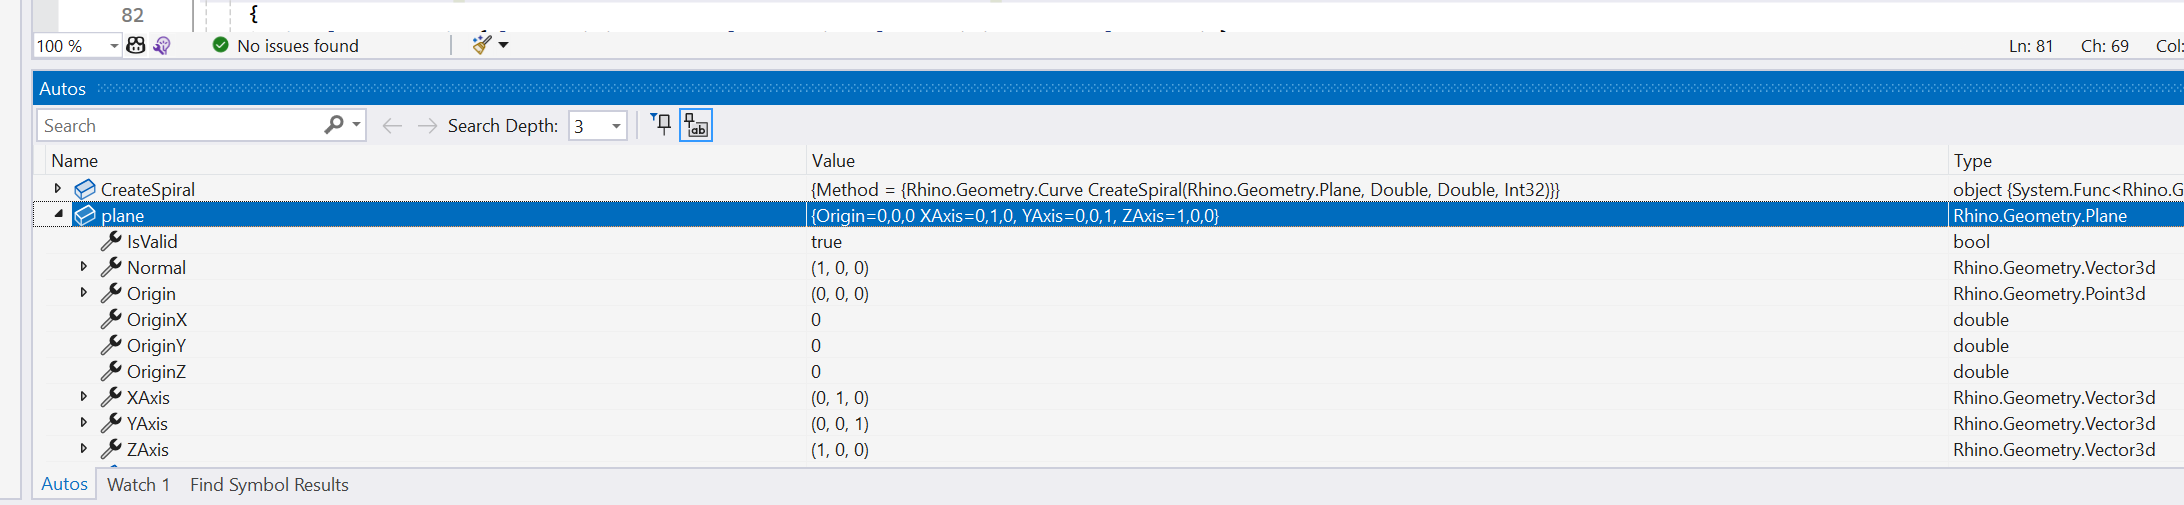
- Continue in Grasshopper 2 by pressing the Continue button in the upper menu of Visual Studio (or press F5)…
- Control is passed back to Grasshopper 2 and the spiral draws in the Rhino viewport. Now, place a World XY component on the canvas and feed it as an input into HelloGrasshopper 2’s Plane input. Notice you hit your breakpoint again, because the
SolveInstanceis being called now that the input values have changed. - Exit Grasshopper 2 and Rhino or Stop the debugging session.
- Remove the breakpoint you created above by clicking on it in the gutter.
Congratulations! You have just built your first Grasshopper 2 component for Rhino for Windows.
