

Introduction
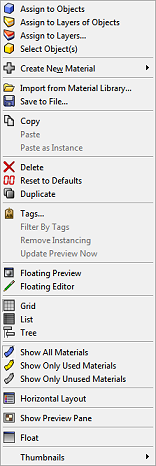 An RDK task encapsulates the functionality of any operation the user can perform by clicking a menu item or pressing a key in a Render Content Editor. For example, when the user right-clicks in the preview area of such an editor, a context menu is displayed with commands such as ‘Assign to Objects’ and ‘Delete’. All of these menu items are implemented by tasks, derived from CRhRdkTask. To make it easy for plug-in developers to add their own tasks to these menus, the RDK provides the class CRhRdkCustomTask. The developer only has to implement a subclass of this and then register the subclass with the RDK. An example of how to do this is shown below. Tasks use an interface called IRhRdkTaskOrigin which represents the place in the UI where the user clicked to invoke the menu. Among other things, this interface allows the task to get the contents that are currently selected in the UI. These are the contents that the user wants to perform an operation on.
Registering custom tasks
To register a custom task, you first need to derive a class from CRhRdkCustomTask. You provide a menu string that is displayed to the user, a menu order which tells the RDK where on the menu to put the item, and one (or optionally two) icons. You also implement an Update() method and an Execute() method.
class CExampleCustomTask : public CRhRdkCustomTask
{
public:
	virtual UUID Id(void) const override { static const UUID uuid = your_uuid_here; return uuid; }
	virtual UUID PlugInId(void) const final override { return your_plug_in_uuid_here; }
	virtual bool IsEnabled(const IRhRdkTaskOrigin& origin) const override { return true; }
	virtual const wchar_t* MenuString(const IRhRdkTaskOrigin&, CRhRdkContent::Kinds)
	                                 const override { return L"Example Custom Task"; }
	virtual bool IconOut(CRhRdkContent::Kinds kind, int w, int h, OUT CRhinoDib& dib)
	                     const override { return false; }
	virtual bool IconIn(CRhRdkContent::Kinds kind, int w, int h, OUT CRhinoDib& dib) const override;
	virtual void Update(IRhRdkTaskUpdate& tu) const override;
	virtual Result Execute(const IRhRdkTaskOrigin&) const override;
	virtual int MenuOrder(const IRhRdkTaskOrigin& origin) const override;
};

int  CExampleCustomTask::MenuOrder(const IRhRdkTaskOrigin& origin) const
{
	// This value should be below 100 to make your task appear
	// before all the RDK's tasks, and above 10,000 to make it
	// appear below all the RDK's tasks. After that, simply use
	// numbers in the order you want the tasks to appear.
	return 10;
}

bool CExampleCustomTask::IconIn(CRhRdkContent::Kinds kind, int width, int height, OUT CRhinoDib& dib) const
{
	// Depending on the 'kind' you might want to use different icons.
	// Use the supplied 'width' and 'height' to load an icon by
	// whatever means your platform allows, and set the icon into
	// the supplied 'dib'. The following just uses a simple check mark.
	return ::RhRdkGetMenuIcon(RhRdkMenuIcons::Check, ON_2iSize(width, height), dib);
}

void CExampleCustomTask::Update(IRhRdkTaskUpdate& tu) const override
{
	// This is called when the user opens the menu. Here you can set if the
	// item is enabled or disabled, and if the item is checked or checked
	// like a radio button. Note that there is also an IsEnabled() method
	// on the task. Update() is only called if IsEnabled() returns true.
	// Generally it is best to have IsEnabled() return true and implement
	// Update() for finer control.
	tu.SetIsChecked(...);
	// or
	tu.SetRadio(...);

	tu.SetIsEnabled(...);
}

CRhRdkTask::Result CExampleCustomTask::Execute(const IRhRdkTaskOrigin& origin) const
{
	// This is called when the user chooses the menu item associated with this task.
	CRhRdkContentArray aContent;
	origin.GetSelection(aContent);
	for (int i = 0; i < aContent.Count(); i++)
	{
		const auto sName = aContent[i]->InstanceName();
		RhinoApp().Print(L"Selected: %s\n", static_cast<const wchar_t*>(sName));
	}

	return Result::Success;
}
Finally, in your override of CRhRdkPlugIn::RegisterExtensions(), you need to register your custom task as an RDK extension:
void CMyRdkPlugIn::RegisterExtensions(void) const
{
	...
	AddExtension(new CExampleCustomTask);
	...
