Simple Component (C#) |
- Introduction
- Grasshopper.Kernel.GH_Component
- The Component Constructor
- Component GUIDs
- Parameter Registration
- The Solver Routine
This article contains an exhaustive, step by step explanation of how to build your first component in C#. It will skip over any complicated issues (such as mathematics, geometry and data handling) in order to reduce the totality of new concepts. You will however need to have a good understanding of basic OOP concepts such as classes, types and inheritance. If you do not understand these DotNET essentials, we recommend you start with some other reading material first.
All you need to do in order to define a new component is to inherit from the GH_Component base class in Grasshopper. Assuming you've set up your project correctly, create a new, blank class in your project:
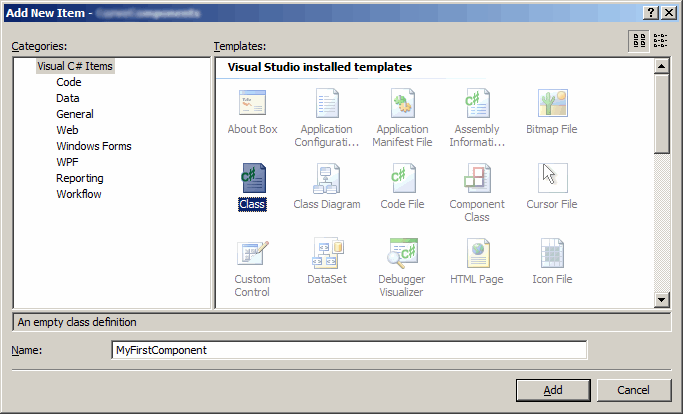
At this point a new file should be created (MyFirstComponent.cs) with the following content:
using System;
using System.Collections.Generic;
using System.Text;

namespace MyFirstProject
{
  public class MyFirstComponent
  {
  }
}
using System;
using Grasshopper.Kernel;

namespace MyFirstProject
{
  public class MyFirstComponent
  {
  }
}
using System;
using Grasshopper.Kernel;

namespace MyFirstProject
{
  // If a class is not public, it won't be visible
  // from where Grasshopper is sitting.
  public class MyFirstComponent
  {
  }
}
using System;
using Grasshopper.Kernel;

namespace MyFirstProject
{
  public class MyFirstComponent : GH_Component
  {
  }
}
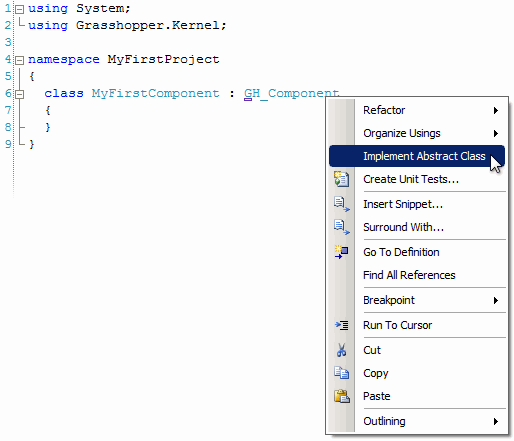
At this point you should see the following:
using System;
using Grasshopper.Kernel;

namespace MyFirstProject
{
  public class MyFirstComponent : GH_Component
  {
    protected override void RegisterInputParams(GH_Component.GH_InputParamManager pManager)
    {
      throw new NotImplementedException();
    }

    protected override void RegisterOutputParams(GH_Component.GH_OutputParamManager pManager)
    {
      throw new NotImplementedException();
    }

    protected override void SolveInstance(IGH_DataAccess DA)
    {
      throw new NotImplementedException();
    }

    public override Guid ComponentGuid
    {
      get { throw new NotImplementedException(); }
    }
  }
}
As we've seen in the previous section, Visual Studio will populate the MyFirstComponent class with a collection of properties and methods that we need to implement. There is however another method that requires our attention that is missing. This is the constructor. The constructor is a special method inside each class which gets called when the class is instantiated (or "constructed"). This can happen only once (we feeble humans can only be born once as well after all) and it necessarily happens before anything else is allowed to happen. The GH_Component base class has a constructor which is not empty, so we have to call that constructor from within our constructor and supply it with all the information it needs. Add the following code near the top of the MyFirstComponent class:
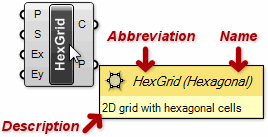
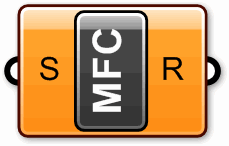
using System;
using Grasshopper.Kernel;

namespace MyFirstProject
{
  public class MyFirstComponent : GH_Component
  {
    public MyFirstComponent() : base("MyFirst", "MFC", "My first component", "Extra", "Simple")
    {
    }
  ...
| Parameter | Purpose |
|---|---|
| name | The name of our component. The name is what appears on tooltips and panel dropdowns. |
| abbreviation | The abbreviation of our component. The abbreviation is what is written on the component once it appears on the canvas. |
| description | A description of our component. The description is used on tooltips to provide users with a more detailed idea about what this component is for. |
| category | The tab category for the component. The category equals the name of the tab onto which the component will appear. If a non-existing category is supplied, a new Tab will be added to the Grasshopper GUI. |
| subCategory | The panel category for the component. The sub-category equals the name of the panel onto which the component will appear. If a non-existing sub-category is supplied, a new Panel will be added to the Category Tab. |
Every type of object inside a Grasshopper document must have a ComponentGuid associated with it. When a Grasshopper file (*.gh or *.ghx) is written these Guids are used as markers, so it becomes clear what portions of the file belong to which object. When the file is read back in, that marker is compared against the list of all cached components and if a match is found the appropriate component is asked to deserialize itself from the appropriate file portion. When no matching component can be found it is assumed that whoever wrote the file had access to certain components that are not available locally, and that portion of the file is dutifully skipped.
So, long story short, we need to invent a Guid (Globally Unique IDentifier) that will positively and unerringly indicate this component. You can generate new Guids using an Online Guid Generator or Microsofts popular guidgen.exe. Never re-use a Guid and never edit one by hand. Always generate a proper one using an official tool.
Once you have a new Guid standing by, modify the ComponentGuid property to return it:
...
public override Guid ComponentGuid
{
  get { return new Guid("419c3a3a-cc48-4717-8cef-5f5647a5ecfc"); }
}
...
Components have unique input and output parameters which are most often fixed. We are ignoring those rare cases where a component either has no inputs or no outputs, or where there is a variable number of parameters. There are two methods that allow you to define (or "register") these parameters. These routines are called from within the base class constructor and they are only called once. Let's have a look at the default implementation that Visual Studio generated again:
...
protected override void RegisterInputParams(GH_Component.GH_InputParamManager pManager)
{
  throw new NotImplementedException();
}

protected override void RegisterOutputParams(GH_Component.GH_OutputParamManager pManager)
{
  throw new NotImplementedException();
}
...
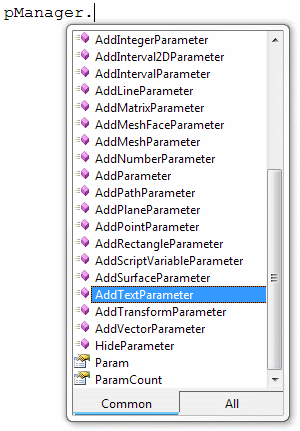
In this example we'll only create two parameters (one input, one output) and they will both be of type String.
...
protected override void RegisterInputParams(GH_Component.GH_InputParamManager pManager)
{
  pManager.AddTextParameter("String", "S", "String to reverse", GH_ParamAccess.item);
}

protected override void RegisterOutputParams(GH_Component.GH_OutputParamManager pManager)
{
  pManager.AddTextParameter("Reverse", "R", "Reversed string", GH_ParamAccess.item);
}
...
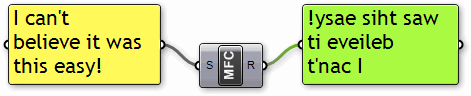
Our new component sure looks perky and expensive, but it doesn't do anything yet. We still need to write the contents of the SolveInstance() subroutine, which is where all the action takes place. The SolveInstance() function is called upon whenever the component needs to handle input data. In this particular example, if we plug a list of twelve strings into the [S] parameter, SolveInstance() will be called twelve times.
As you may already have guessed, the component we're writing will reverse a given textual string from [S] and output the result to [R]. Since we're operating on individual items of data (the default behaviour), all we need to do inside the SolveInstance() function is retrieve the current String from [S], reverse it and assign it to [R]. Now, String reversal is not a function that is directly available in the framework String type, so we need to actually do some thinking:
...
protected override void SolveInstance(IGH_DataAccess DA)
{
  // Declare a variable for the input String
  string data = null;

  // Use the DA object to retrieve the data inside the first input parameter.
  // If the retieval fails (for example if there is no data) we need to abort.
  if (!DA.GetData(0, ref data)) { return; }

  // If the retrieved data is Nothing, we need to abort.
  // We're also going to abort on a zero-length String.
  if (data == null) { return; }
  if (data.Length == 0) { return; }

  // Convert the String to a character array.
  char[] chars = data.ToCharArray();

  // Reverse the array of character.
  System.Array.Reverse(chars);

  // Use the DA object to assign a new String to the first output parameter.
  DA.SetData(0, new string(chars));
}
...