
It is presumed you already have the necessary tools installed and are ready to go. If you are not there yet, see Installing Tools (Windows).
Migrate the project
- Launch Visual Studio 2017 and click File > Open > Project/Solution….
- Navigate to your project’s folder and open either your plugin project (.vcxproj) or solution (.sln)
- When your plugin project opens, navigate to the project’s setting by clicking Project > Properties….
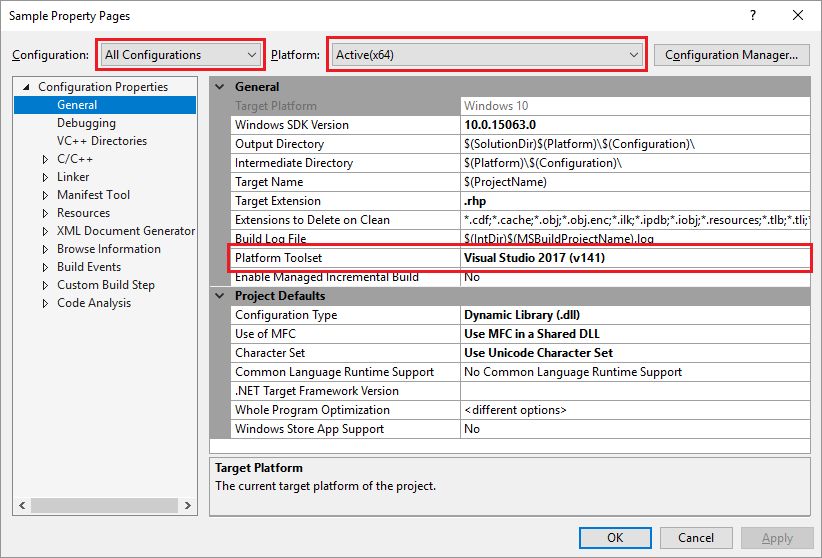
- In the project’s settings, set the Configuration to All Configurations, and set the platform to x64.
- Then, set the Platform Toolset to Visual Studio 2017 (v141) and the click Apply.
Remove 32-bit support
Rhino 6 plugins are 64-bit only. If your plugin project has Win32 platform support, then it is safe to remove it using Visual Studio’s Configuration Manager.
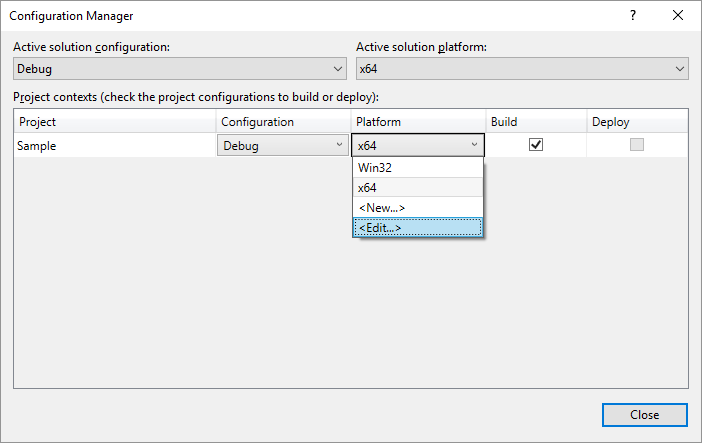
- From Visual Studio 2017, click Build > Configuration Manager….
- In Project Contexts, click Platform > Edit….
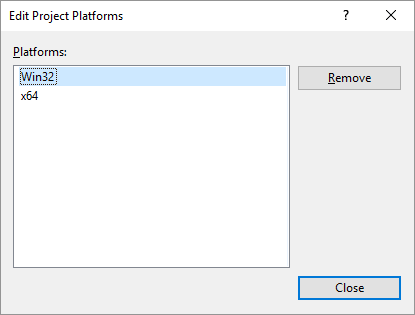
- In Edit Project Platforms, select the Win32 platform, click Remove and then click Close.
- Repeat the above step for the solution by click Active solution platform > Edit….
- In Edit Solution Platforms, select the Win32 platform, click Remove and then click Close.
Rename build configurations
Rhino 6 plugin projects have different project build configuration names. In order to use the new SDK Property Sheets, you will need to rename the plugin project’s build configurations so they match the new build configuration names.
- In Project Contexts, click Configuration > Edit….
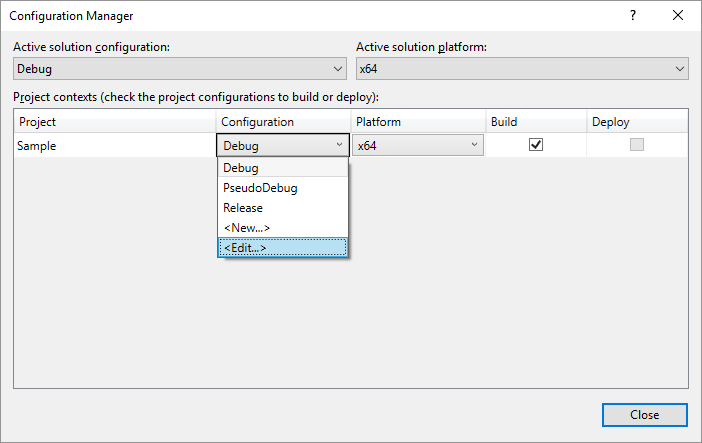
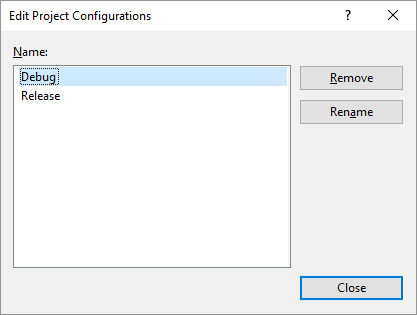
- In Edit Project Configurations, remove the Debug configuration.
- And then, rename the PseudoDebug configuration to Debug.
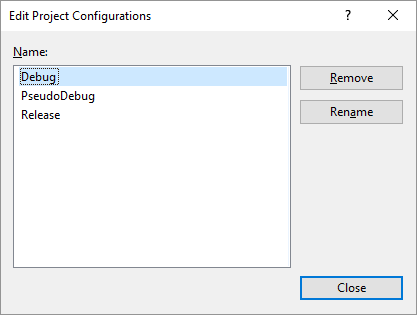
- When you have finished renaming the configurations, click Close.
- Repeat the above step for the solution by click Active solution Configuration > Edit….
- In Edit Solution Configurations, remove the Debug configuration, and then rename the PseudoDebug configuration to Debug.
- When finished, click Close.
- Close Configuration Manager.
Add property sheet
The Rhino C/C++ SDK includes Visual Studio Property Sheets that provide a convenient way to synchronize or share common settings among other plugin projects.
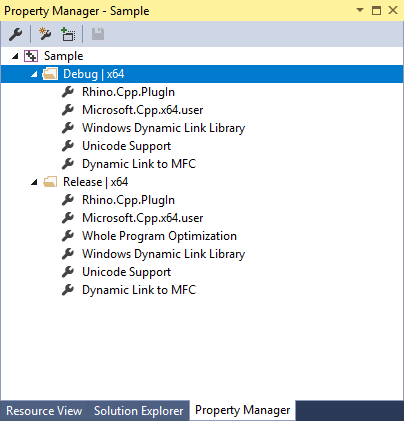
- From Visual Studio 2017, click View > Property Manager.
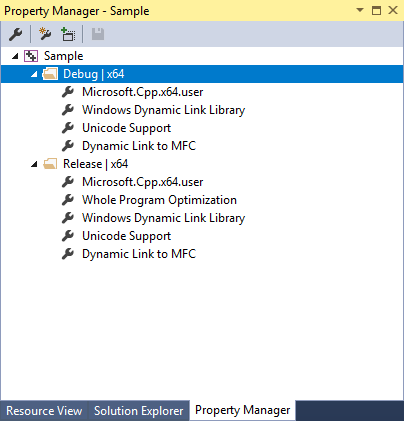
- Right-click on the Debug | x64 configuration and click Add Existing Property Sheet.
- Navigate to the following location: C:\Program Files\Rhino 6.0 SDK\PropertySheets
- Select Rhino.Cpp.PlugIn.props and click OK.
- Repeat the above steps for the the Release | x64 configuration.
Modify the project
The project’s pre-compiled header file, stdafx.h, needs to be modified so SDK header file inclusions point to the correct location. Also, the plugin .cpp file needs to include an additional SDK header. Finally, Visual Studio’s resource editor and compiler requires the project contain a targetver.h file that identifies the target platform.
-
Using Visual Studio’s Solution Explorer, open stdafx.h and add the following preprocessor directive:
///////////////////////////////////////////////////////////////////////////// // stdafx.h : include file for standard system include files, // or project specific include files that are used frequently, but // are changed infrequently #pragma once #ifndef VC_EXTRALEAN #define VC_EXTRALEAN // Exclude rarely-used stuff from Windows headers #endif // Added for Rhino 6 Migration #define RHINO_V6_READY // If you want to use Rhino's MFC UI classes, then // uncomment the #define RHINO_SDK_MFC statement below. // Note, doing so will require that your plug-in is // built with the same version of Visual Studio as was // used to build Rhino. //#define RHINO_SDK_MFC ... -
Also, remove the path specifiers to Rhino SDK header files found in stdafx.h, as the path to the SDK is provided by the SDK Property Sheet added above.
// Rhino SDK Preamble //#include "C:\Program Files (x86)\Rhino 5.0 x64 SDK\Inc\RhinoSdkStdafxPreamble.h" #include "RhinoSdkStdafxPreamble.h" ... // Rhino Plug-in //#include "C:\Program Files (x86)\Rhino 5.0 x64 SDK\Inc\RhinoSdk.h" #include "RhinoSdk.h" // Render Development Kit //#include "C:\Program Files (x86)\Rhino 5.0 x64 SDK\Inc\RhRdkHeaders.h" #include "RhRdkHeaders.h" ... // Rhino Plug-in Linking Pragmas //#include "C:\Program Files (x86)\Rhino 5.0 x64 SDK\Inc\rhinoSdkPlugInLinkingPragmas.h" #include "rhinoSdkPlugInLinkingPragmas.h" -
Using Visual Studio’s Solution Explorer, open the project’s PlugIn.cpp file and add the following SDK include statement:
#include "StdAfx.h" #include "SamplePlugIn.h" // Added for Rhino 6 Migration #include "rhinoSdkPlugInDeclare.h" ... -
Using Visual Studio’s Solution Explorer, right-click on the Header Files folder and click Add > New Item….
-
Add a new Header File (.h) named targetver.h.
-
Add the following content to it:
 #pragma once

 // Including SDKDDKVer.h defines the highest available Windows platform.
 // If you wish to build your application for a previous Windows platform,
 // include WinSDKVer.h and set the _WIN32_WINNT macro to the platform you
 // wish to support before including SDKDDKVer.h.
 #include "rhinoSdkWindowsVersion.h"

 #include <SDKDDKVer.h>
Your plugin project should now be ready to build with the Rhino 6 C/C++ SDK.
