
Python Component
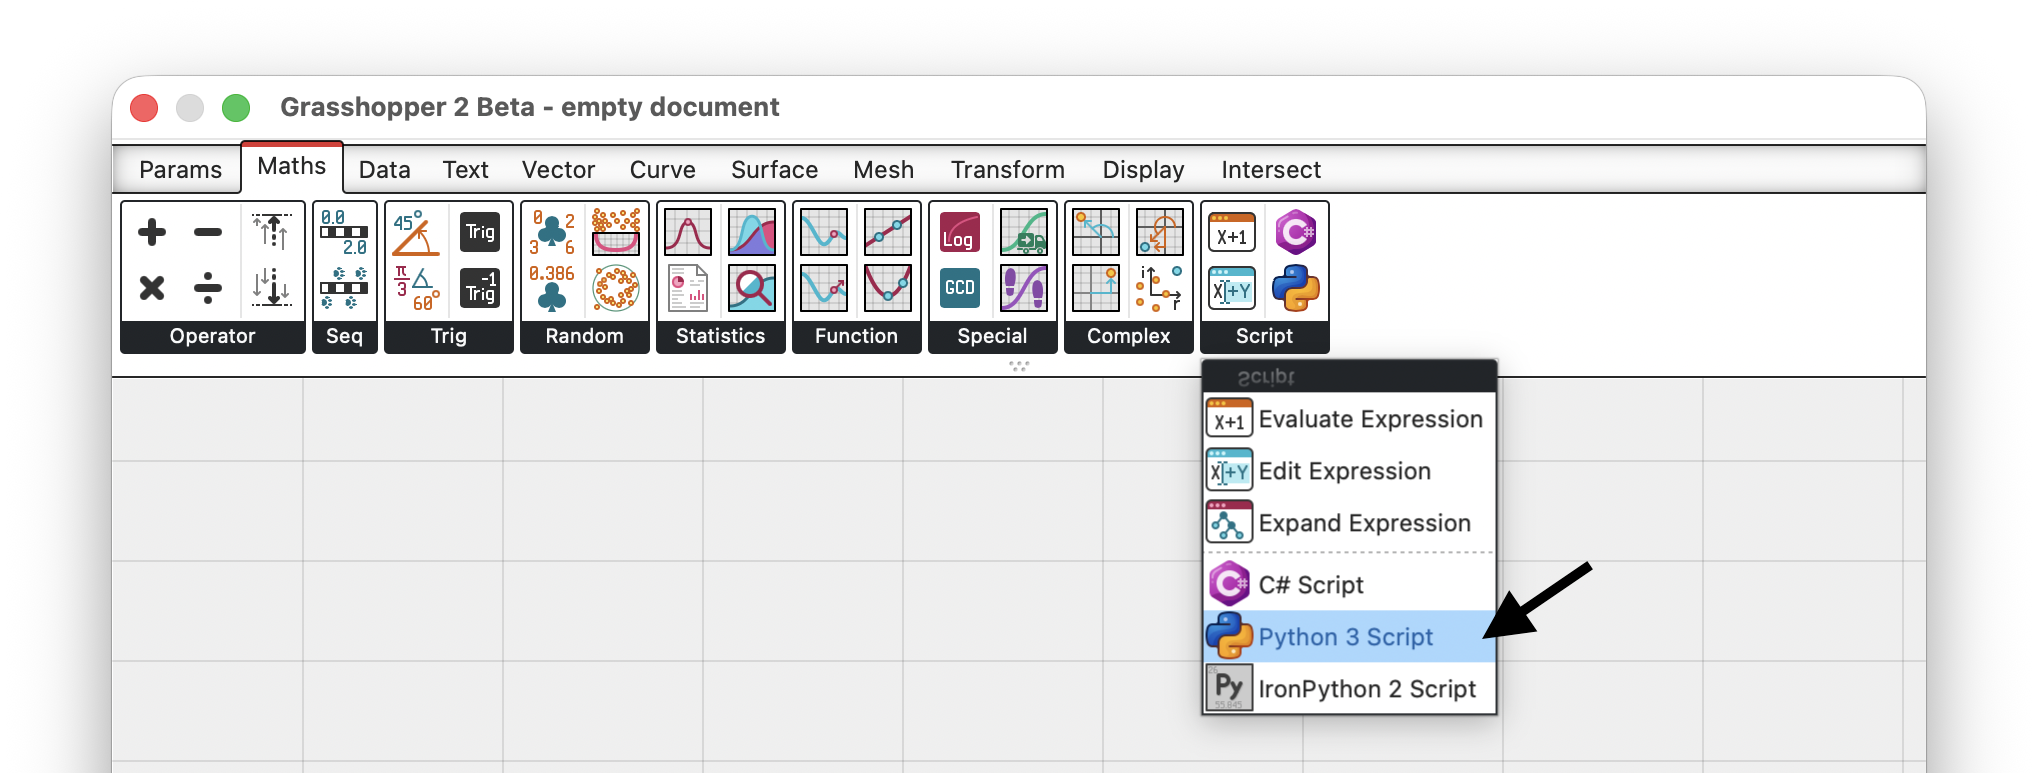
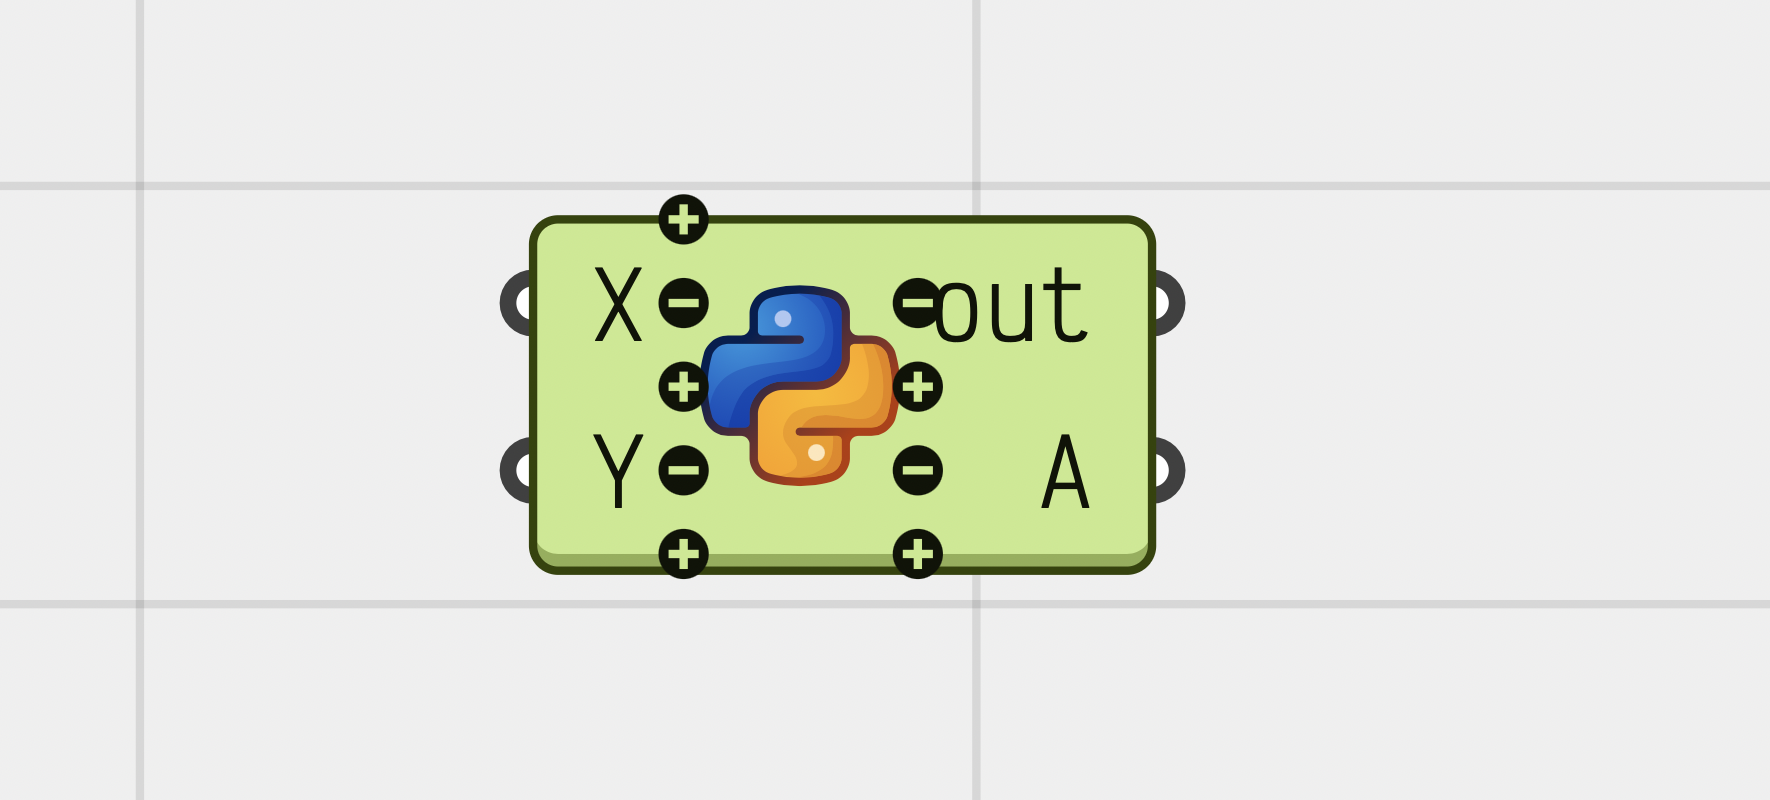
The Python script component is in the Maths tab, Script panel. Drop one onto the canvas:
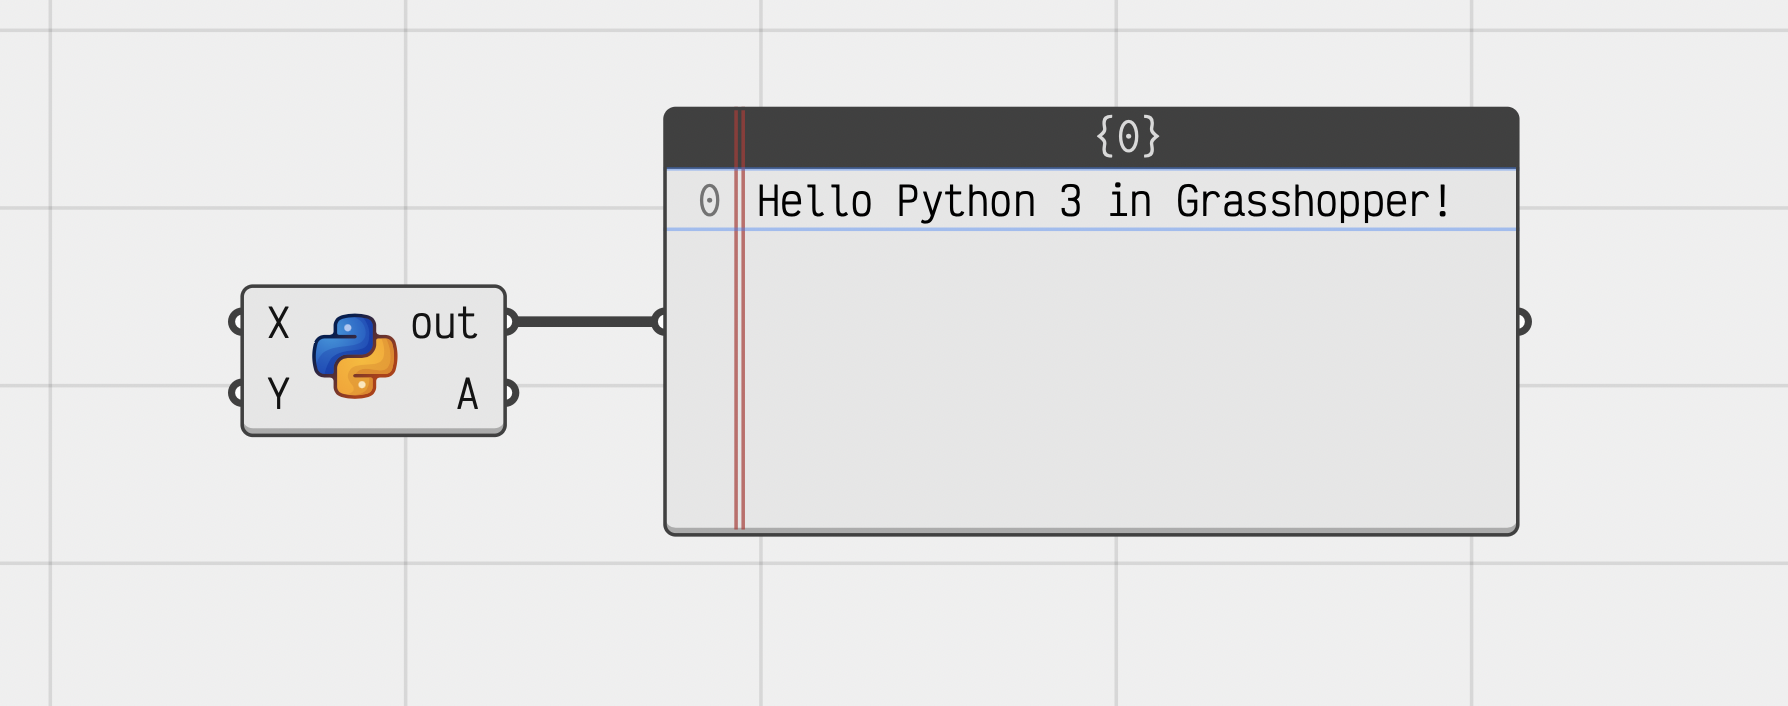
A new component starts with a small script that sets one output:
"""Grasshopper Script"""
A = "Hello Python 3 in Grasshopper!"
print(A)
Python 3 and Python 2 are separate components, so pick the one you need. They are separate runtimes rather than two versions of the same thing:
- Python 3 is CPython. It can use packages from PyPI like
numpy, and reaches .NET through Python.NET - Python 2 is IronPython, which runs on .NET itself. Pure RhinoCommon calls are faster, and it has real .NET multithreading
Opening the Script Editor
Double-click the component to open a script editor. The component draws a cone pointing to the editor associated with it:
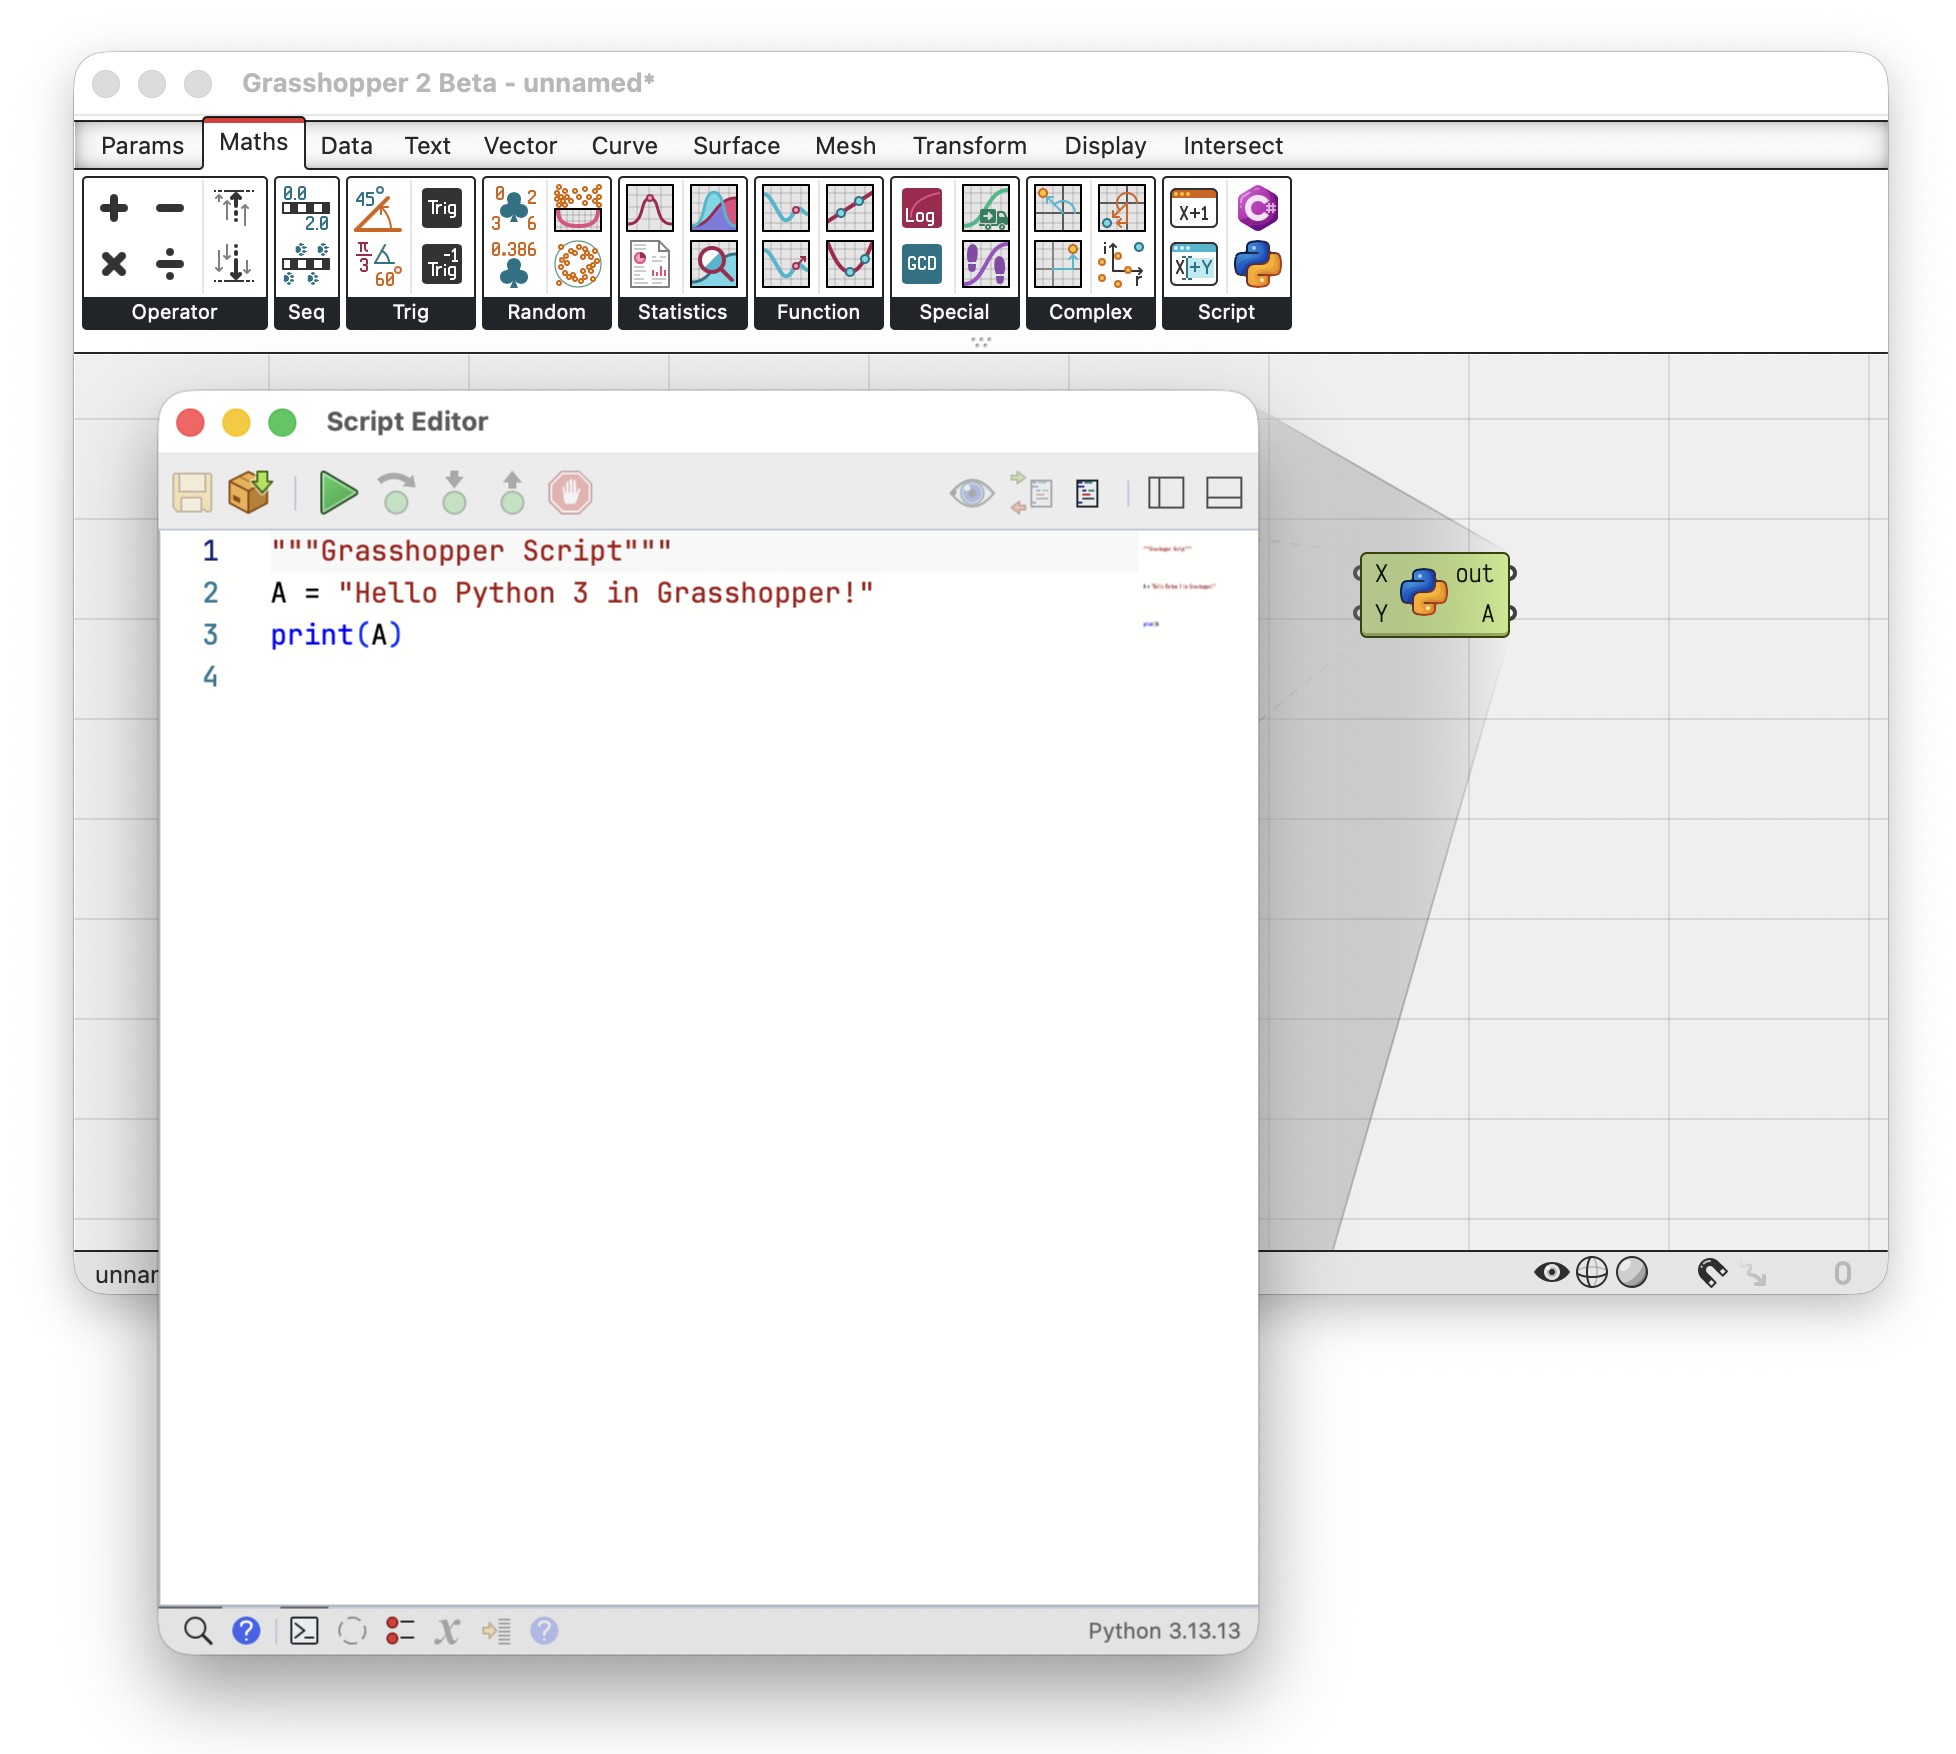
The script editor shows the version of the Python language on the status bar:

Component Options
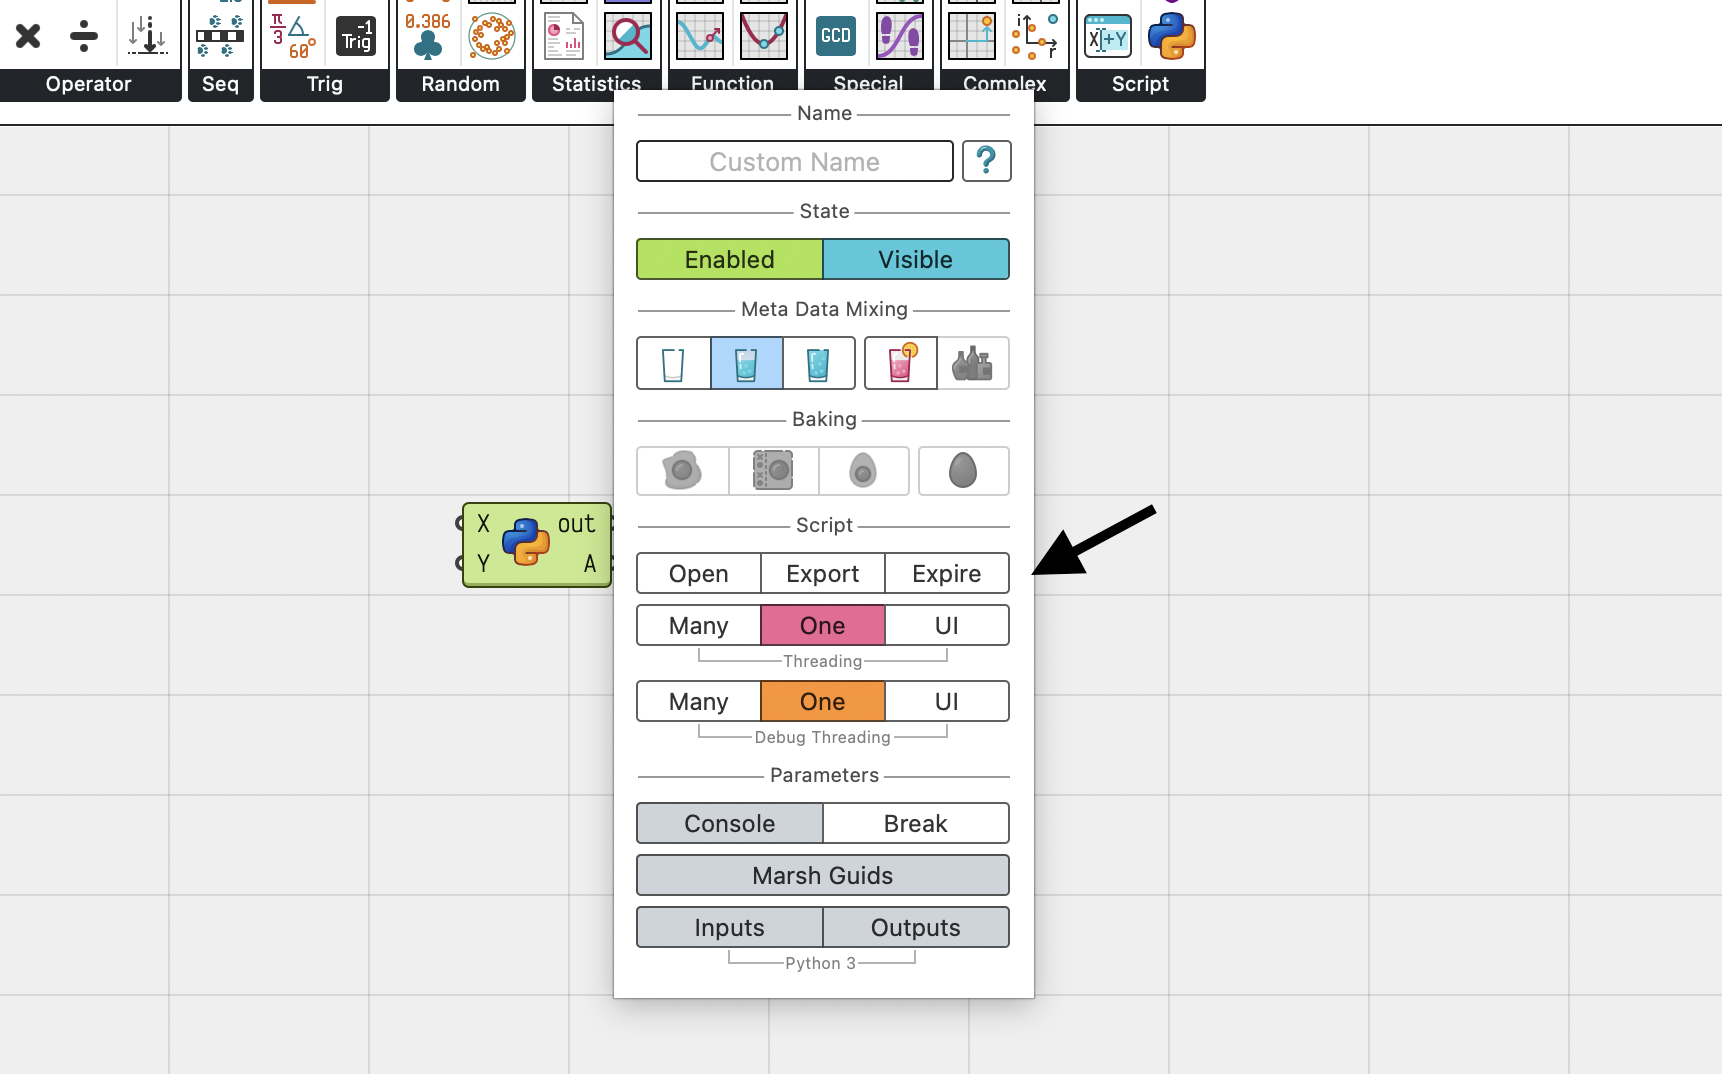
Component options are in the component panel. The Script category has:
- Open opens the script in the editor
- Export saves the script to a file
- Expire clears cached results and recomputes
Threading
Threading sets how the iterations of your script are run:
- One runs iterations on a single thread, in order. This is the default
- Many runs iterations on different threads
- UI runs iterations on the application UI thread, in order
One is the default because scripts that run on many threads at once are harder to reason about. Iterations no longer run in order, and anything your script shares between them has to be written carefully.
Debug Threading sets the same choice for debug runs and defaults to One, to keep debugging simple. Switch it to Many only when you are sure that helps, since stepping through a script while several iterations run at once is confusing:
Inputs, Outputs
A new component has two inputs and one output, plus the Console output. Inputs may be left empty, so a script runs even when nothing is connected.
Add, remove, and rename parameters the same way as any other Grasshopper 2 component. Give them meaningful names, since the names are how your script reaches their values:
Pick Pears
Grasshopper 2 keeps metadata alongside every value, and the value together with its metadata is a pear. Turn on Pick Pears in the Variable category of an input’s panel to receive IPear instances instead of naked values. This is off by default, and is only offered on inputs. Turn it on when your script needs the metadata of an item, not just its value.
Standard Output (Console)
The Console (out) output captures anything your script prints with print(). Each printed line becomes one item:
Toggling Output
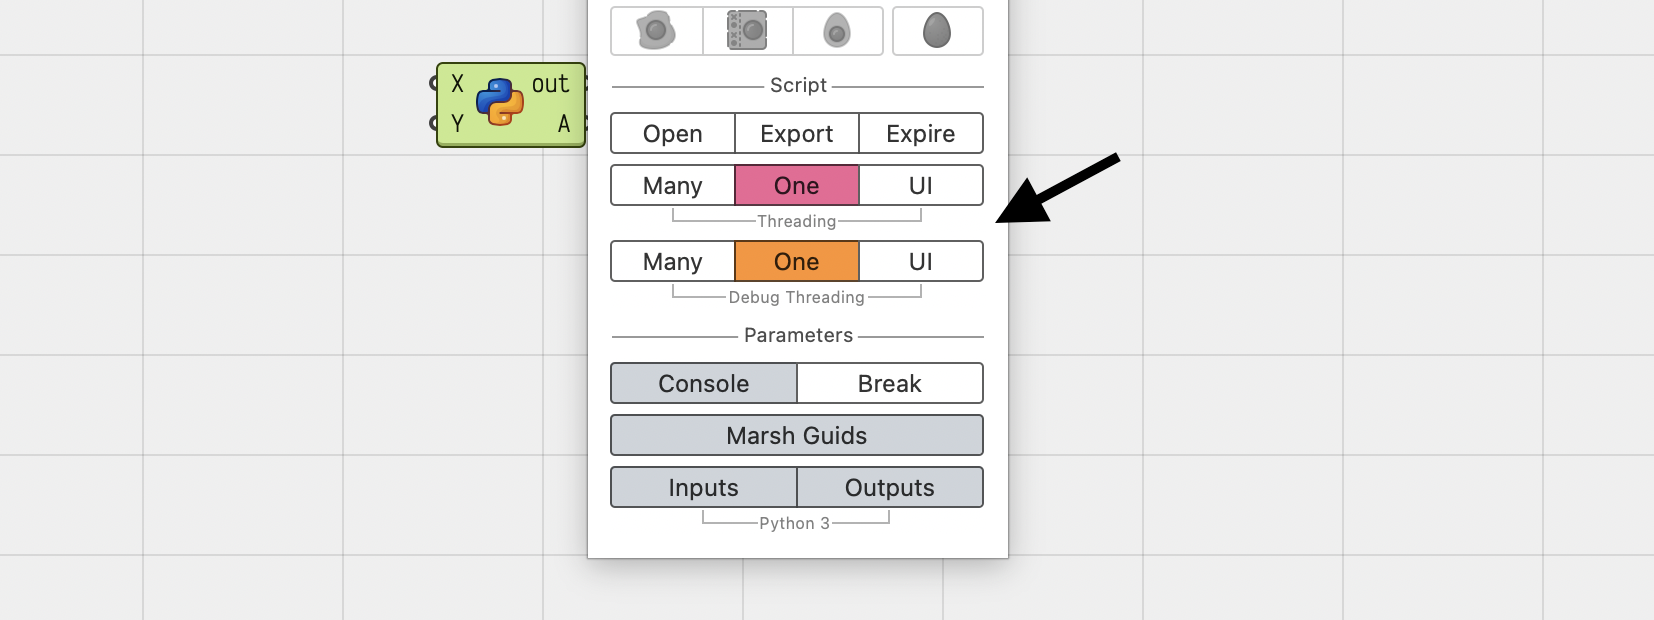
Two toggles in the Parameters category of the component panel control it:
- Console shows or hides the output parameter
- Break splits the collected text into one item per line
Hiding the parameter when your script prints nothing saves the component from collecting and splitting output on every run.
Parameter Converters
Right-click a parameter to choose how its data reaches your script. The list is grouped by kind:
- System types like boolean, integer, string, number,
Guid,DateTime, color, and file path - Rhino data types like
Point3d,Vector3d,Plane,Interval,Box,Transform - Geometry types like
Line,Circle,Arc,Polyline,Rectangle3d - Geometry base types like
Curve,Mesh,Surface,Brep,SubD,PointCloud
No Conversion is the default, so values reach your script as Grasshopper stores them. Pick a converter and values are converted to that type first.
Converters replace the type hints of the Grasshopper 1 component.
Parameter Access
Each parameter takes Item, Twig, or Tree access, which sets whether your script is handed one value, a list, or a whole tree. Unwrap Data on an output turns collections your script sets into Grasshopper trees and twigs.
Script-Mode
The default script is a plain list of statements. Inputs arrive as variables named after the input parameters, and outputs are set by assigning to variables named after the output parameters:
"""Grasshopper Script"""

# x and y are inputs, A is an output
A = x + y

print("A is {}".format(A))
SDK-Mode
Choose Convert To Grasshopper2ScriptInstance (Component SDK Mode) on the editor dashboard to turn the script into a class. The component then calls RunScript for every iteration:
"""Grasshopper Script Instance"""
import System
import Rhino
import Grasshopper2

class Script_Instance(Grasshopper2.Components.GH_ScriptInstance):
    def RunScript(self, x, y):
        self.Print("Iteration {} of {}".format(self.Iteration, self.Iterations))

        return x + y
The instance also gives access to what is running the script:
self.Component |
The component running the script |
self.Document |
The Grasshopper document holding the component |
self.RhinoDocument |
The active Rhino document |
self.Access |
Data access for the iteration being computed |
self.Solution |
The solution being computed |
self.Callstack |
The call stack leading up to the component |
self.CustomData |
Data shared by all iterations of the solution |
self.Iteration |
Index of the iteration being computed |
self.Iterations |
Number of iterations in the solution |
RunScript Signature
Inputs are method parameters named after the input parameters. Outputs are returned, so a component with one output returns one value, and a component with more returns them in the order the output parameters are in.
Changing the component parameters changes the signature, so keep the method parameters in step with the component. Use self.Print to write to the Console output.
Before, After Solve Overrides
Choose Add Solve Overrides to add methods that run once per solution, before and after all the iterations:
class Script_Instance(Grasshopper2.Components.GH_ScriptInstance):
    # runs once before the first iteration
    def BeforeRun(self):
        self.count = 0

    def RunScript(self, x, y):
        self.count += 1
        return x + y

    # runs once after the last iteration
    def AfterRun(self):
        self.Print("Solved {} iterations".format(self.count))
Preview Overrides
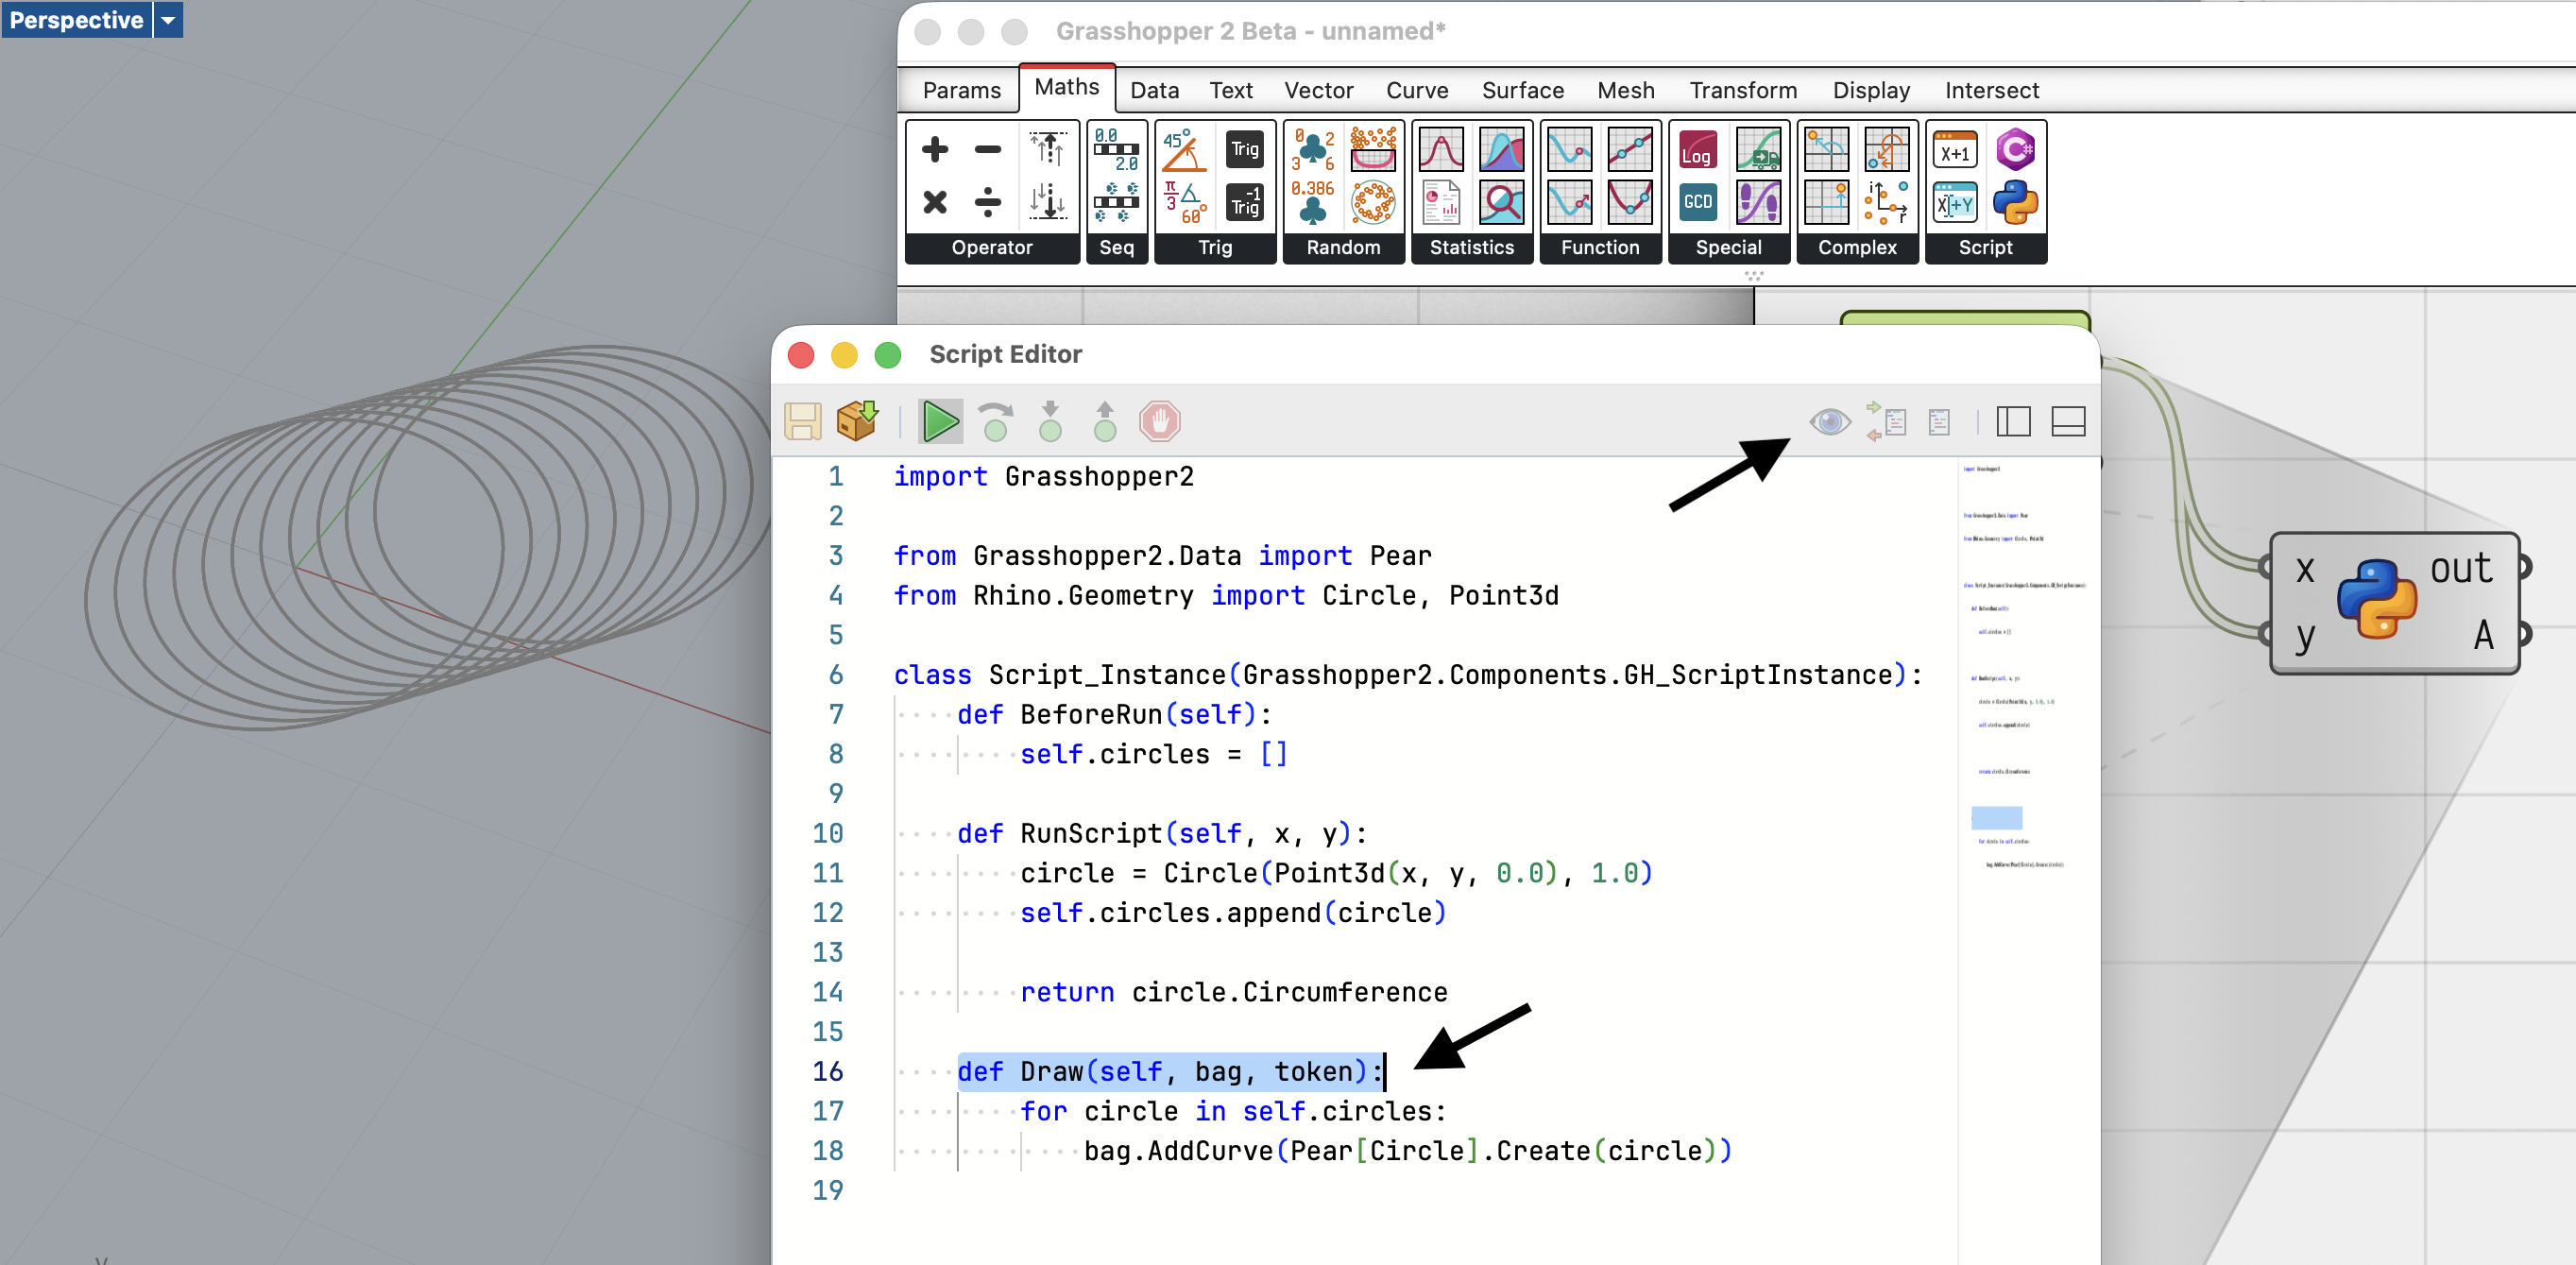
Choose Add Preview Overrides to add Draw, the single override where a script draws into the Rhino viewports. Keep whatever you draw on the instance, since Draw runs separately from RunScript:
import Grasshopper2

from Grasshopper2.Data import Pear
from Rhino.Geometry import Circle, Point3d

class Script_Instance(Grasshopper2.Components.GH_ScriptInstance):
    def BeforeRun(self):
        self.circles = []

    def RunScript(self, x, y):
        circle = Circle(Point3d(x, y, 0.0), 1.0)
        self.circles.append(circle)

        return circle.Circumference

    def Draw(self, bag, token):
        for circle in self.circles:
            bag.AddCurve(Pear[Circle].Create(circle))
Input Panel
A script instance can add its own items to the component panel. Override AppendToInputPanel and the edits land on the instance:
class Script_Instance(Grasshopper2.Components.GH_ScriptInstance):
    def BeforeRun(self):
        if not hasattr(self, "factor"):
            self.factor = 2.0

    def RunScript(self, x, y):
        return (x + y) * self.factor

    def AppendToInputPanel(self, panel):
        with panel.BeginCategory("Options"):
            panel.AddLabel("Factor is {}".format(self.factor))
            panel.AddText(str(self.factor), self.SetFactor, "Multiplier applied to the sum.")

    def SetFactor(self, text):
        try:
            self.factor = float(text)
        except ValueError:
            pass
Edits apply on the next solve.
Marshalling
Marshalling GUIDs
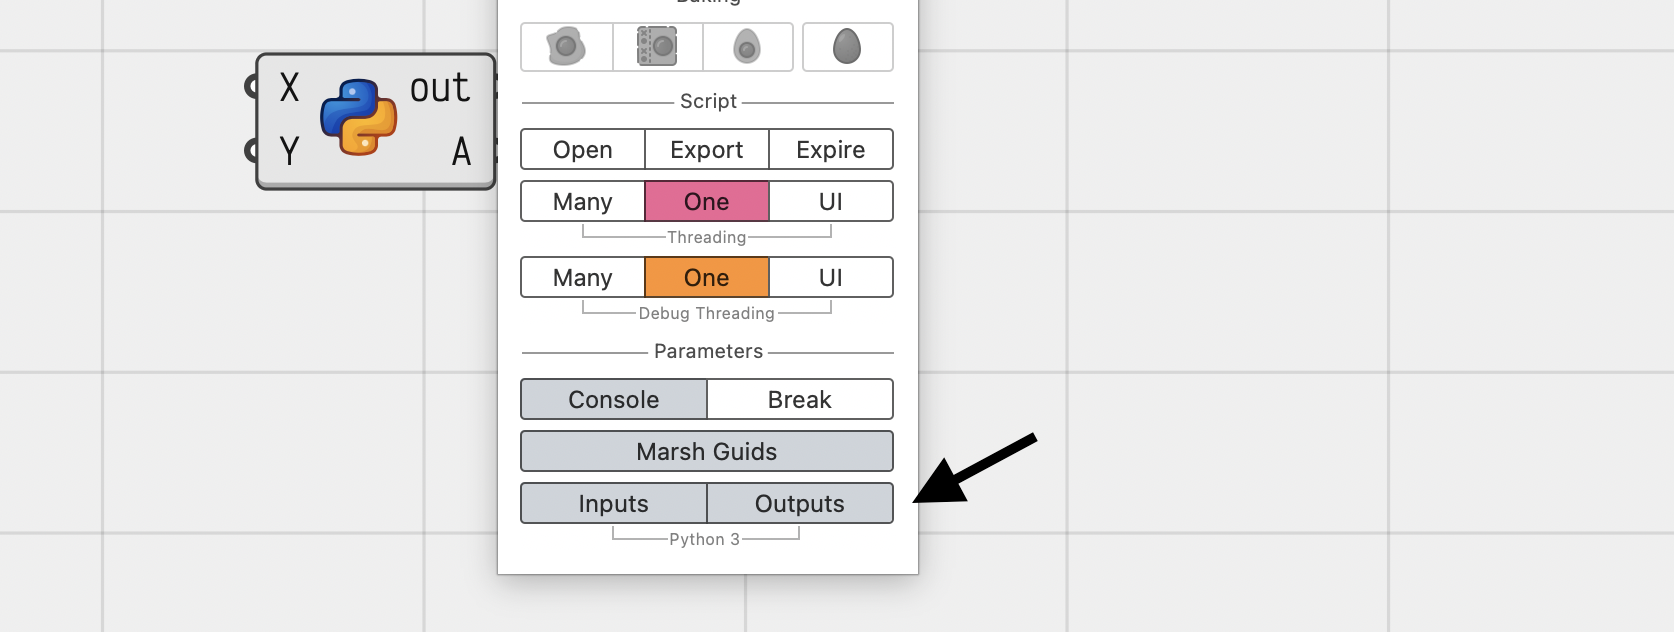
rhinoscriptsyntax refers to Rhino document objects by their unique identifier. Marsh Guids in the component panel controls what happens to identifiers your script sets on an output:
- On, the identifiers are looked up and the output carries the objects they refer to
- Off, the identifiers are passed along as they are
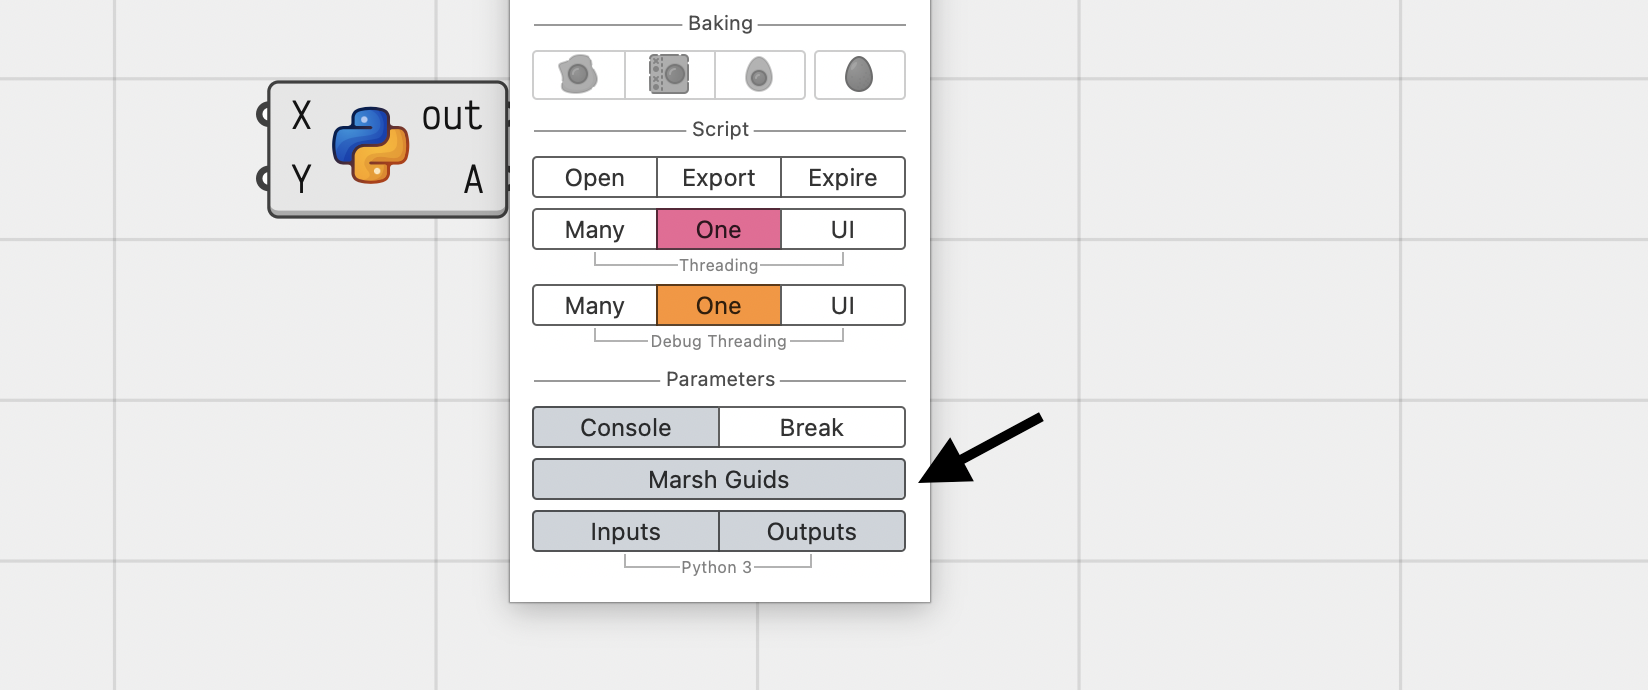
On the input side, pick the ghdoc Object converter to receive an identifier your script can pass to rhinoscriptsyntax functions.
Marshalling Data Types
Python 3 types are not .NET types. A .NET List<> has a Count property, while a Python list uses len().
The Python 3 category of the component panel controls the conversion:
- Inputs converts incoming .NET types into native Python types, so a
List<>arrives as alist - Outputs converts Python types your script returns into .NET types other components can read
Leaving both off passes data through without conversion, which is faster when one Python component feeds another:
Debugging Scripts
Debugging pauses your script mid-solution so you can look at your values and step through your code line by line. Click the gutter to the left of a line to add a Breakpoint. The Run button becomes Debug once the script has a breakpoint. Click it and the component solves until it reaches that line, then stops with the line marked and the debugging panels open:
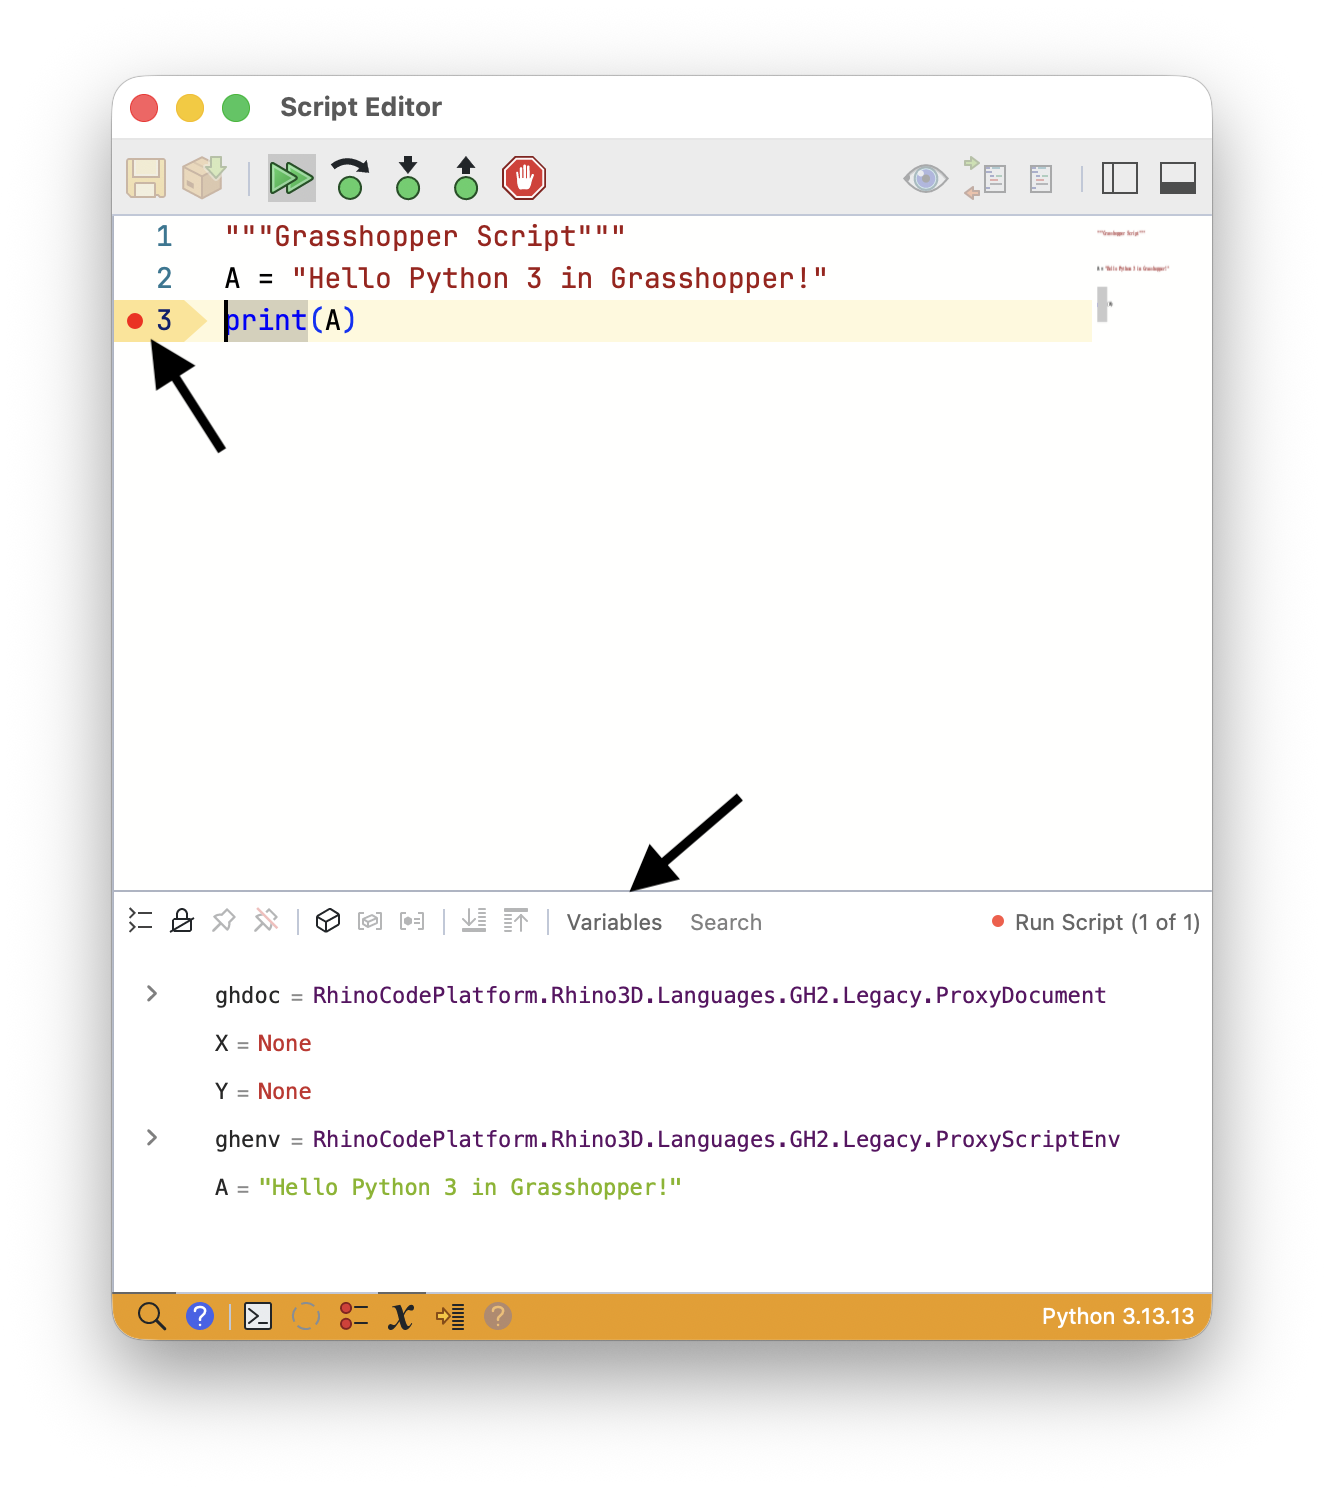
Debug runs are single-threaded by default, so iterations stop in order even when the script itself is set to run on Many threads. See Debug Threading in Threading.
Debug Controls
The debug buttons on the editor dashboard control what happens next:
- Continue runs until the next breakpoint, which is often the next iteration of the same component
- Step Over runs the current line
- Step Into steps into the function called on the current line
- Step Out runs the rest of the current function and stops where it was called
- Stop ends the debug run
Variables Tray
The Variables tray lists the values your script is holding at the line it stopped on, including the component inputs. Expand a value to see its members, or the items of a collection:
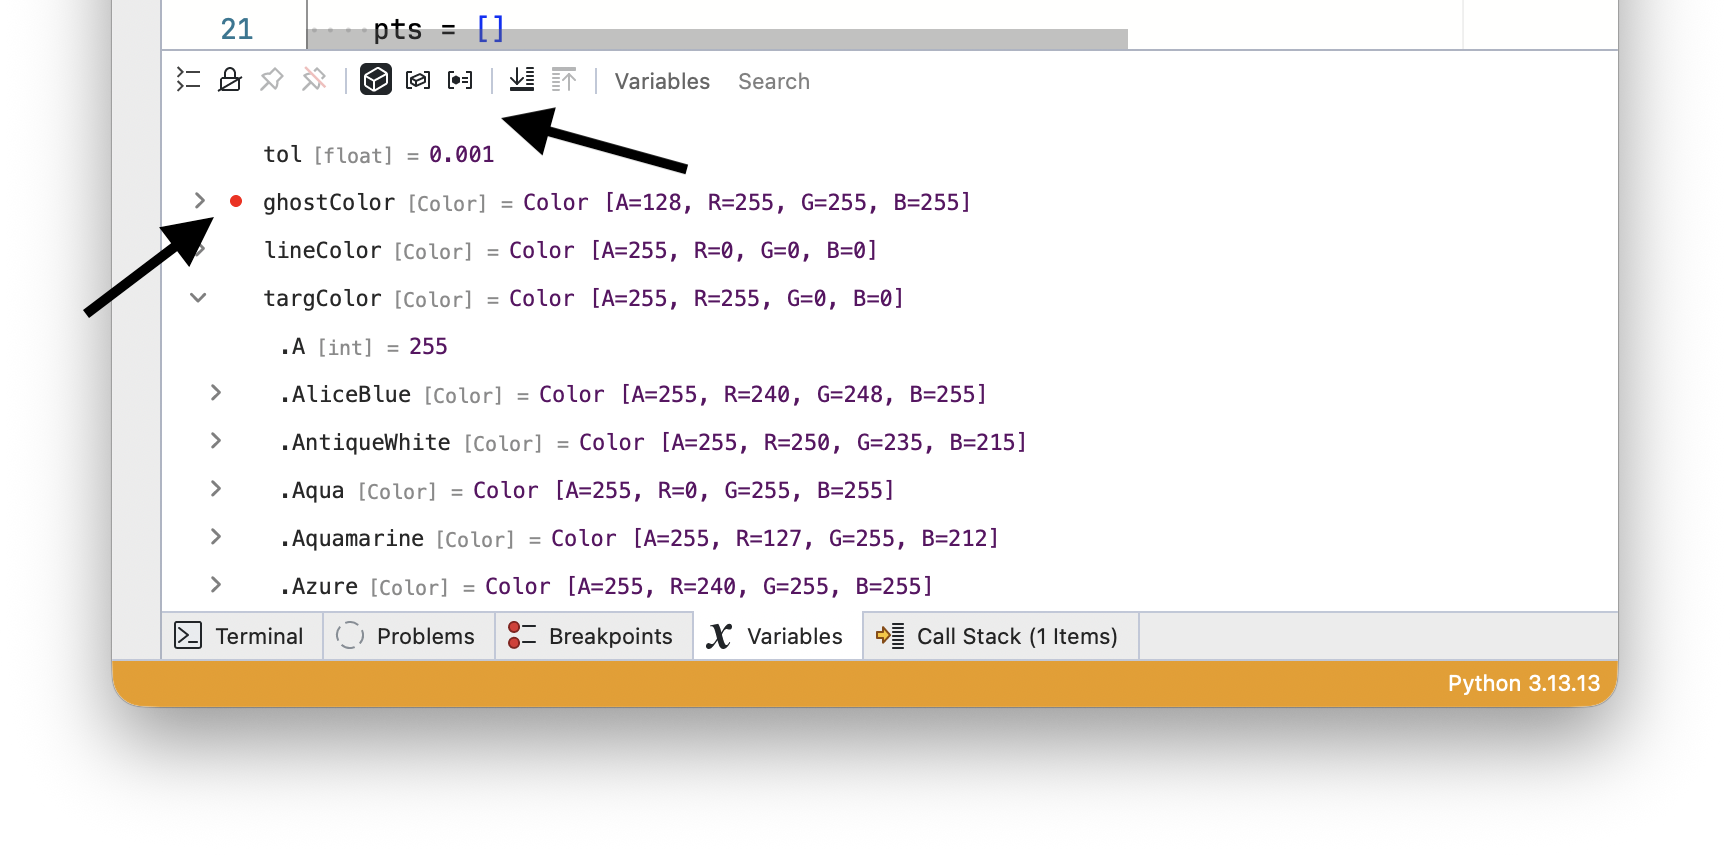
Pin a value to keep watching it as you step and as iterations go by.
Call Stack Tray
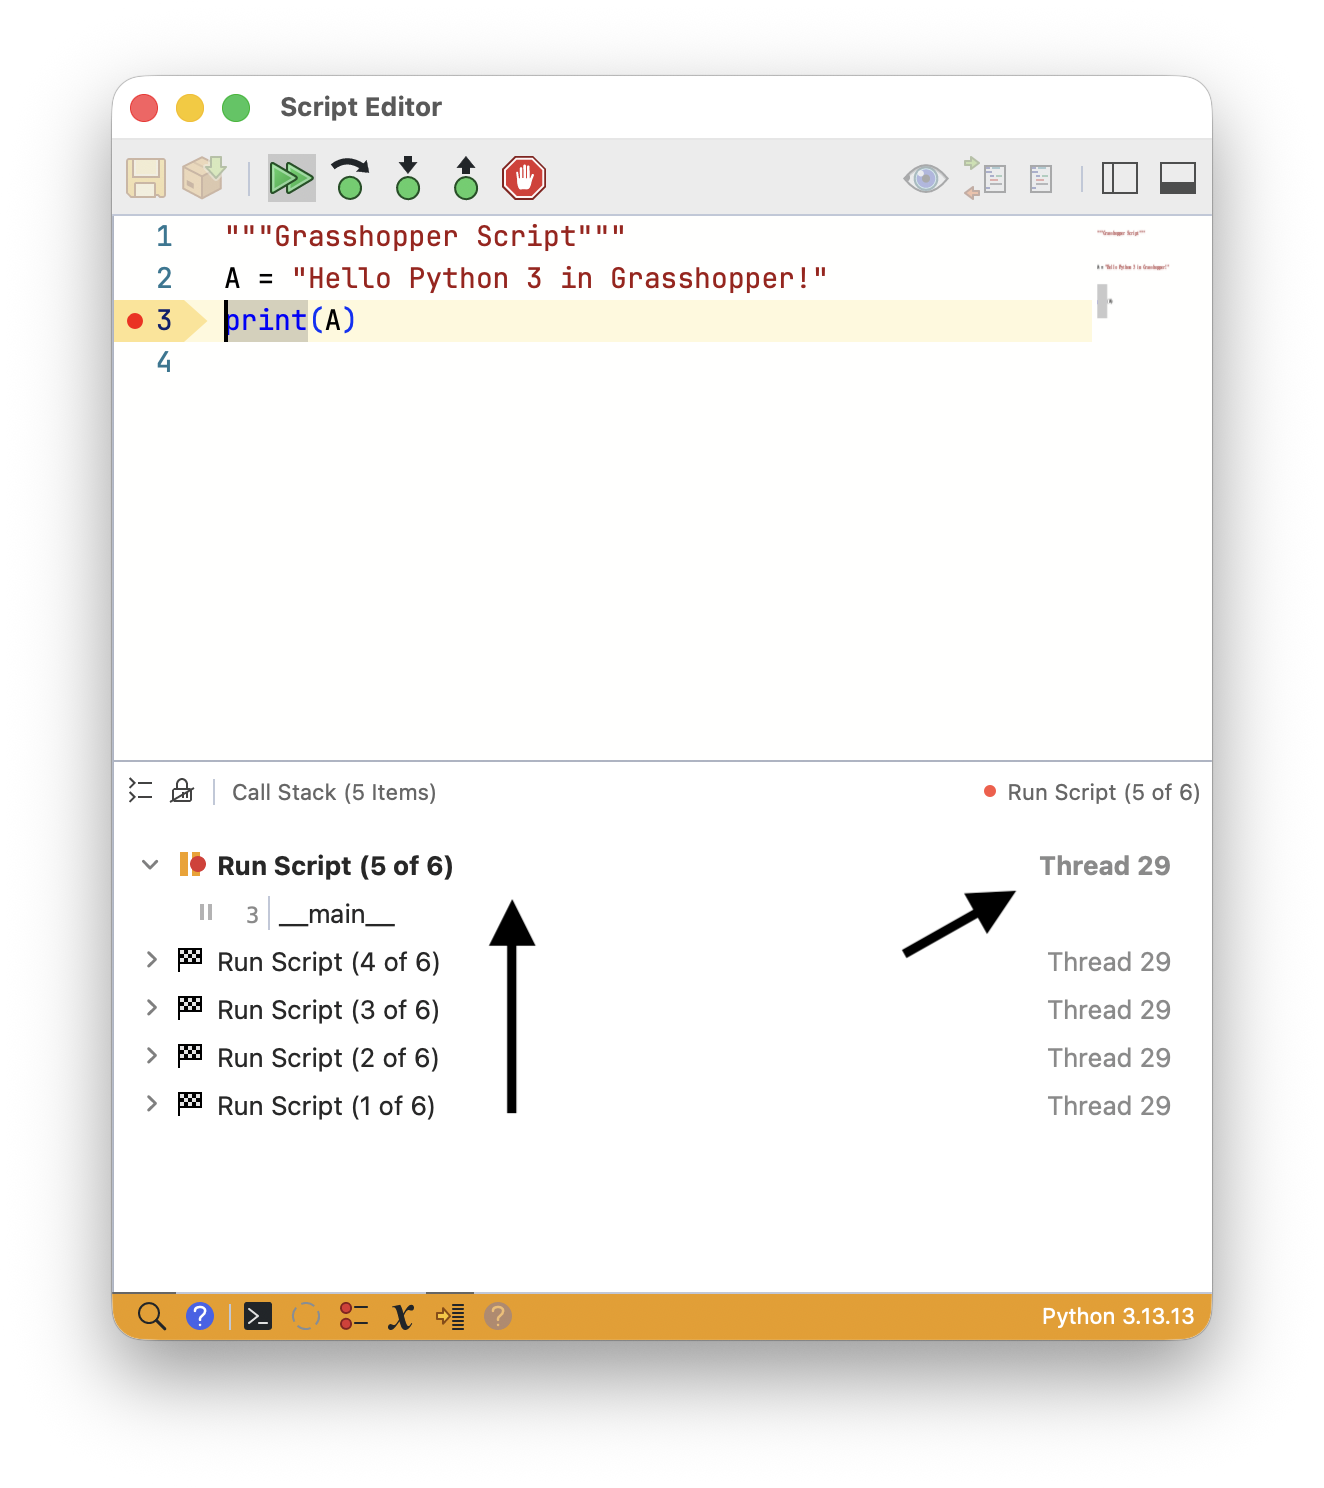
The Call Stack tray shows which functions the script is inside. RunScript sits at the bottom of a paused component, with any function it called above it. Select a frame to see its values in the Variables tray:
Call Stacks On Many Threads
With Debug Threading set to Many, more than one iteration of your script can be paused at the same time. The Call Stack tray keeps them apart. Each run is listed with the threads it is using, and each thread carries its own frames:
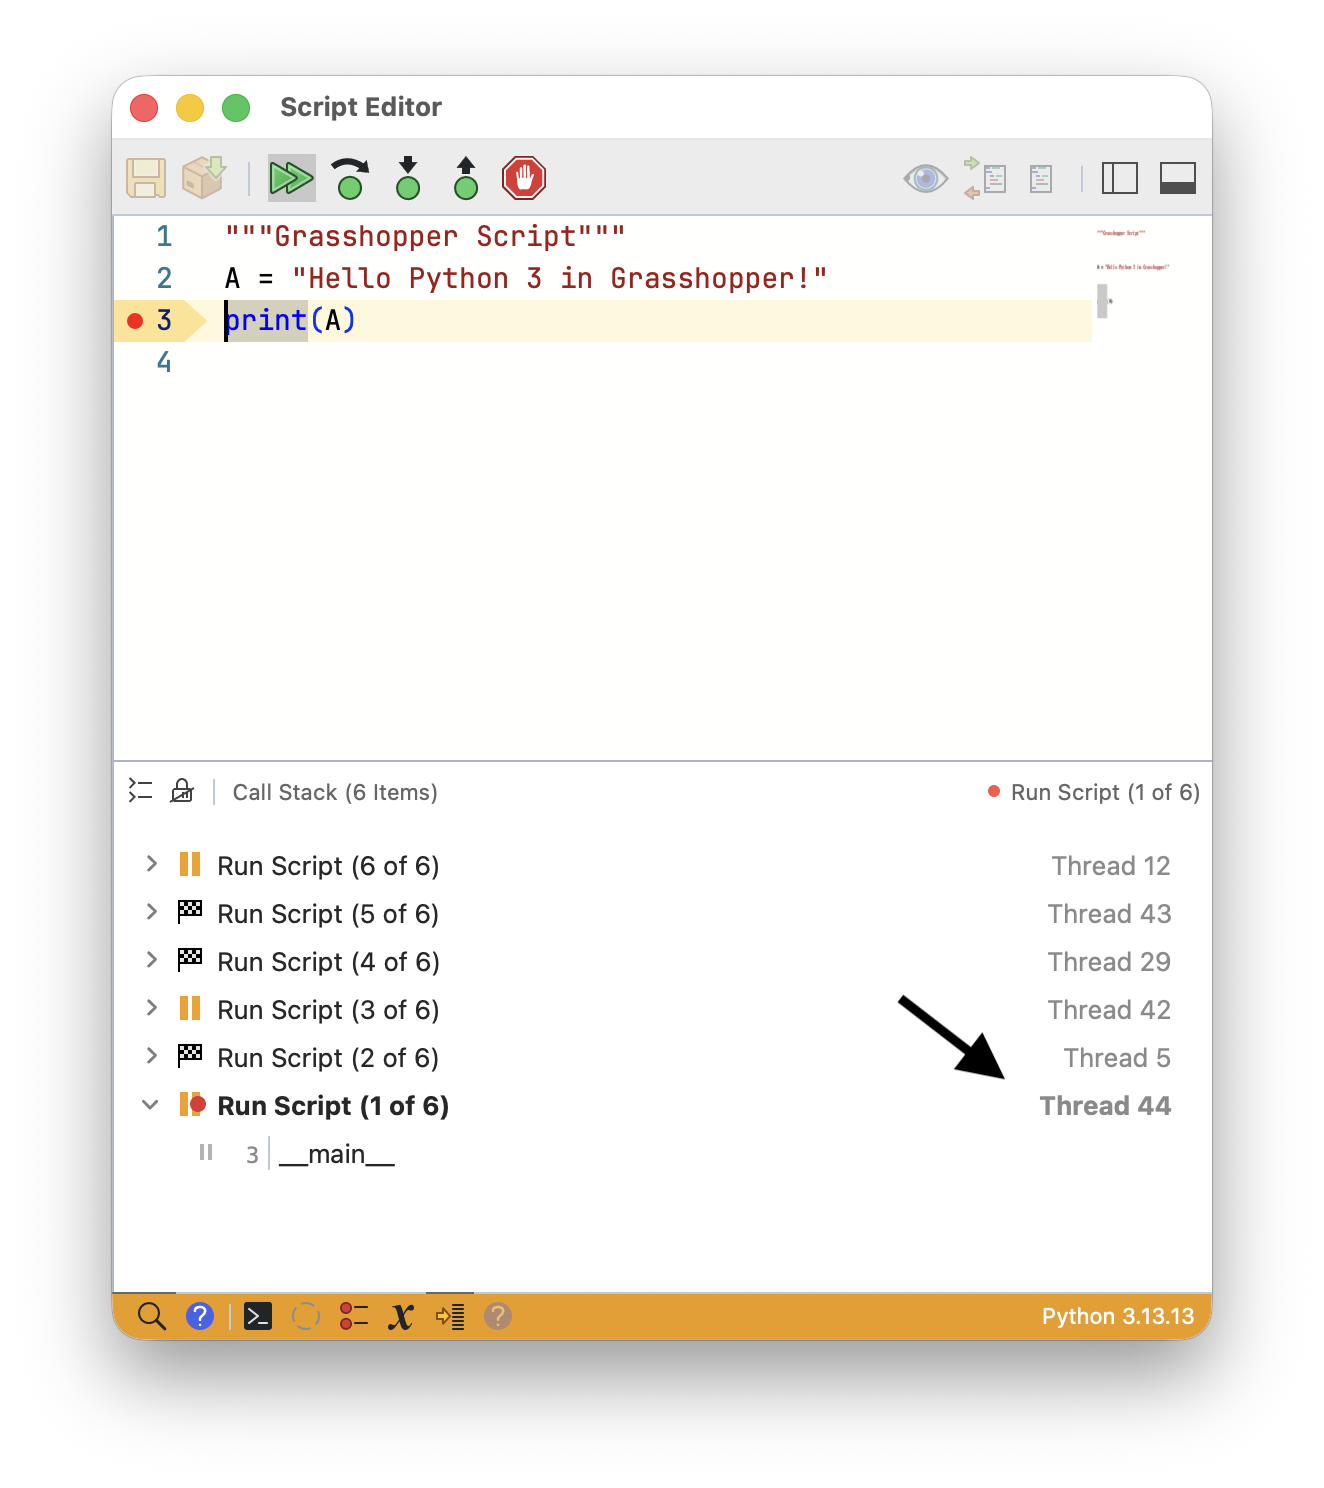
Every row shows its own state, so you can see which thread is paused on a breakpoint and which is still running, completed, or errored.
Toggle Follow Locks on the panel header shows a lock on each run. Lock a run and the debugger stays with it instead of following whichever thread stops next.
Unless you are chasing a problem that only happens across threads, leave Debug Threading at One.
PyPI Packages
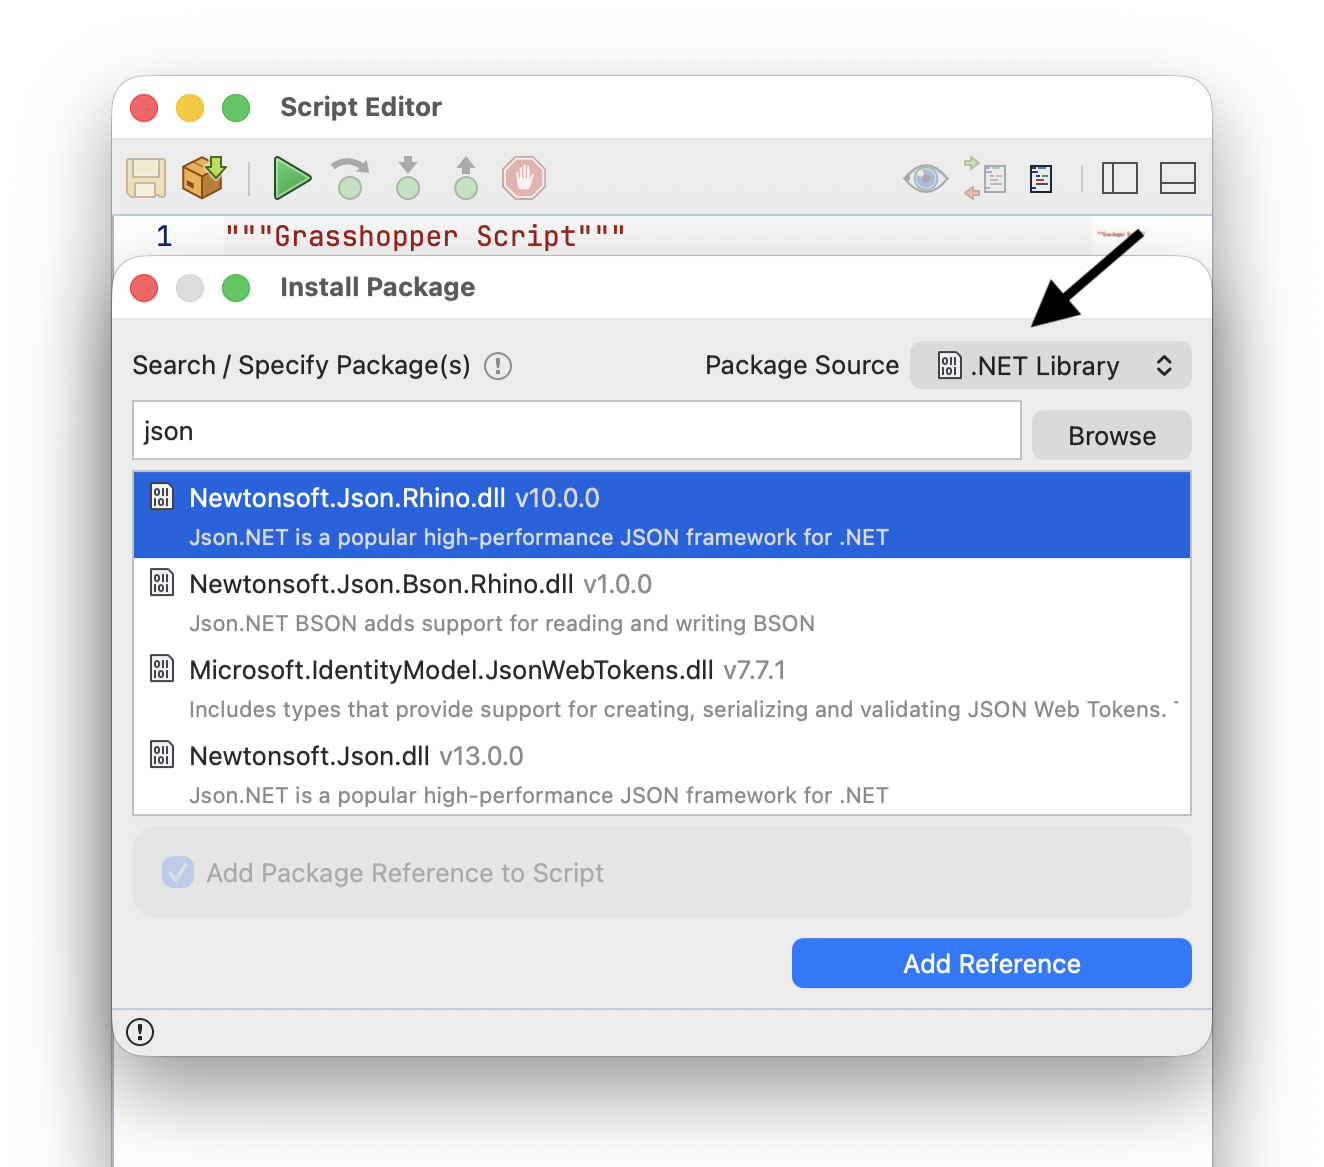
Your script can use packages published on PyPI. Choose Install Package on the editor dashboard, then search for the package or type its name and version:
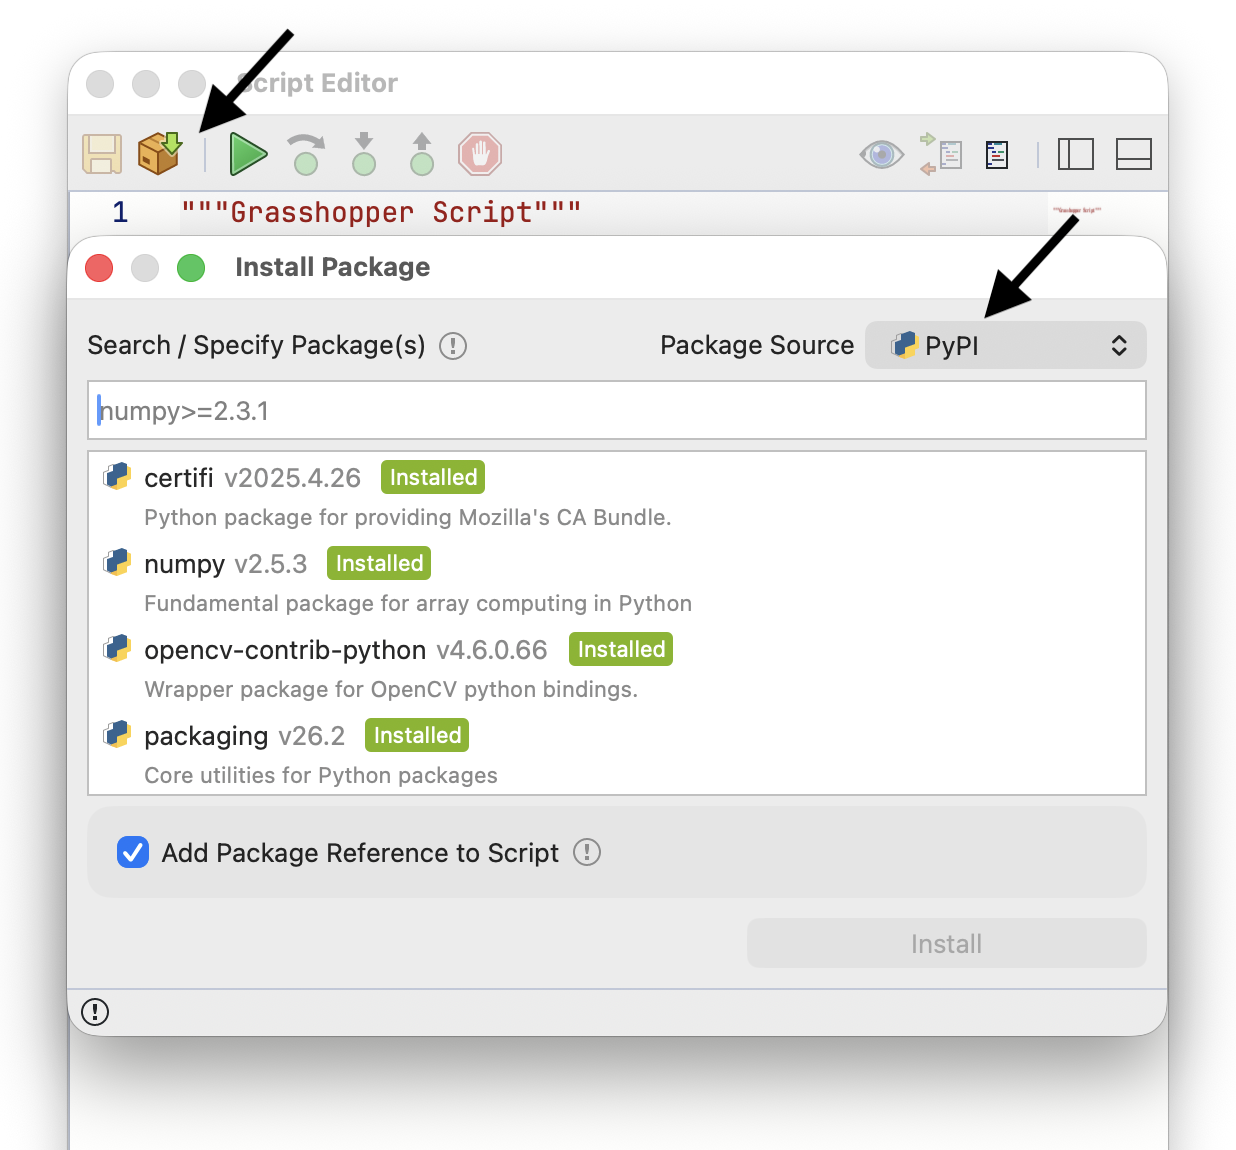
Leave Add Package Reference to Script checked. The package is then written into the script text, so the script carries the list of packages it needs and someone opening your definition gets them installed:
"""Grasshopper Script (With Numpy)"""
#requirements: numpy

import numpy as np

A = np.random.rand(7)

print(A)
#r: and #requirements: are the same thing, and both take more than one package. Packages can also be declared in a PEP 723 block:
# /// script
# dependencies = ["numpy", "requests"]
# ///
See Script Package References for the full set of package directives, including editable installs of your own libraries, git repositories, alternate package indexes, and PEP 723 blocks.
For packages that clash with each other, or with what Rhino already loads, see Python Package Environments.
Module Search Paths
Modules of your own are imported the usual way:
import myhelpers
For Rhino to find the module, its folder has to be on the module search path. Module Search Paths in Options lists the folders that are searched, in order. See Python Path Files for adding paths with a .pth file instead.
NuGet Packages
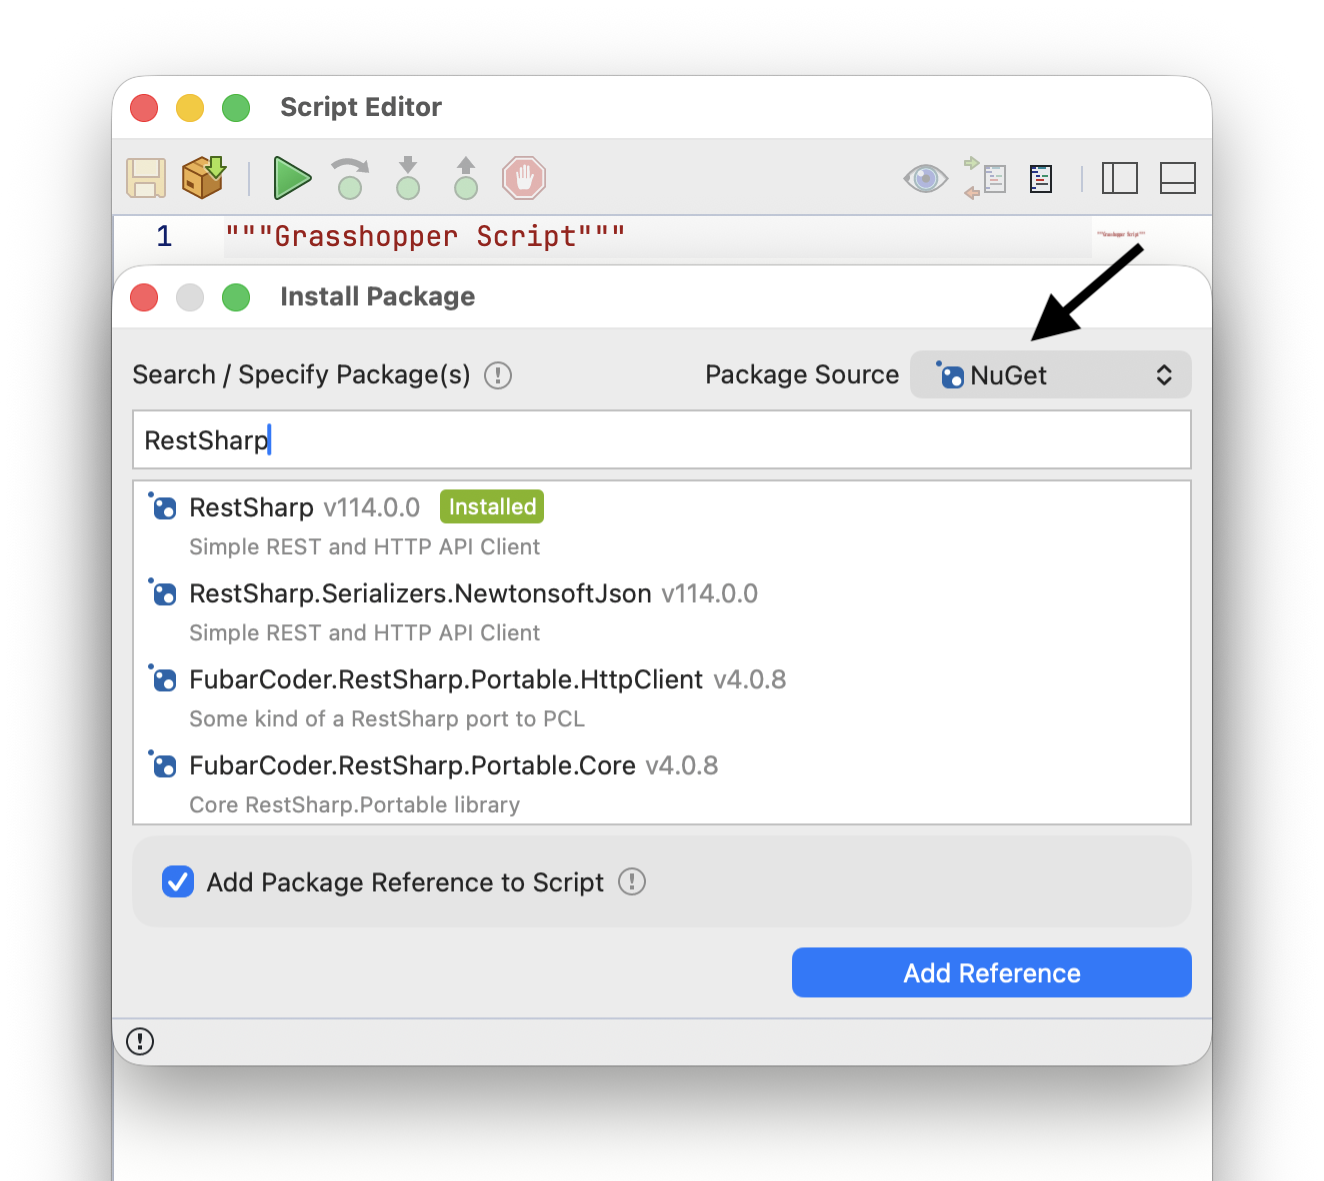
Python scripts can reach .NET, so they can use packages published on NuGet too. Use Install Package on the editor dashboard, or write the reference by hand:
#r "nuget: Newtonsoft.Json, 13.0.3"

from Newtonsoft.Json import JsonConvert
Yak Packages
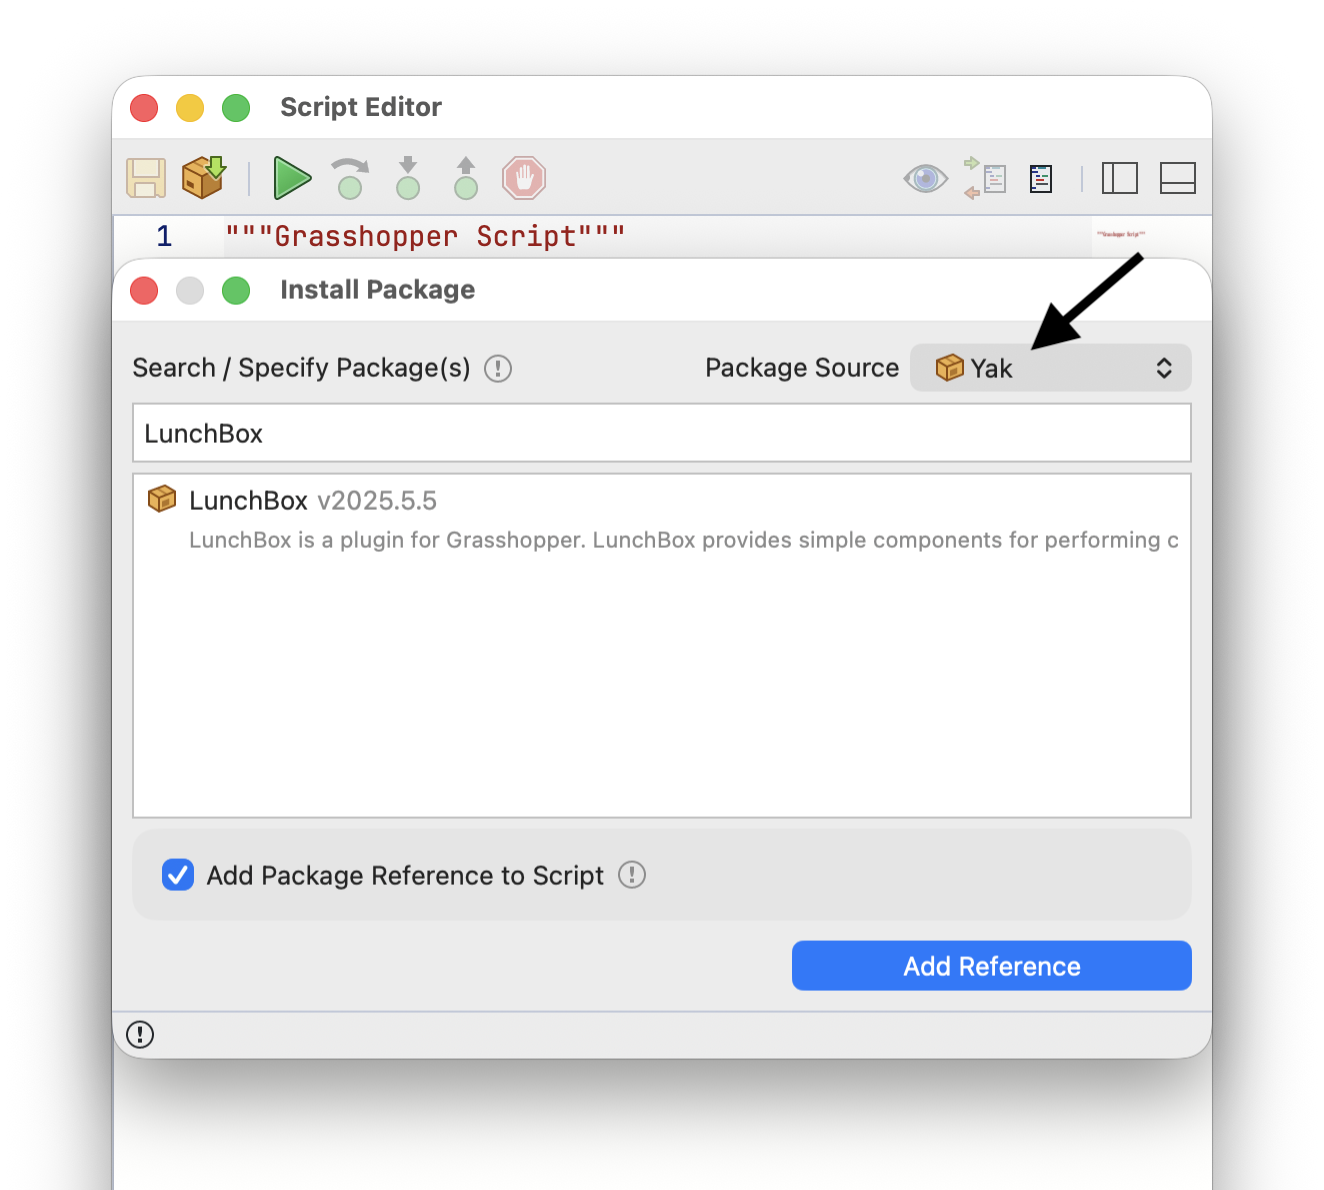
Python scripts can reference .NET assemblies from Yak packages directly. Change Package Source to Yak in the Install Package dialog:
#r "yak: LunchBox, 2025.5.50"

import LunchBox as LB
Assembly References
Scripts can reference .NET assemblies directly, by name if the assembly is already loaded in Rhino, or by path:
#r "System.Text.Json.dll"
#r "/path/to/my/assemblies/MySharedAssembly.dll"
Import the namespaces you need after referencing them:
import System
import Rhino
Shared State Between Iterations
One script instance is shared by every iteration, so anything you keep on self is shared too.
With the default One threading, iterations run one after another and shared state is safe. With Many, several iterations run at the same time. Iterations no longer run in order, and updating shared state from more than one of them at once can lose values or leave a half-finished result behind.
This script looks correct and is not:
class Script_Instance(Grasshopper2.Components.GH_ScriptInstance):
    def BeforeRun(self):
        self.count = 0

    def RunScript(self, x, y):
        self.count += 1   # increments can get lost

        return self.count
self.count += 1 reads the value, adds one, and writes it back. Two iterations can read the same value and write back the same result, so one increment disappears.
Locking
Guard shared state with a lock. Every iteration that reaches the lock waits its turn:
import threading

class Script_Instance(Grasshopper2.Components.GH_ScriptInstance):
    def BeforeRun(self):
        self.lock = threading.Lock()
        self.count = 0
        self.circles = []

    def RunScript(self, x, y):
        circle = Circle(Point3d(x, y, 0.0), 1.0)

        with self.lock:
            self.count += 1
            self.circles.append(circle)

        return circle.Circumference
Keep the work inside a lock small. While one iteration holds the lock, the others wait, and a large locked block cancels out the speed you switched to Many for.
Avoiding Shared State
The simplest fix is often to not share anything. Values you only need for one iteration belong in local variables, which every iteration gets its own copy of:
def RunScript(self, x, y):
    # local, so no other iteration can see it
    circle = Circle(Point3d(x, y, 0.0), 1.0)

    return circle.Circumference
BeforeRun and AfterRun run once per solution, not once per iteration, so setting up and summarizing there needs no lock. self.Iteration and self.Iterations are also safe to read, since each iteration sees its own values.
When a script is hard to make thread-safe, set Threading to One and leave it there.