
It is presumed you already have all the necessary tools installed and are ready to go. If you are not there yet, see both Installing Tools (Windows) and Installing Tools (Mac). It is also helpful to have read and understood Your First Plugin (Windows) and Your First Plugin (Mac).
Overview
There are many ways to architect a cross-platform solution, depending on your plugin, your projects, and your preferences. In this guide we will employ a method called “cloned project files.” This method uses two very similar .csproj files - each with platform-specific dependencies - that share the same source files. The main goal is to illustrate a straightforward way of handling platform-specific needs while sharing the maximum amount of code.
We will build on what we learned in the HelloRhinoCommon sample projects seen in Your First Plugin (Windows) and Your First Plugin (Mac)…
HelloRhino.CrossPlatform
Let’s begin by creating a new solution to contain both platforms’ projects. For the sake of illustration, we’ll begin on macOS in Visual Studio for Mac, but the reverse - on Windows in Visual Studio for Windows - should work. It is useful to work in a folder that is visible to both macOS and Windows and/or use a version control system like git that can be used on both platforms.
File New
- If you have not done so already, launch Visual Studio for Mac.
- Navigate to File > New > Solution…

- A New Project wizard should appear. In the left column, find the Other > Miscellaneous section. Under Generic, select the Blank Solution template…
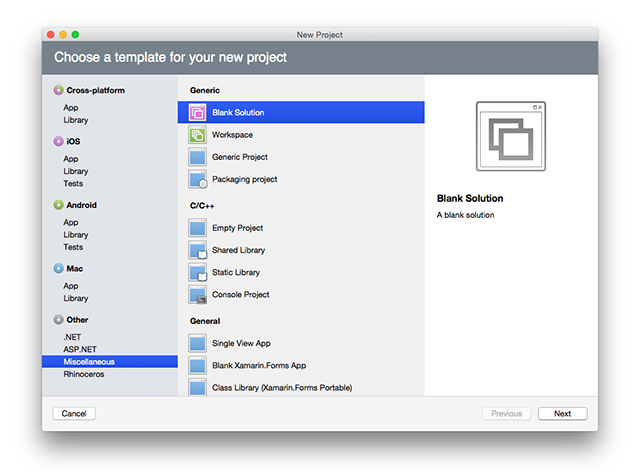
- Click the Next button.
- You will now Configure your new solution. For the purposes of this guide, we will name our solution HelloRhino.CrossPlatform. Fill in the Solution Name field. Browse and select a location for this plugin that is visible to both macOS and Windows.
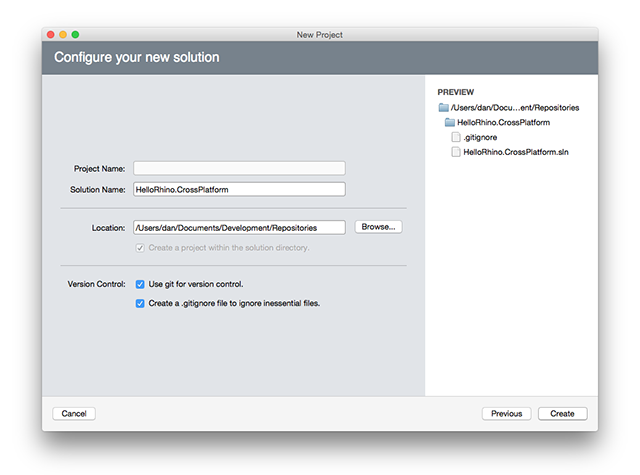
- Click the Create button. Note: It is recommended that you create a .git repository for this demo.
- A new blank solution called HelloRhino.CrossPlatform should open.
Add Project
Mac
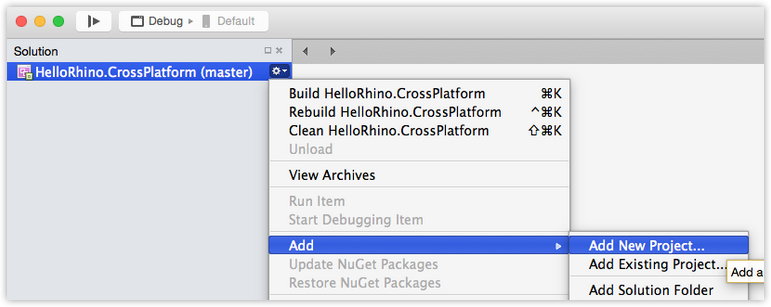
- As in the Your First Plugin (Mac) guide, let’s add a template project to the solution. Right-click the HelloRhino.CrossPlatform solution entry in the Solution panel. Navigate to Add > Add New Project….
- A New Project wizard should appear. In the left column, find the Other > Miscellaneous section. Under General, select the RhinoCommon Plug-In template…
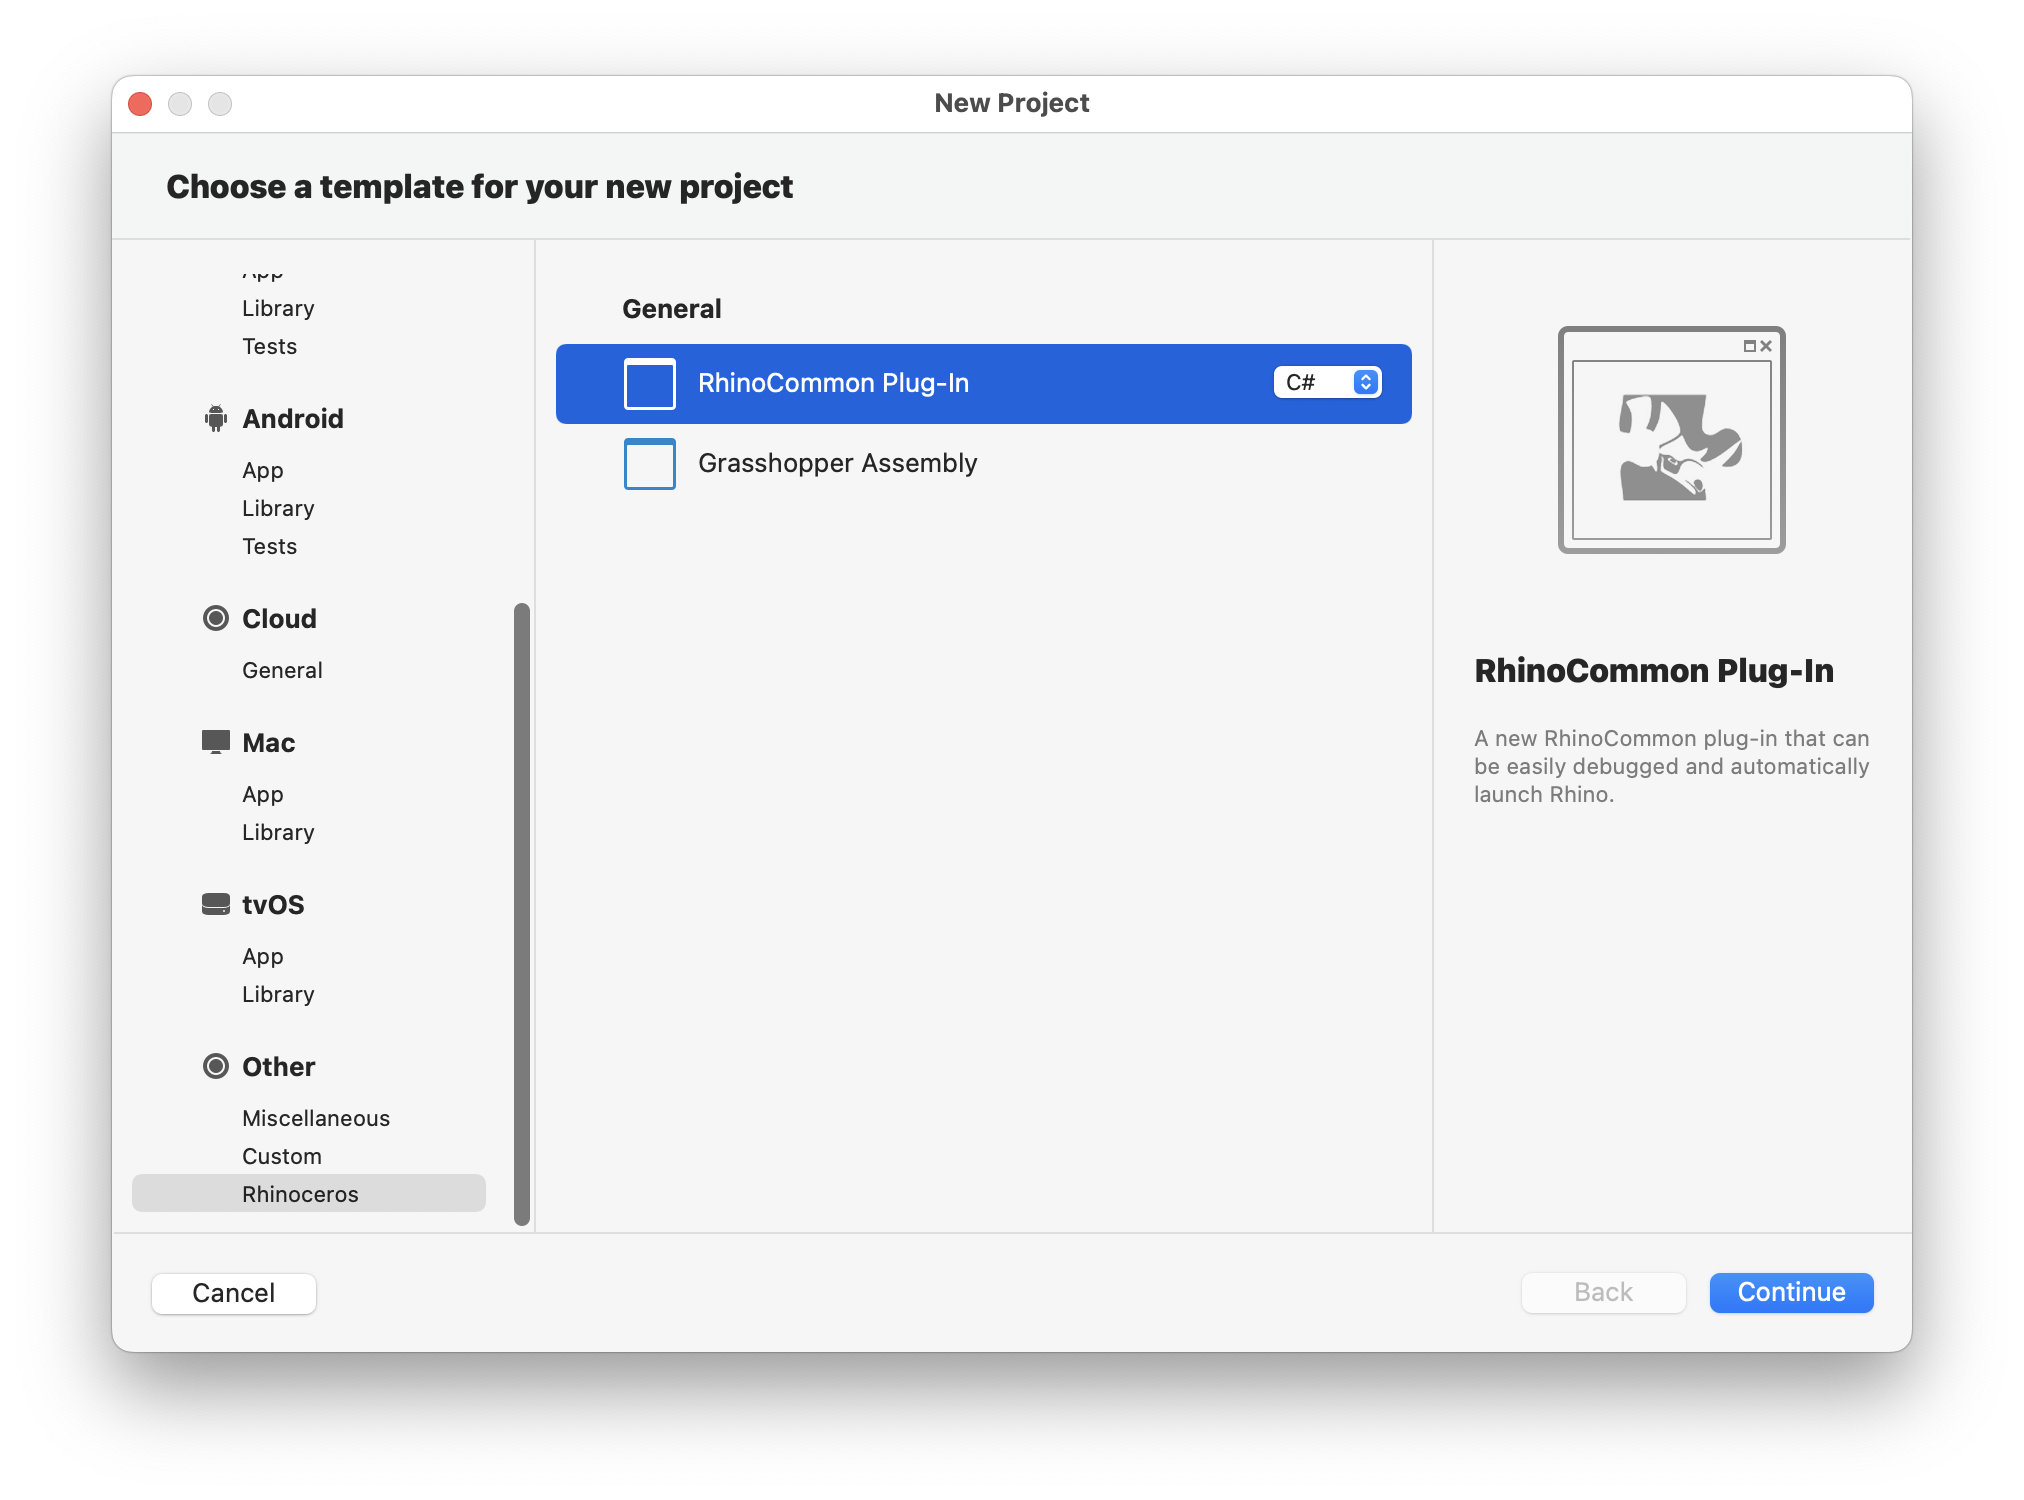
- Click the Next button.
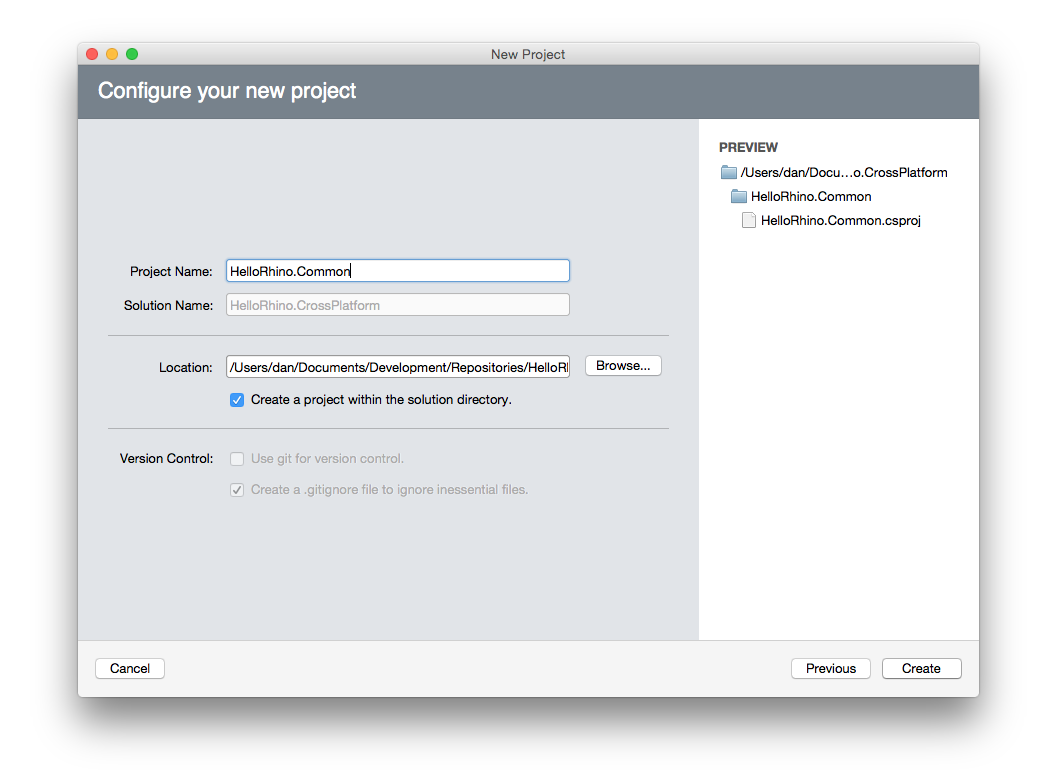
- You will now Configure your new project. Fill in the Project Name field…call it HelloRhino.Common. Browse and select the HelloRhino.CrossPlatform folder. Check the Create a project within the solution directory checkbox; we want the HelloRhino.Common.csproj to be created in the HelloRhino.Common folder.
- In the Solution panel, right-click the HelloRhino.Common project and select Rename. Rename the project HelloRhino.Common.Mac.
- Rename HelloRhino.CommonCommand.cs to HelloRhinoCommonCommand.cs.
- Rename HelloRhino.CommonPlugin.cs to HelloRhinoCommonPlugin.cs.
- Open HelloRhinoCommonPlugin.cs and remove the period (
.) between theHelloRhinoand theCommon:
public class HelloRhinoCommonPlugin : Rhino.PlugIns.PlugIn
  {
    ///<summary>Gets the only instance of the HelloRhinoCommonPlugin plugin.</summary>
    public static HelloRhinoCommonPlugin Instance { get; private set; }

    public HelloRhinoCommonPlugin()
    {
      Instance = this;
    }
  }
Clone Project
Windows
- In Visual Studio for Windows, open the HelloRhino.CrossPlatform solution you created above.
- You may get a warning about trusting this project. Click OK.
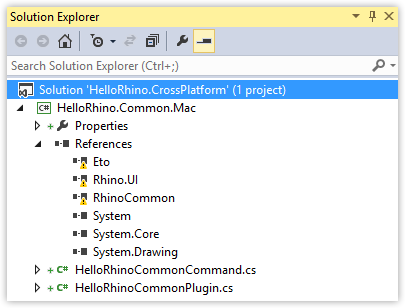
- Expand the References section of the HelloRhino.Common.Mac project. Notice that Visual Studio for Windows cannot resolve the references to RhinoCommon, Rhino.UI and Eto. This is to be expected, as this is not the Windows plugin project file.
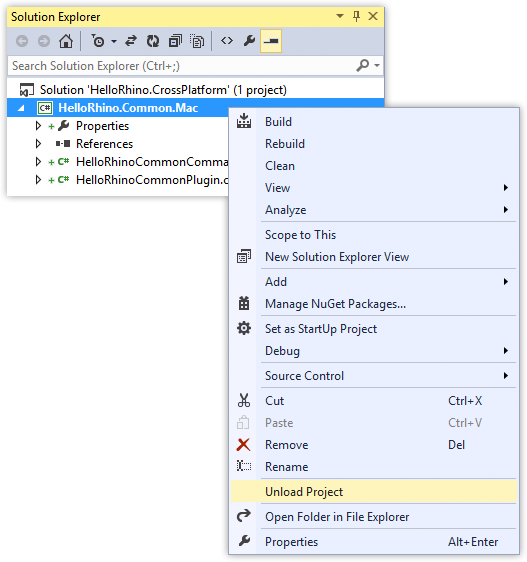
- In the Solution Explorer, right-click the HelloRhino.Common.Mac project and select Unload Project from the drop-down menu.
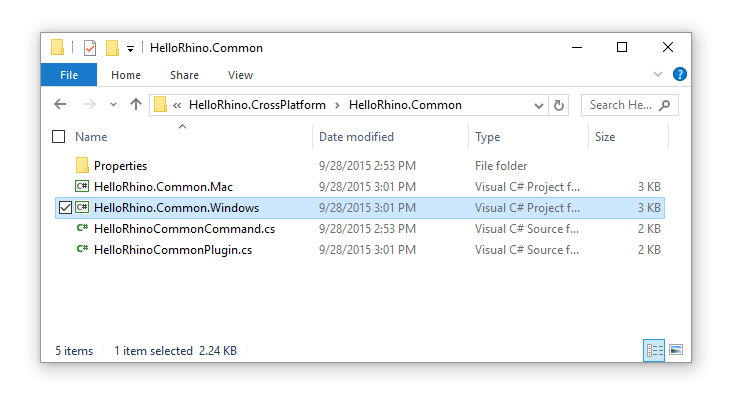
- In Windows File Explorer, navigate to the HelloRhino.CrossPlatform/HelloRhino.Common folder. We are going to “clone” (copy) the HelloRhino.Common.Mac.csproj as our template for the Windows .csproj.
- Copy the HelloRhino.Common.Mac.csproj file and rename it HelloRhino.Common.Windows.csproj:
- In Visual Studio for Windows, right-click on the HelloRhino.CrossPlatform solution in the Solution Explorer and navigate to Add > Existing Project…
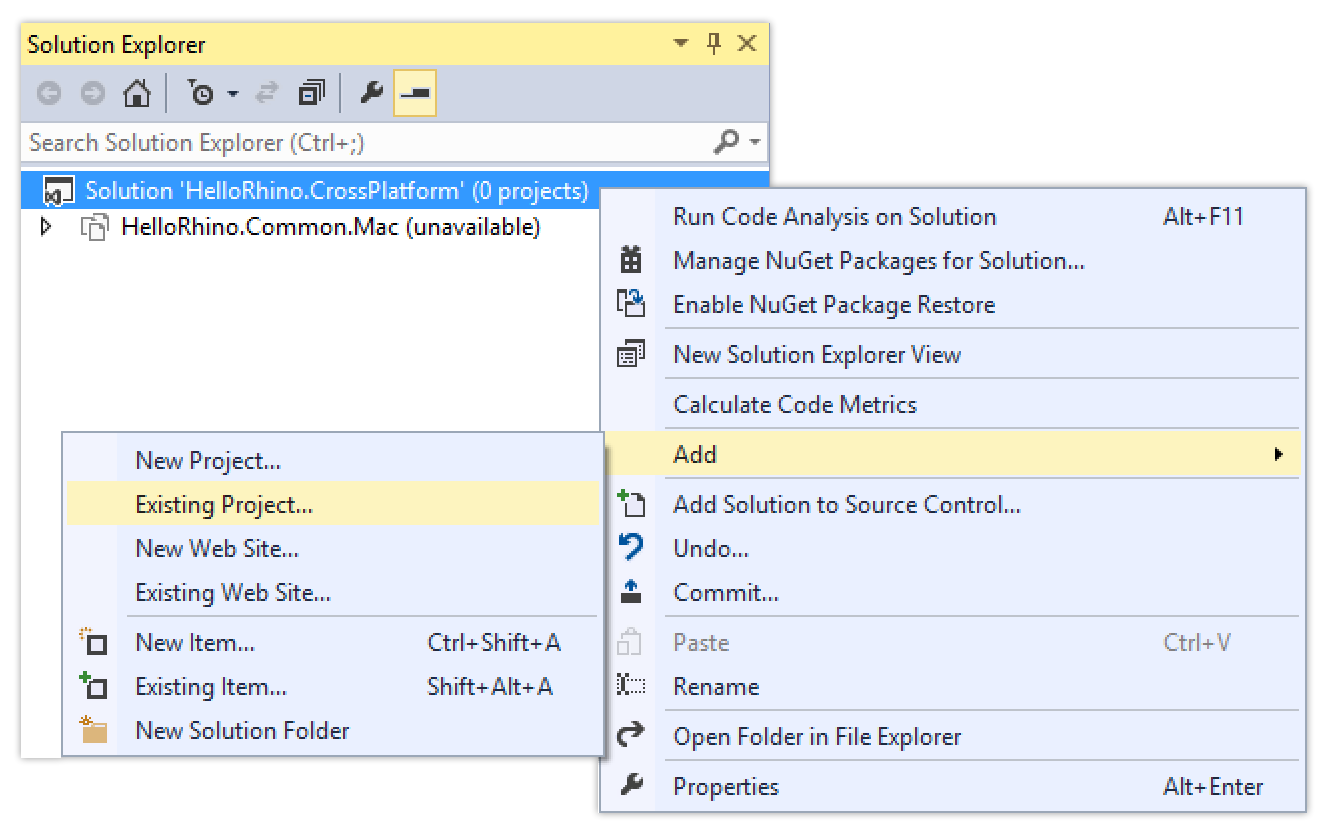
- Navigate to the HelloRhino.Common.Windows.csproj you just copied in Step 6 above.
- In the Solution Explorer, expand the References section of HelloRhino.Common.Windows project. Because we copied (“cloned”) the .csproj file, these Mac-specific references are still present. Let’s delete those…
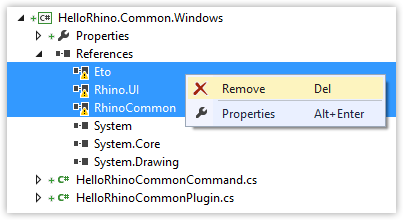
- Shift Select the three references Eto*, Rhino.UI, and RhinoCommon in the list. Right-click and Remove those references.
- Right-click the References to Add new references.
- Browse to RhinoCommon.dll. (Let’s presume we’re targeting Rhino for Windows 64-bit). The location of RhinoCommon.dll is C:\Program Files\Rhinoceros 5 (64-bit)\System\RhinoCommon.dll. Click OK.
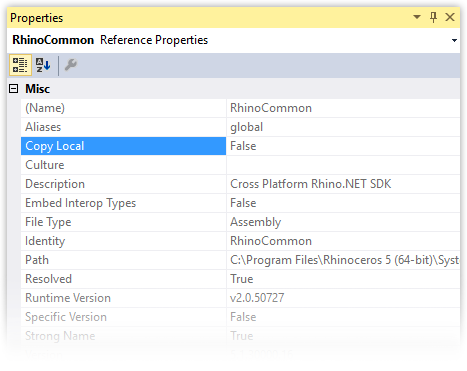
- In the Solution Explorer, select the RhinoCommon reference you just added to HelloRhino.Common.Windows. Open the Properties panel if it is not already visible (View > Properties Window). Make sure Copy Local is False:
- In the Solution Explorer, right-click the HelloRhino.Common.Windows project and select Properties from the menu.
- In the Build Events section, in the Post-build event command line: enter
Copy "$(TargetPath)" "$(TargetDir)$(ProjectName).rhp" Erase "$(TargetPath)"…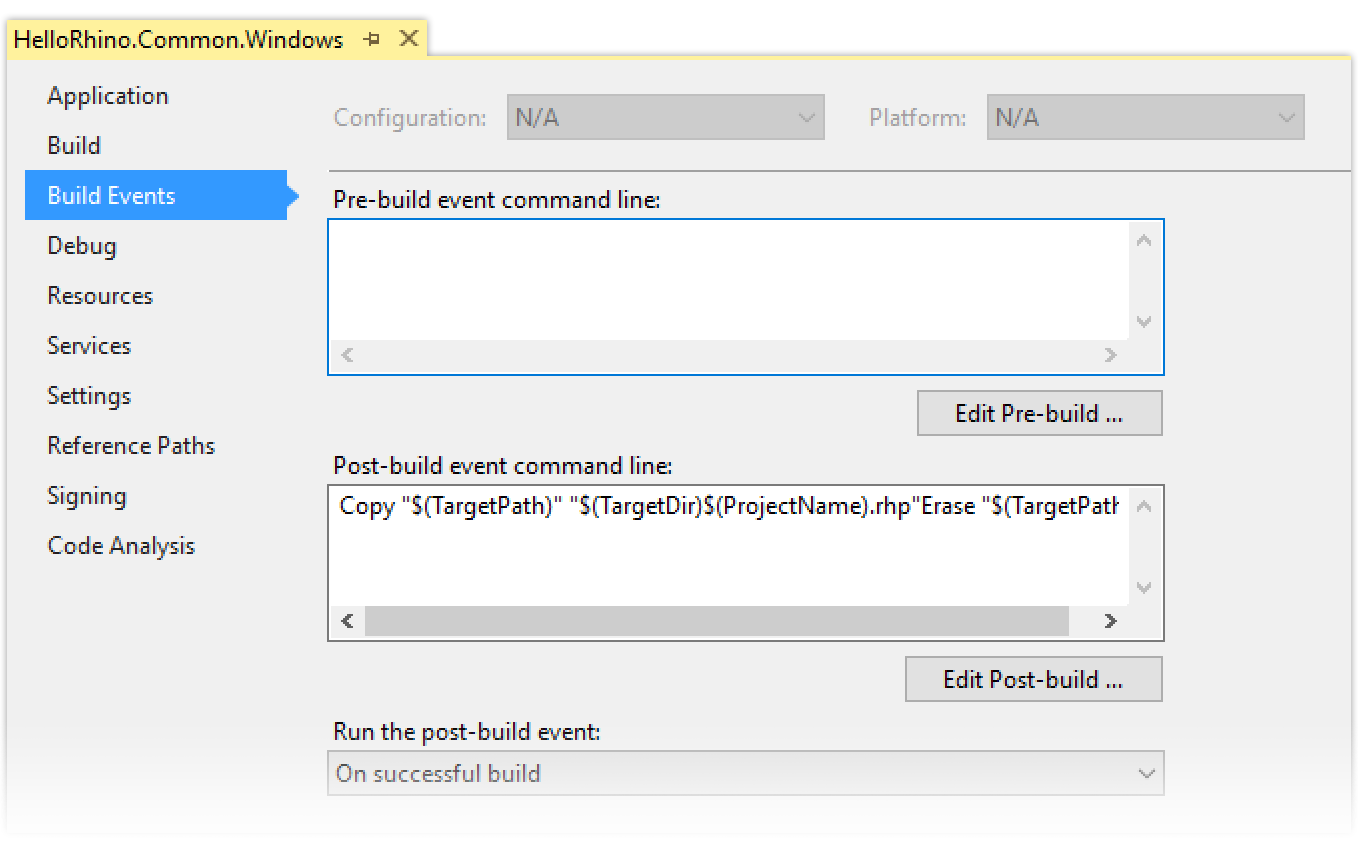
- In the Debug section, in the Start external program, browse to:
C:\Program Files\Rhinoceros 5 (64-bit)\System\Rhino.exe…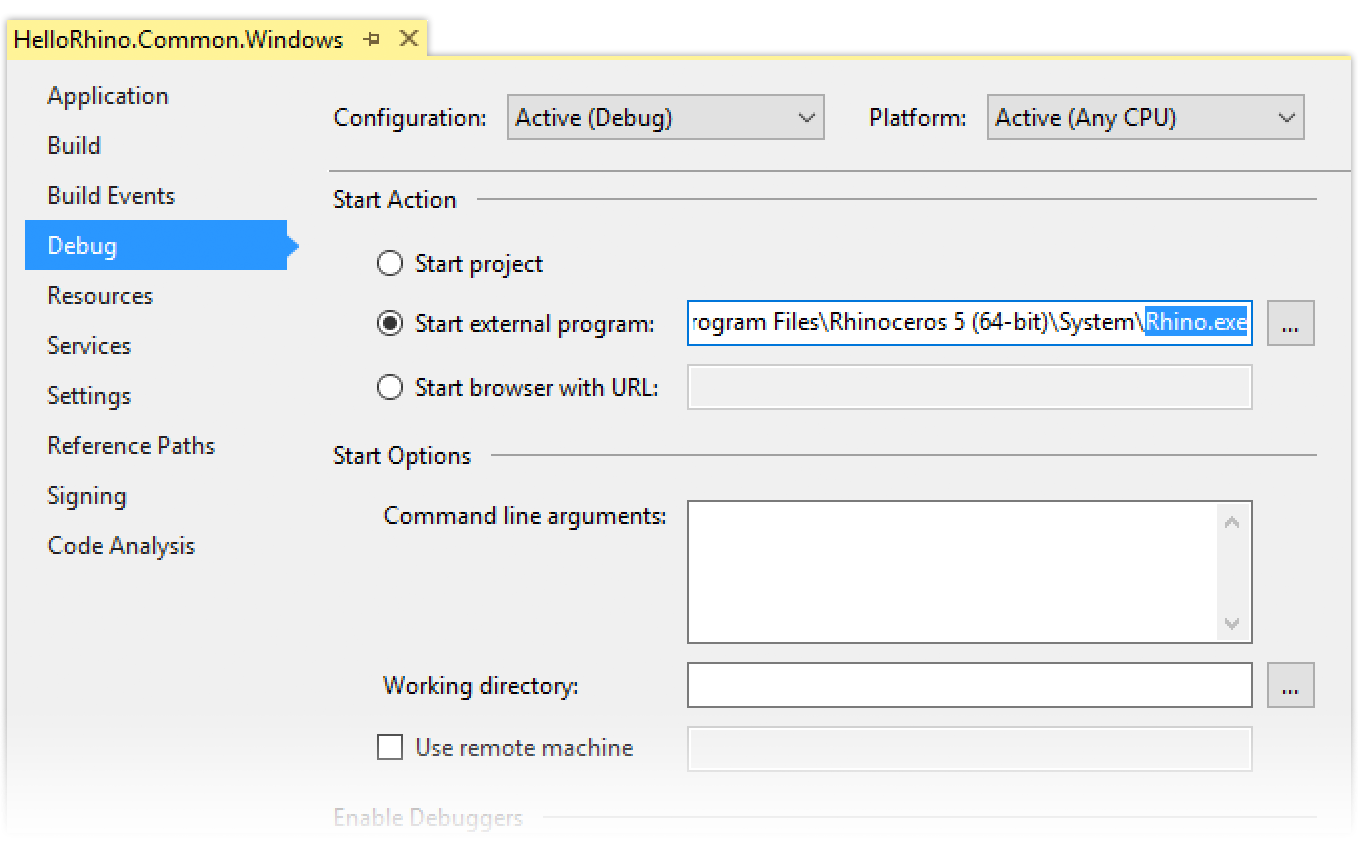
- Build and Start Debugging. You should get two build errors concerning Eto. Let’s take this opportunity to do create some…
Platform Defines
Though we are sharing cross-platform code, there will be inevitably be situations where you want to do one thing on Windows and another on Mac. Within shared code, the way to manage this is with platform-specific defines in your platform-targeted projects. Let’s define a symbol to get around the reference errors we just encountered.
Windows
-
In the Solution Explorer, right-click the HelloRhino.Common.Windows project and select Properties from the menu.
-
In the Build section, switch the Configuration: to All Configurations and, in Conditional compilation symbols, create a define called
ON_RUNTIME_WIN…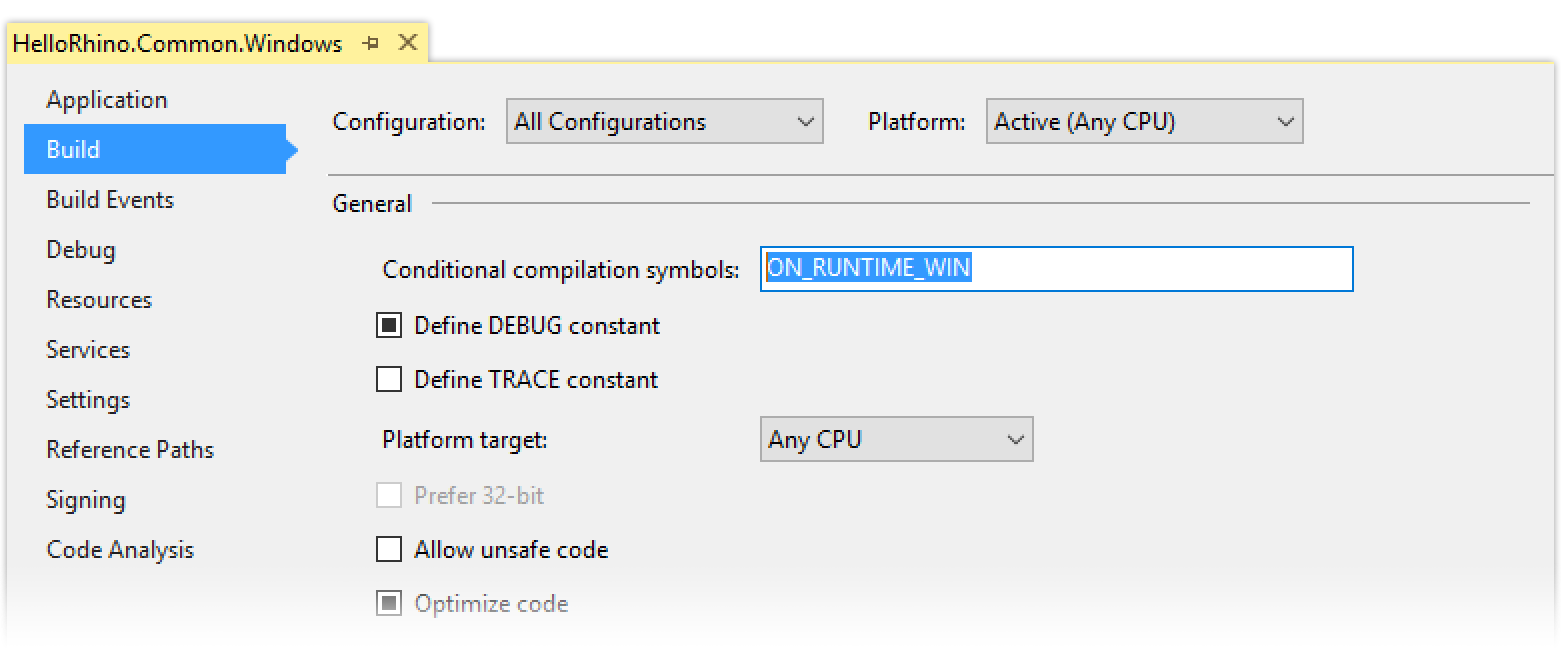
-
Open HelloRhinoCommonCommand.cs.
-
In the
usingsection at the top, create a conditional define around the Eto references like this:#if ON_RUNTIME_APPLE using Eto.Drawing; using Eto.Forms; #endif -
Build and Start Debugging. Your build errors should disappear and debugging should begin. You can use the PluginManager to install your plugin and the HelloRhino command should work. When you are done testing out the command, stop the debugging session, close Visual Studio for Windows and switch back to…
Mac
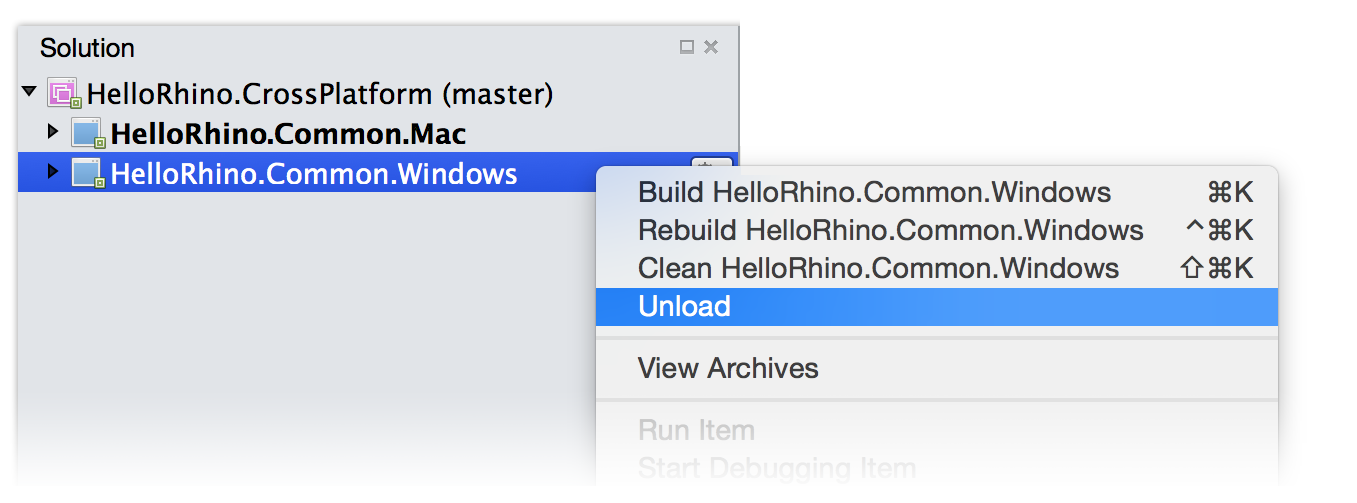
- In Visual Studio for Mac, open the HelloRhino.CrossPlatform solution (if it is not already open).
- Notice that HelloRhino.Common.Windows is now present in your solution (as expected). In the Solution panel, right-click the HelloRhino.Common.Windows project and select Unload…
- In the Solution panel, double-click the HelloRhino.Common.Mac project to bring up its Project Options (Properties).
- Navigate to the Build > Compiler section in the Project Options. Notice that the configuration is set to Debug. In the Define Symbols: add a
ON_RUNTIME_APPLEafterDEBUG. You must separate these with a semi-colon. It should read:DEBUG;ON_RUNTIME_APPLE. Switch the Configuration to Release. Add theON_RUNTIME_APPLEagain (Visual Studio for Mac lacks an “All Configurations” like Visual Studio for Windows)…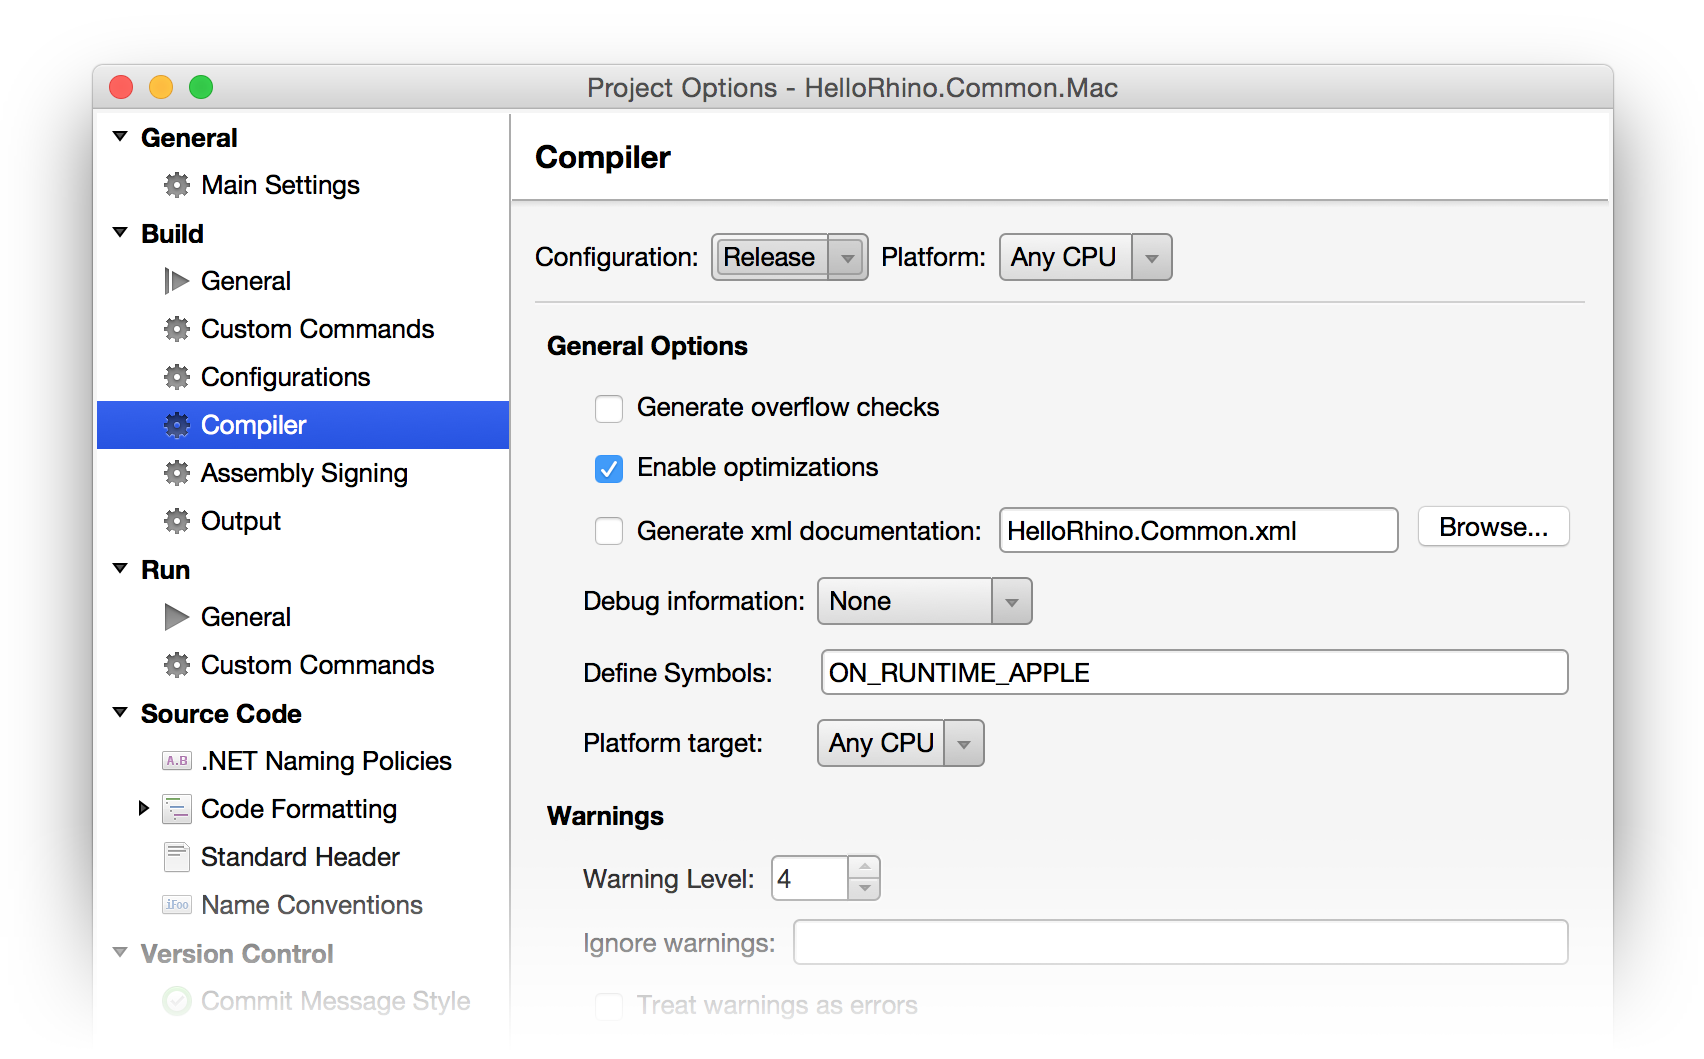
- Click OK to close the Project Options dialog.
- Build and Run. The HelloRhino command from the plugin should autocomplete and run.
Common Code
You have just created two platform-specific plugins using the same, shared code. In review, let’s take a look at the Solution architecture…simply open the HelloRhino.CrossPlatform folder using either Finder or Windows File Explorer…
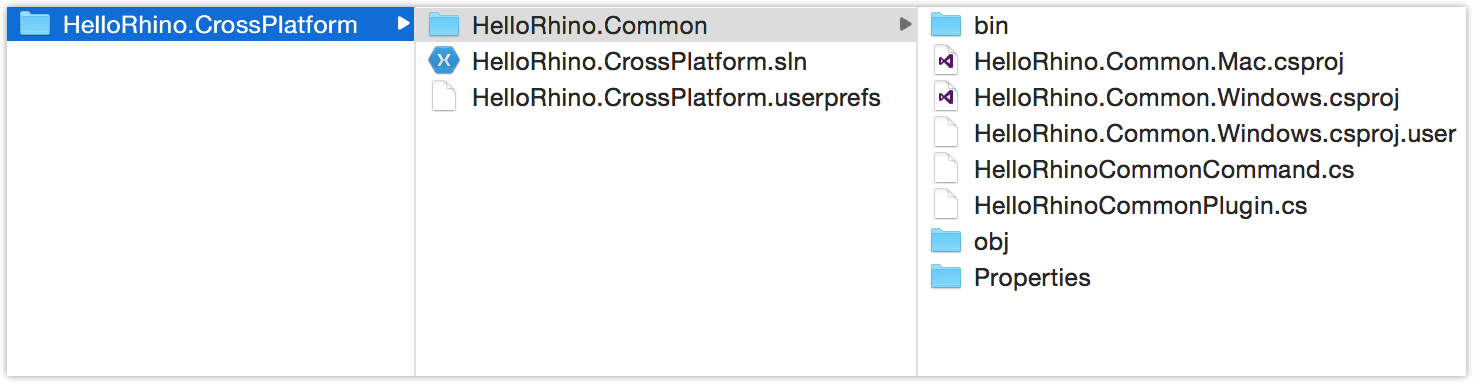
In summary…
- The HelloRhino.CrossPlatform solution (.sln) contains the:
- HelloRhino.Common folder, which contains the common code for the:
- HelloRhino.Common.Mac project (.csproj) and the
- HelloRhino.Common.Windows project (.csproj)
- HelloRhino.Common folder, which contains the common code for the:
The cloned projects have platform-specific defines and platform-specific references, but otherwise reference the same shared (common) code. Notice that the namespace of your common code is:
namespace HelloRhino.Common
This common (sometimes called “core”) namespace can be thought of as a shared library. This is where the “business logic” of your plugin should be stored.
Even though it was possible - in this simple example - to share all of the code, in some real-life plugins, it may be necessary to separate out platform-specific projects that share the same Common core.
For example, you might want to structure a project this way:
- The YourPlugin.CrossPlatform solution (.sln) contains the:
- YourPlugin.Common folder, which contains the common code for the:
- YourPlugin.Common.Mac project (.csproj) and the
- YourPlugin.Common.Windows project (.csproj), each of which reference:
- YourCommonBusinessLogic.cs files in the YourPlugin.Common namespace.
- YourPlugin.Mac folder, which contains the:
- YourPlugin.Mac project (.csproj), which references YourPlugin.Common.Mac.
- YourMacSpecific.cs files which do Mac-specific stuff.
- YourPlugin.Windows folder, which contains the:
- YourPlugin.Windows project (.csproj), which references *YourPlugin.Common.Windows.
- YourWindowsSpecific.cs files which do Windows-specific stuff.
- YourPlugin.Common folder, which contains the common code for the:
This is merely one example; the architecture of the project depends on the needs of the plugin. It is even possible to share much of the user interface code using Eto…but this is a subject for another guide.
Congratulations! You have just built your first RhinoCommon plugin sharing common code between Rhino for Mac and Rhino for Windows.
