It is presumed you already have the necessary tools installed and are ready to go. If you are not there yet, see:
Bare bones plugin
- Use git to clone the starter repo
git clone https://github.com/mcneel/CrossPlatformCppPlugin - Download the SDK
git submodule update --init - Run the rename
./rename.shorpowershell -ExecutionPolicy Bypass -File ./rename.ps1script to fill out the plugin, command, properties and GUIDs correctly. For this tutorial, it is suggested to use all of the default values.
Plugin Anatomy
The following files are of interest:
| File | Platform | Description |
|---|---|---|
| Sample.vcxproj | Windows | Project file that allows Visual C++ to build your plugin. |
| stdafx.h | Windows | Main project header. |
| stdafx.cpp | Windows | Used to generate the precompiled header. |
| SampleApp.h | Both | Application class header that contains the CSampleApp class declaration. |
| SampleApp.cpp | Both | Application class implementation that contains the CSampleApp member functions. |
| SamplePlugIn.h | Both | Plugin class header that contains the CSamplePlugIn class declaration. |
| SamplePlugIn.cpp | Both | Plugin class implementation that contains the CSamplePlugIn member functions. |
| cmdSample.cpp | Both | Initial Rhino command. |
| Resource.h | Windows | #define constant definitions for resources. |
| Sample.rc | Windows | Resource script. |
| Sample.rc2 | Windows | Resource script. |
| Sample.def | Windows | Module definition. |
| Sample.ico | Windows | Plugin icon. |
| targetver.h | Windows | Defines the supported Windows platform. |
Getting up and Running
Windows
- Run the rename script
powershell -ExecutionPolicy Bypass -File ./rename.ps1to fill out the plugin, command, properties and GUIDs correctly. For this tutorial, it is suggested to use all of the default values. - Double click the
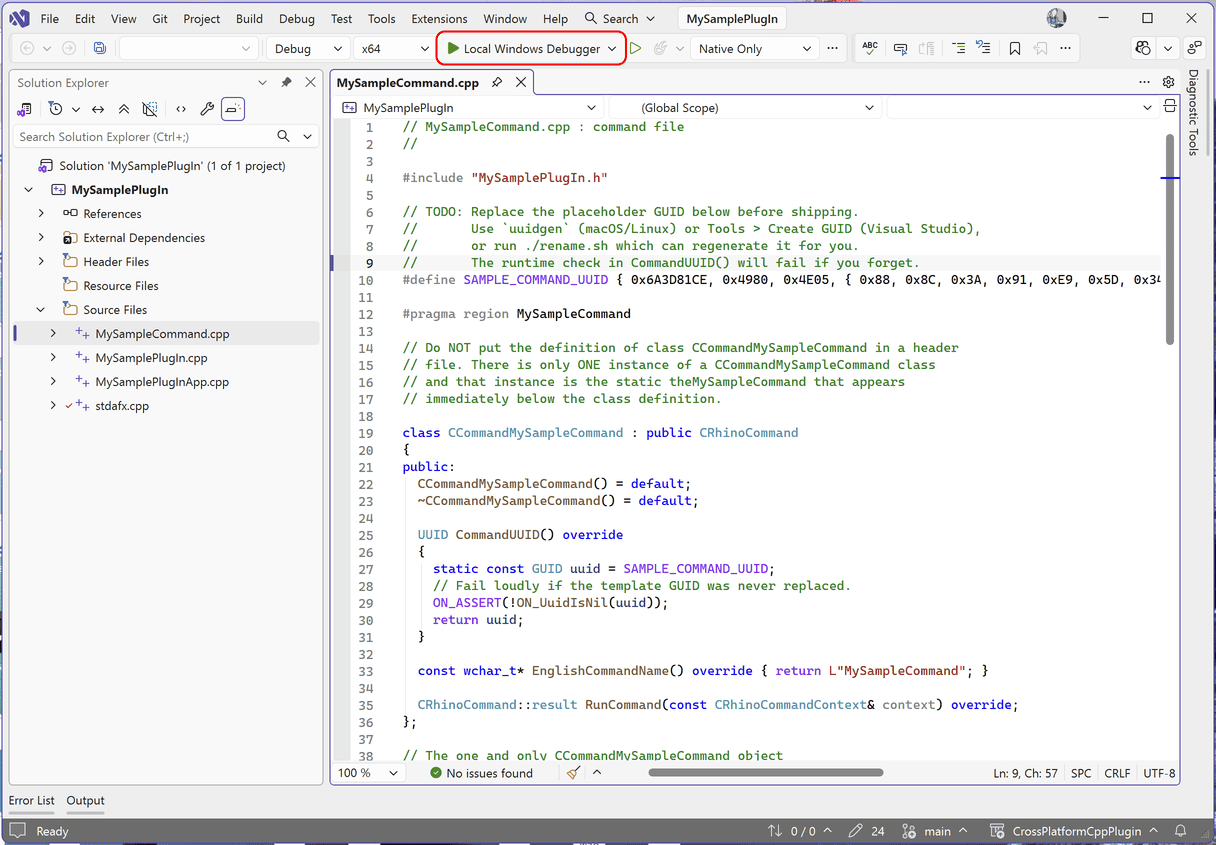
MySamplePlugIn.slnfile in thewindirectory - In Visual Studio click Local Windows Debugger next to the green arrow. This will load Rhino and the plug-in
-
For this guide, build the Debug configuration.
-
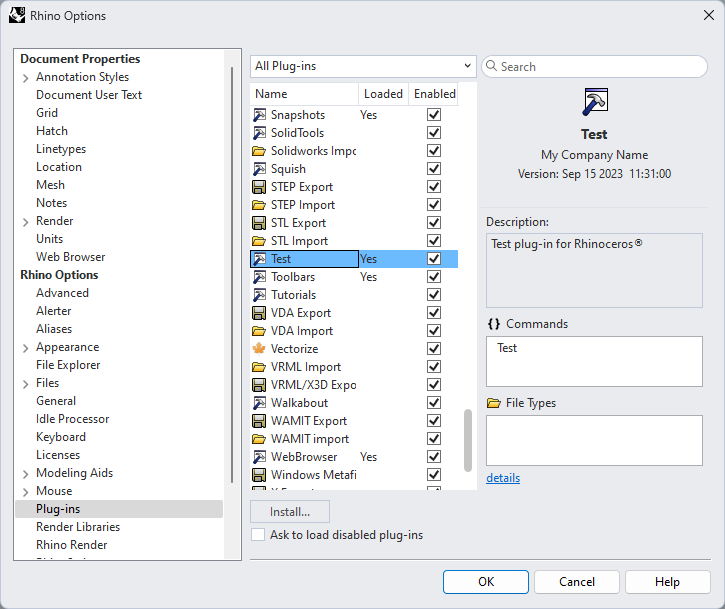
From within Rhino, navigate to Tools > Options. Navigate to the Plugins page under Rhino Options and install your plugin (it will be in the win/x64/Debug folder)
-
Run MySampleCommand, a message box should appear
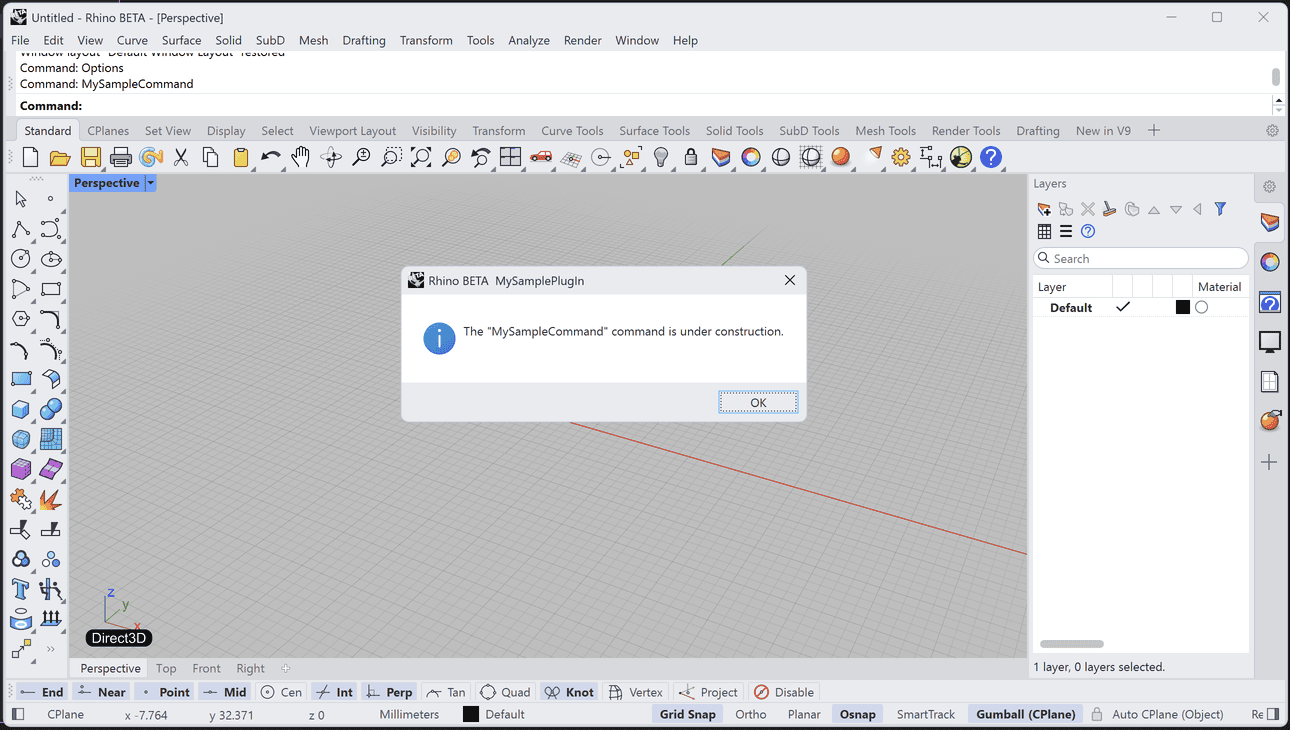
- You have finished creating your first plugin!
Mac
-
Run the rename script
./rename.shto fill out the plugin, command, properties and GUIDs correctly. For this tutorial, it is suggested to use all of the default values. -
Open
osx/MySamplePlugIn.xcodeprojin XCode. -
Click the Run button, project > run. This will load Rhino and the plugin.
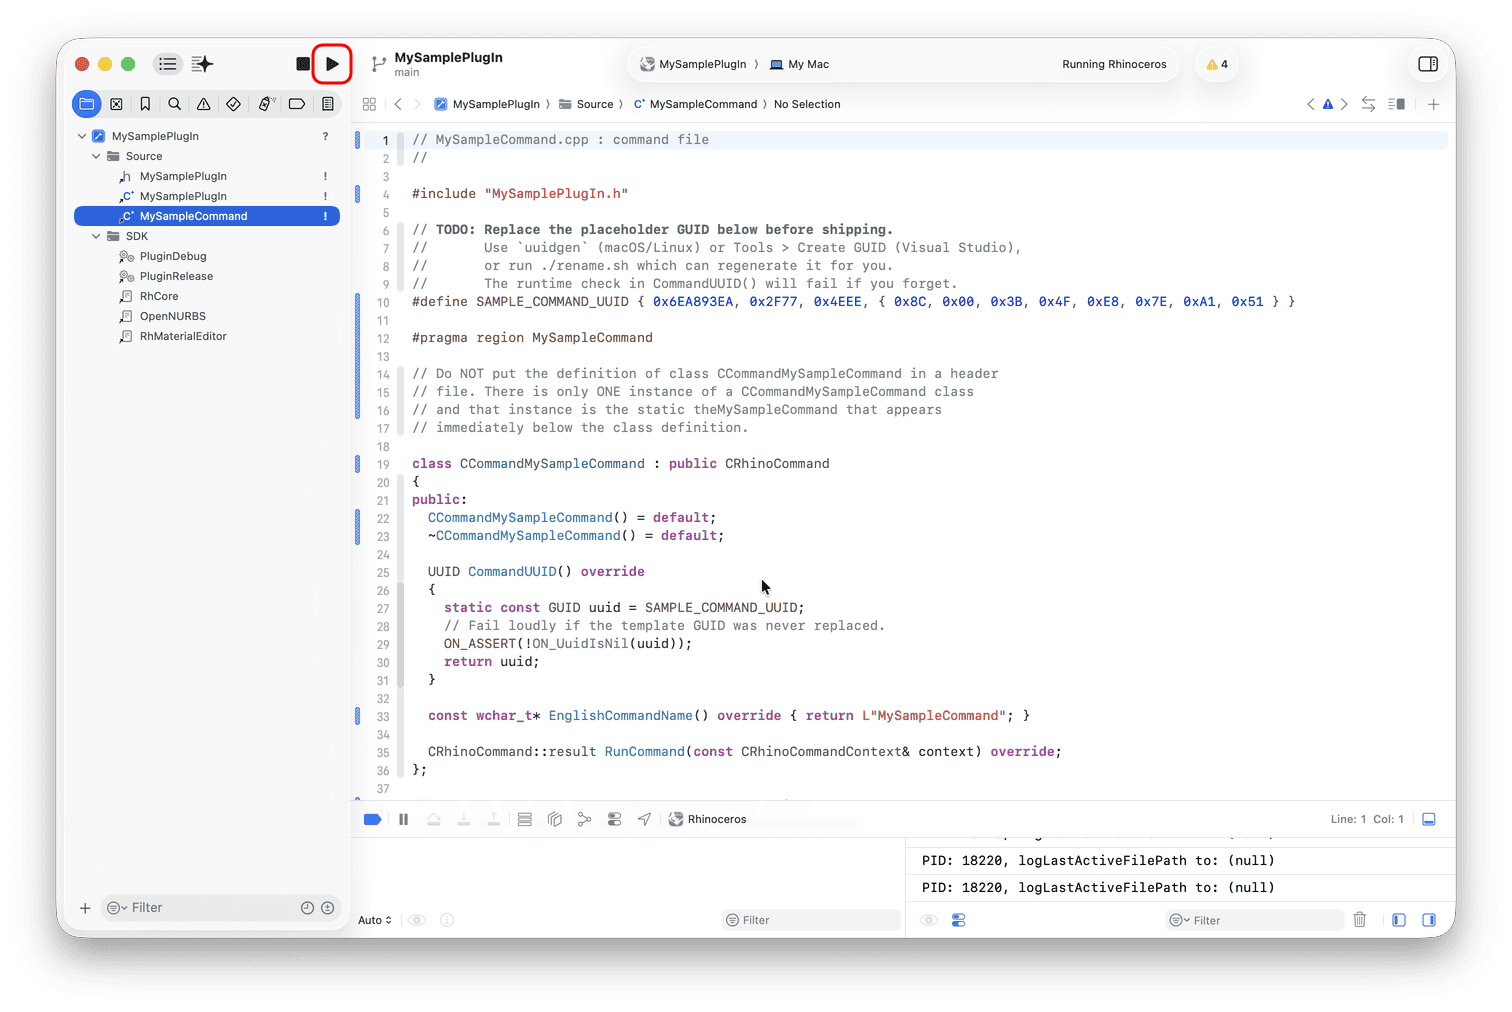
-
Run MySampleCommand, a message box should appear
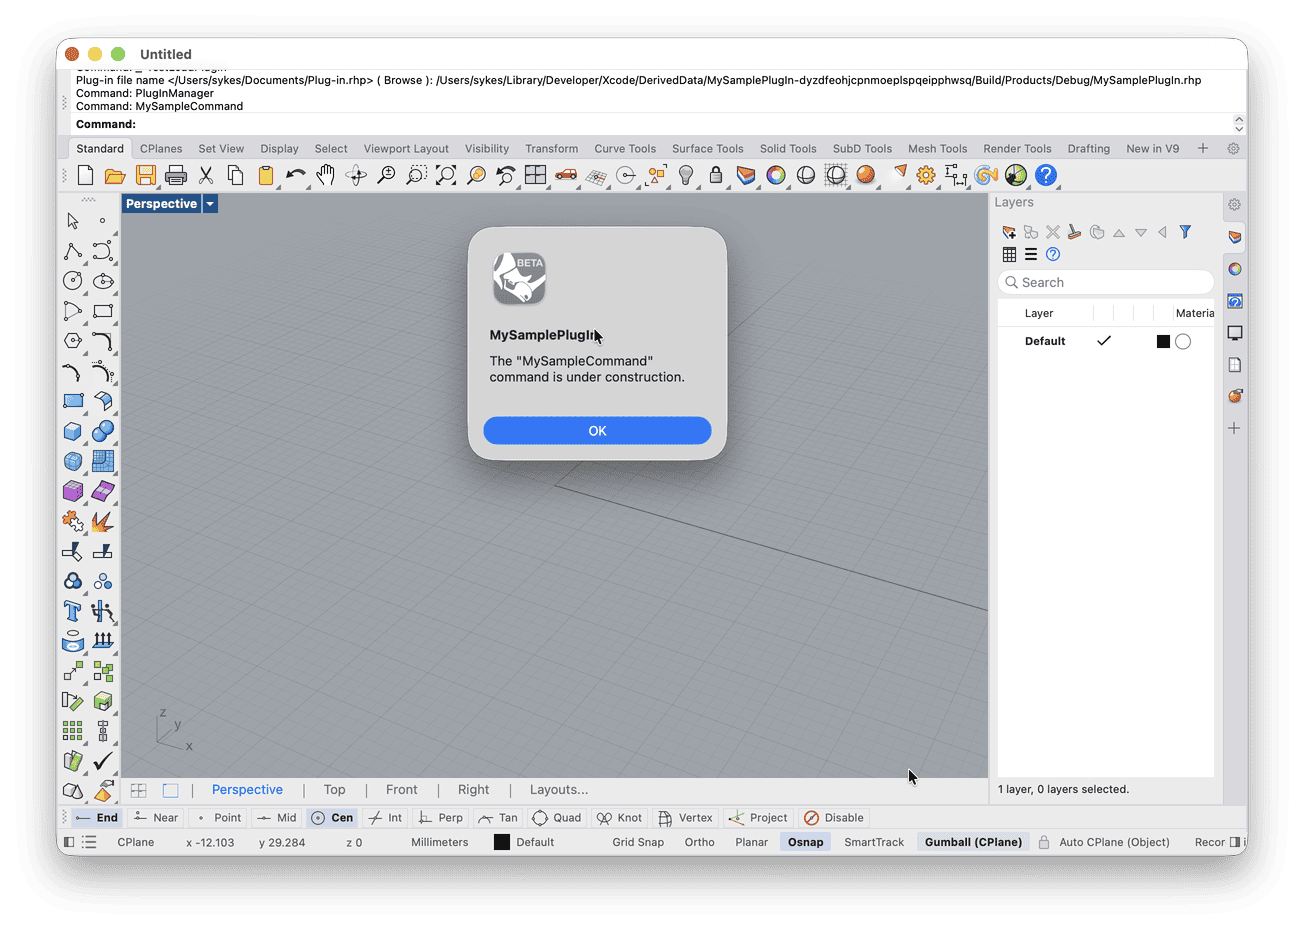
-
You have finished creating your first plugin!
Adding Additional Commands
Rhino plugins can contain any number of commands. Commands are created by deriving a new class from CRhinoCommand. See rhinoSdkCommand.h for details on the CRhinoCommand class.
Example
The following example code demonstrates a simple command class that essentially does nothing:
// Do NOT put the definition of class CCommandTest in a header
// file. There is only ONE instance of a CCommandTest class
// and that instance is the static theTestCommand that appears
// immediately below the class definition.

class CCommandTest : public CRhinoCommand
{
public:
  // The one and only instance of CCommandTest is created below.
  // No copy constructor or operator= is required.
  // Values of member variables persist for the duration of the application.

  // CCommandTest::CCommandTest()
  // is called exactly once when static theTestCommand is created.
  CCommandTest() = default;

  // CCommandTest::~CCommandTest()
  // is called exactly once when static theTestCommand is destroyed.
  // The destructor should not make any calls to the Rhino SDK.
  // If your command has persistent settings, then override
  // CRhinoCommand::SaveProfile and CRhinoCommand::LoadProfile.
  ~CCommandTest() = default;

  // Returns a unique UUID for this command.
  // If you try to use an id that is already being used, then
  // your command will not work. Use GUIDGEN.EXE to make unique UUID.
  UUID CommandUUID() override
  {
    // {F502C783-C0CE-4118-8869-EFB0CB34CCCB}
    static const GUID TestCommand_UUID =
    { 0xF502C783, 0xC0CE, 0x4118, { 0x88, 0x69, 0xEF, 0xB0, 0xCB, 0x34, 0xCC, 0xCB } };
    return TestCommand_UUID;
  }

  // Returns the English command name.
  // If you want to provide a localized command name, then override

  // CRhinoCommand::LocalCommandName.
  const wchar_t* EnglishCommandName() override { return L"Test"; }

  // Rhino calls RunCommand to run the command.
  CRhinoCommand::result RunCommand(const CRhinoCommandContext& context) override;
};

// The one and only CCommandTest object
// Do NOT create any other instance of a CCommandTest class.
static class CCommandTest theTestCommand;

CRhinoCommand::result CCommandTest::RunCommand(const CRhinoCommandContext& context)
{
  // CCommandTest::RunCommand() is called when the user
  // runs the "Test".

  // TODO: Add command code here.

  // Rhino command that display a dialog box interface should also support
  // a command-line, or scriptable interface.

  ON_wString str;
  str.Format(L"The \"%s\" command is under construction.\n", EnglishCommandName());
  if (context.IsInteractive())
    RhinoMessageBox(str, TestPlugIn().PlugInName(), MB_OK);
  else
    RhinoApp().Print(str);

  // TODO: Return one of the following values:
  //   CRhinoCommand::success:  The command worked.
  //   CRhinoCommand::failure:  The command failed because of invalid input, inability
  //                            to compute the desired result, or some other reason
  //   CRhinoCommand::cancel:   The user interactively canceled the command
  //                            (by pressing ESCAPE, clicking a CANCEL button, etc.)
  //                            in a Get operation, dialog, time consuming computation, etc.

  return CRhinoCommand::success;
}
Notes
A couple things to consider:
- Command classes must return a unique UUID. If you try to use a UUID that is already in use, then your command will not work. To create a unique UUID, use GUIDGEN.EXE (which ships with Visual Studio) on Windows, or run
uuidgenfrom the Terminal on macOS. - Command classes must return a unique command name. If you try to use a command name that is already in use, then your command will not work.
- Only ONE instance of a command class can be created. This is why you should put the definition of your command classes in .cpp files.